


Setting the configuration preferences
227
PRO6 Live Audio System
Owner’s Manual
Setting the configuration preferences
WARNING!
CHANGING THE SYNCHRONISATION CAN RESULT IN LOUD NOISES
FROM THE SYSTEM. ALWAYS MUTE THE PA AT THE
AMPLIFIER/SPEAKER BEFORE CHANGING THE SYNCHRONISATION
SOURCE OR MASTER/SLAVE STATUS.
Caution:
The Automate Patching option switches on per-scene automatic
routing, and must be used with caution. To alert you to the drastic
consequences of using this option, a WARNING window appears.
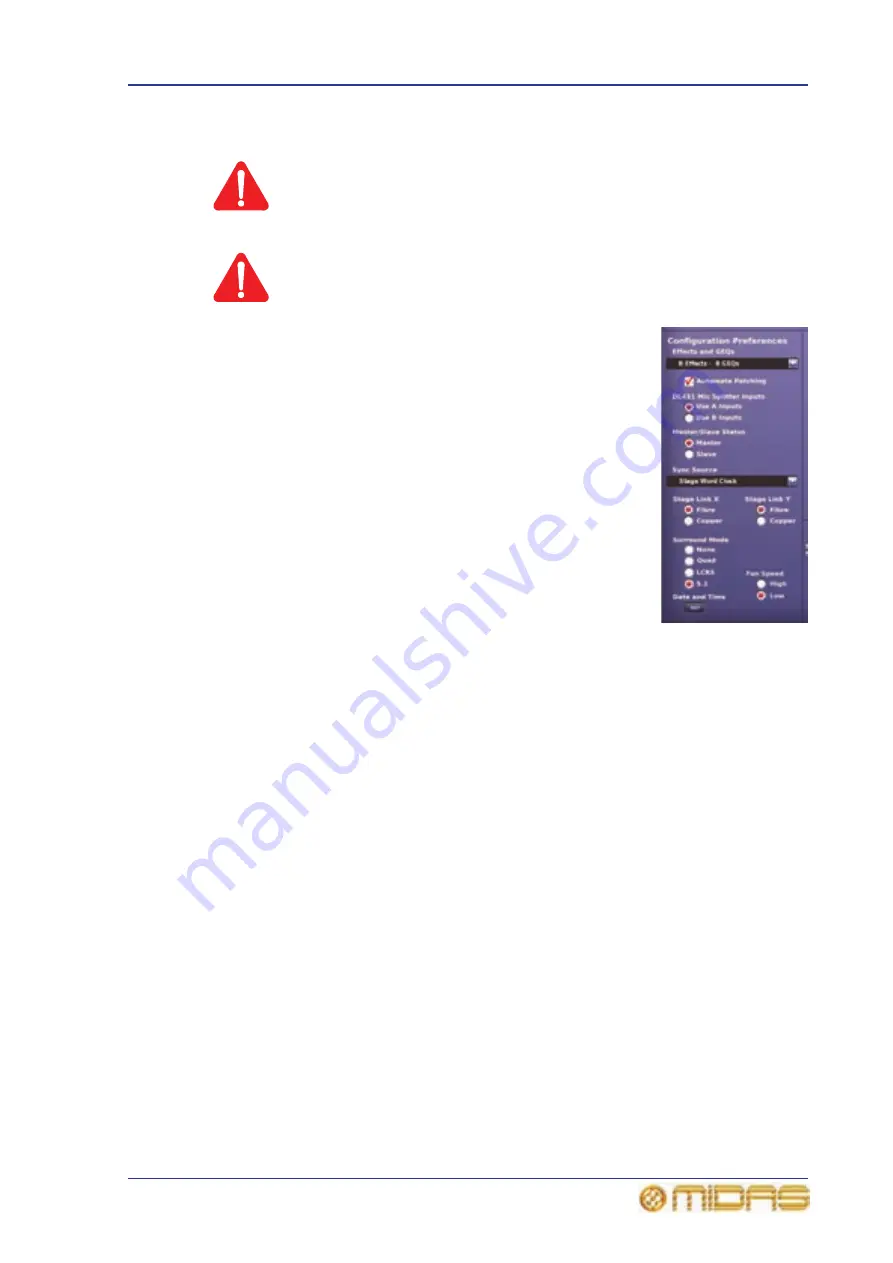
The Configuration Preferences section of the Preferences
screen lets you configure the system as follows:
• Effects and GEQs — drop-down list from which you can
select the combination of effects and GEQs you want (see
Chapter 15 "Graphic Equaliser (GEQ)" on page 137).
• Automate Patching — ticking this option allows you to
change audio patching in automation (see “Using patching in
automation” on page 188).
• DL431 Mic Splitter Inputs — if you are linking two PRO6
Control Centres (for example, for FOH and MON operation)
this option allows you to select the type of inputs (A or B)
you want for this PRO6. The other PRO6 must be set with
the alternate option. For example, if you select Use B
Inputs at this control centre, the other one will have to be
set for Use A Inputs.
• Master/Slave Status — selects the synchronisation source
of the PRO6’s digital audio, which can be either internal or
external. For configuration details when connecting two PRO6’s, see “Using multiple
digital consoles” on page 321.
If you choose Master (internal), all system units must be configured for external
sync source.
If you want an external sync source, choose Slave. Then, select the sync source
from the Sync Source drop-down list (below). On the sync source itself, for
example, a line I/O or mic splitter, configure its sync source as internal.
• Sync Source — drop-down list from which you can select the synchronisation
source.
• Stage Link X and Stage Link Y — select the snake type for each network. This
must be done before operating the PRO6, otherwise it will not work.
• Surround Mode — select the type of surround mode you want. Otherwise, select
None for no surround mode.
• Fan Speed — select the speed of the internal cooling fan of the PRO6 as High (fast)
or Low (slow). If you are operating the PRO6 in a warm or hot environment, we
recommend that you select the High option. If the noise of the fan operation is
causing a problem, select the Low option.
• Date and Time — click the SET button to set the date and time (see “Setting the
Содержание PRO6
Страница 2: ......
Страница 4: ......
Страница 6: ......
Страница 10: ......
Страница 14: ...xvi Precautions PRO6 Live Audio System Owner s Manual...
Страница 24: ...xxvi Contents PRO6 Live Audio System Owner s Manual...
Страница 25: ...PRO6 Live Audio System Owner s Manual Volume 1 Overview...
Страница 26: ......
Страница 30: ...4 Chapter 1 Introduction PRO6 Live Audio System Owner s Manual...
Страница 42: ...16 Chapter 2 PRO6 Live Audio System PRO6 Live Audio System Owner s Manual...
Страница 50: ...24 Chapter 3 About The PRO6 Control Centre PRO6 Live Audio System Owner s Manual...
Страница 51: ...PRO6 Live Audio System Owner s Manual Volume 1 Getting Started...
Страница 52: ......
Страница 59: ...PRO6 Live Audio System Owner s Manual Volume 2 Basic Operation Of The PRO6...
Страница 60: ......
Страница 64: ...38 Chapter 5 Before You Start PRO6 Live Audio System Owner s Manual...
Страница 104: ...78 Chapter 8 Patching PRO6 Live Audio System Owner s Manual...
Страница 131: ...PRO6 Live Audio System Owner s Manual Volume 3 Advanced Operation And Features...
Страница 132: ......
Страница 136: ...110 Chapter 10 Stereo Linking PRO6 Live Audio System Owner s Manual...
Страница 144: ...118 Chapter 11 Panning PRO6 Live Audio System Owner s Manual...
Страница 148: ...122 Chapter 12 Soloing PRO6 Live Audio System Owner s Manual...
Страница 150: ...124 Chapter 13 Muting PRO6 Live Audio System Owner s Manual...
Страница 192: ...166 Chapter 18 Copy And Paste PRO6 Live Audio System Owner s Manual...
Страница 242: ...216 Chapter 24 User Libraries Presets PRO6 Live Audio System Owner s Manual...
Страница 246: ...220 Chapter 25 File Management PRO6 Live Audio System Owner s Manual...
Страница 250: ...224 Chapter 26 Using Other Devices With The PRO6 PRO6 Live Audio System Owner s Manual...
Страница 267: ...PRO6 Live Audio System Owner s Manual Volume 4 Description...
Страница 268: ......
Страница 335: ...PRO6 Live Audio System Owner s Manual Volume 5 Appendices...
Страница 336: ......
Страница 365: ...Audio signal path 339 PRO6 Live Audio System Owner s Manual Audio signal path...
Страница 366: ...340 Appendix C Klark Teknik DN370 GEQ PRO6 Live Audio System Owner s Manual...
Страница 372: ...346 Appendix D Klark Teknik DN780 Reverb PRO6 Live Audio System Owner s Manual...
Страница 376: ...350 Appendix E I O Modules PRO6 Live Audio System Owner s Manual...
Страница 400: ...374 Appendix I Documentation PRO6 Live Audio System Owner s Manual...
Страница 511: ...Return 485 XL8 Live Performance System Owner s Manual Gate Not applicable EQ Not applicable...
Страница 524: ...498 Appendix N Parameters Affected By Copy And Paste XL8 Live Performance System Owner s Manual...
Страница 568: ...542 Appendix O Parameters Affected By Stereo Linking XL8 Live Performance System Owner s Manual...
Страница 612: ...586 Glossary PRO6 Live Audio System Owner s Manual...


