


298
Chapter 31: Outputs
PRO6 Live Audio System
Owner’s Manual
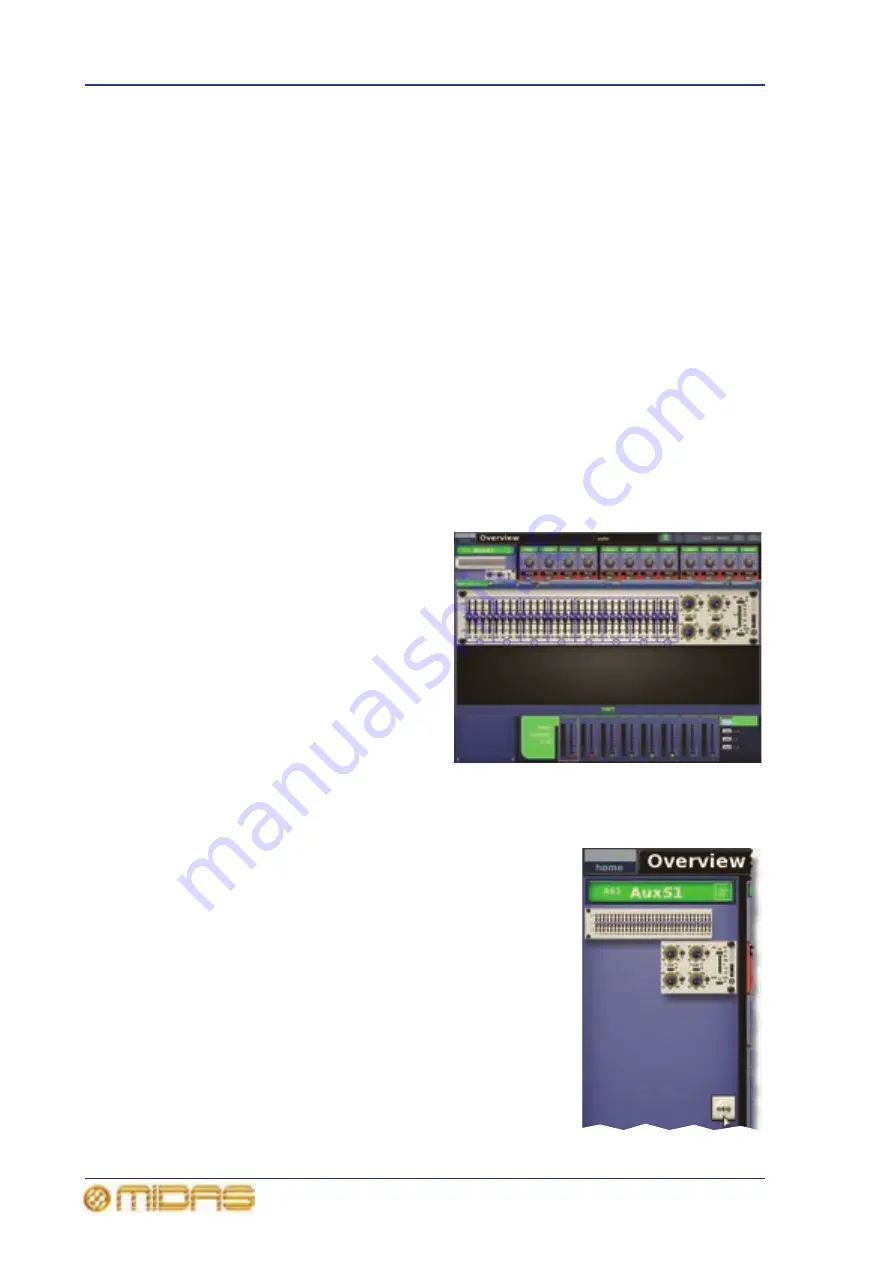
GEQ
You can access the output GEQ (shown
right) from the EQ processing area of
the GUI channel strip.
The GEQ is similar to the ones found in
the Graphic EQs screen and can also
be operated using the assignable
controls. For information, see Chapter
15 "Graphic Equaliser (GEQ)" on
page 137.
>> To open the GEQ window
1
Select the output. Its ‘overview’
display will appear in the channel
strip.
2
In the GUI channel strip, open the EQ processing area (see “To select a
processing area in the GUI channel strip” on page 49).
3
Open the GEQ display (shown right) by clicking GEQ
in the processing area.
4
Open the GEQ screen (shown above right) by
clicking on a non-control area of the GEQ image in
the processing area.
>> To close the GEQ window
1
In the GEQ screen (shown above), do one of the
following:
• Click OK.
• Click X at the upper-right corner of the EQ
window.
2
In the EQ processing area, click GEQ to open the
outputs overview display.
1
Up/down band navigation buttons (see
“Navigating the PEQ output bands” on
page 299). Also used in conjunction with the
blue adjacent LEDs to show which band is
currently selected. Illuminated up arrow
means that band 5 is selected, and illuminated
down arrow means that band 2 is selected.
2
Four blue LEDs, illuminate to show the
current band selection. Used in conjunction
with the up and down buttons, they show —
from the bottom LED upwards — when band 1,
3, 4 or 6 is selected.
3
gain control knob, adjusts signal gain in
the range -16dB to +16dB. On the graph in
the EQ processing area (GUI channel strip),
causes the envelope to move up/down,
inverting as it passes the origin.
4
width control knob, adjusts the signal
bandwidth in the range 0.1 Oct to 3.0 Oct. On
the graph in the EQ processing area (GUI
channel strip), causes the base of the envelope
to widen. (Not available for shelving modes.)
5
freq control knob, adjusts signal
frequency. The range is band-dependent (see
“Main input channel functions” on page 333).
On the graph in the EQ processing area (GUI
channel strip), causes the envelope to move
left/right.
6
SHAPE button, changes the shelving
mode on treble and bass bands. For a
description of each mode, see “Description of
the output channel EQ modes” on page 317.
7
Shelving symbol.
8
Graph of EQ envelope (see “EQ graph” on
page 299). When “OFF” is displayed, EQ is
switched off.
Содержание PRO6
Страница 2: ......
Страница 4: ......
Страница 6: ......
Страница 10: ......
Страница 14: ...xvi Precautions PRO6 Live Audio System Owner s Manual...
Страница 24: ...xxvi Contents PRO6 Live Audio System Owner s Manual...
Страница 25: ...PRO6 Live Audio System Owner s Manual Volume 1 Overview...
Страница 26: ......
Страница 30: ...4 Chapter 1 Introduction PRO6 Live Audio System Owner s Manual...
Страница 42: ...16 Chapter 2 PRO6 Live Audio System PRO6 Live Audio System Owner s Manual...
Страница 50: ...24 Chapter 3 About The PRO6 Control Centre PRO6 Live Audio System Owner s Manual...
Страница 51: ...PRO6 Live Audio System Owner s Manual Volume 1 Getting Started...
Страница 52: ......
Страница 59: ...PRO6 Live Audio System Owner s Manual Volume 2 Basic Operation Of The PRO6...
Страница 60: ......
Страница 64: ...38 Chapter 5 Before You Start PRO6 Live Audio System Owner s Manual...
Страница 104: ...78 Chapter 8 Patching PRO6 Live Audio System Owner s Manual...
Страница 131: ...PRO6 Live Audio System Owner s Manual Volume 3 Advanced Operation And Features...
Страница 132: ......
Страница 136: ...110 Chapter 10 Stereo Linking PRO6 Live Audio System Owner s Manual...
Страница 144: ...118 Chapter 11 Panning PRO6 Live Audio System Owner s Manual...
Страница 148: ...122 Chapter 12 Soloing PRO6 Live Audio System Owner s Manual...
Страница 150: ...124 Chapter 13 Muting PRO6 Live Audio System Owner s Manual...
Страница 192: ...166 Chapter 18 Copy And Paste PRO6 Live Audio System Owner s Manual...
Страница 242: ...216 Chapter 24 User Libraries Presets PRO6 Live Audio System Owner s Manual...
Страница 246: ...220 Chapter 25 File Management PRO6 Live Audio System Owner s Manual...
Страница 250: ...224 Chapter 26 Using Other Devices With The PRO6 PRO6 Live Audio System Owner s Manual...
Страница 267: ...PRO6 Live Audio System Owner s Manual Volume 4 Description...
Страница 268: ......
Страница 335: ...PRO6 Live Audio System Owner s Manual Volume 5 Appendices...
Страница 336: ......
Страница 365: ...Audio signal path 339 PRO6 Live Audio System Owner s Manual Audio signal path...
Страница 366: ...340 Appendix C Klark Teknik DN370 GEQ PRO6 Live Audio System Owner s Manual...
Страница 372: ...346 Appendix D Klark Teknik DN780 Reverb PRO6 Live Audio System Owner s Manual...
Страница 376: ...350 Appendix E I O Modules PRO6 Live Audio System Owner s Manual...
Страница 400: ...374 Appendix I Documentation PRO6 Live Audio System Owner s Manual...
Страница 511: ...Return 485 XL8 Live Performance System Owner s Manual Gate Not applicable EQ Not applicable...
Страница 524: ...498 Appendix N Parameters Affected By Copy And Paste XL8 Live Performance System Owner s Manual...
Страница 568: ...542 Appendix O Parameters Affected By Stereo Linking XL8 Live Performance System Owner s Manual...
Страница 612: ...586 Glossary PRO6 Live Audio System Owner s Manual...


