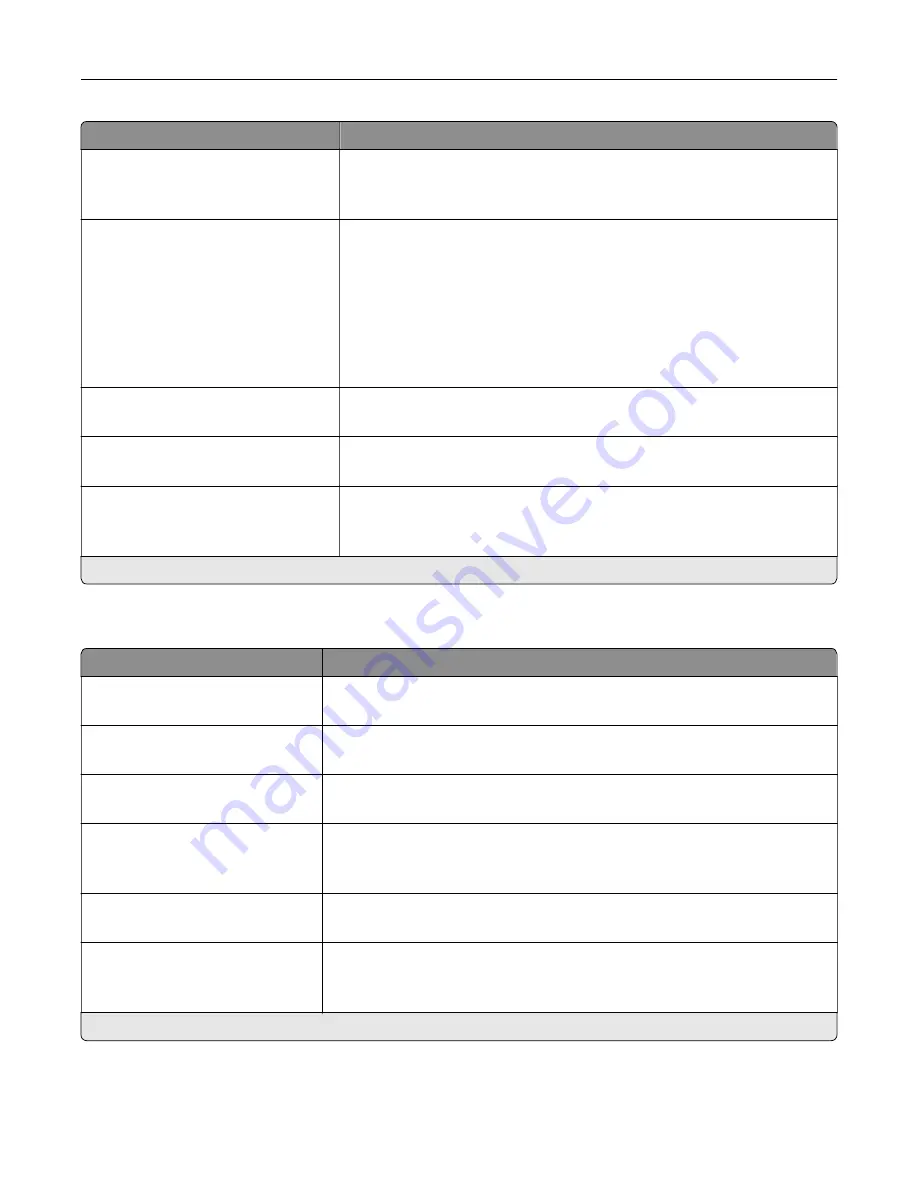
Menu item
Description
Auto LF after CR
Off*
On
Set the printer to perform a line feed after a carriage return control
command.
Tray Renumber
Assign MP Feeder
Assign Tray [x]
Assign Manual Paper
Assign Manual Envelope
Configure the printer to work with a different print driver or custom
application that uses a different set of source assignments to request a
given paper source.
Choose from the following options:
Off*—The printer uses the factory default paper source assignments.
None—The paper source ignores the Select Paper Feed command.
0–199—Select a numeric value to assign a custom value to a paper
source.
Tray Renumber
View Factory Defaults
Show the factory default value assigned for each paper source.
Tray Renumber
Restore Defaults
Restore the tray renumber values to their factory defaults.
Print Timeout
Off
On* (90 seconds)
Set the printer to end a print job after it has been idle for the specified
amount of time.
Note:
An asterisk (*) next to a value indicates the factory default setting.
HTML
Menu item
Description
Font Name
Times*
Set the font to use when printing HTML documents.
Font Size
1–255 (12*)
Set the font size to use when printing HTML documents.
Scale
1–400% (100*)
Scale HTML documents for printing.
Orientation
Portrait*
Landscape
Set the page orientation for HTML documents.
Margin Size
8–255 mm (19*)
Set the page margin for HTML documents.
Backgrounds
Do Not Print
Print*
Print background information or graphics in HTML documents.
Note:
An asterisk (*) next to a value indicates the factory default setting.
Understanding the printer menus
92
Содержание XC6152
Страница 65: ...5 Touch Scan Here If necessary change the scan settings 6 Scan the document Scanning 65 ...
Страница 161: ... Scanner glass pad 3 Open door E Maintaining the printer 161 ...
Страница 162: ...4 Wipe the following areas ADF glass in door E Maintaining the printer 162 ...
Страница 163: ... ADF glass pad in door E 5 Close the door and then close the scanner cover Maintaining the printer 163 ...
Страница 173: ...2 Remove the waste toner bottle 3 Remove the imaging unit 4 Remove the photoconductor unit Maintaining the printer 173 ...
Страница 175: ...Replacing an imaging unit 1 Open door A 2 Remove the waste toner bottle Maintaining the printer 175 ...
Страница 179: ...3 Remove the pick roller 4 Unpack the new pick roller Maintaining the printer 179 ...
Страница 189: ...4 Insert the new transfer roller 5 Remove the white packing material 6 Close door B Maintaining the printer 189 ...
Страница 196: ...2 Open door G 3 Remove the staple cartridge 4 Unpack the new staple cartridge Maintaining the printer 196 ...
Страница 198: ...2 Open door G 3 Pull out the staple cartridge holder Maintaining the printer 198 ...
Страница 216: ...2 Open door G 3 Pull out the staple cartridge holder Clearing jams 216 ...
Страница 274: ...4 Remove the paper bail 5 Remove the standard bin insert Upgrading and migrating 274 ...


