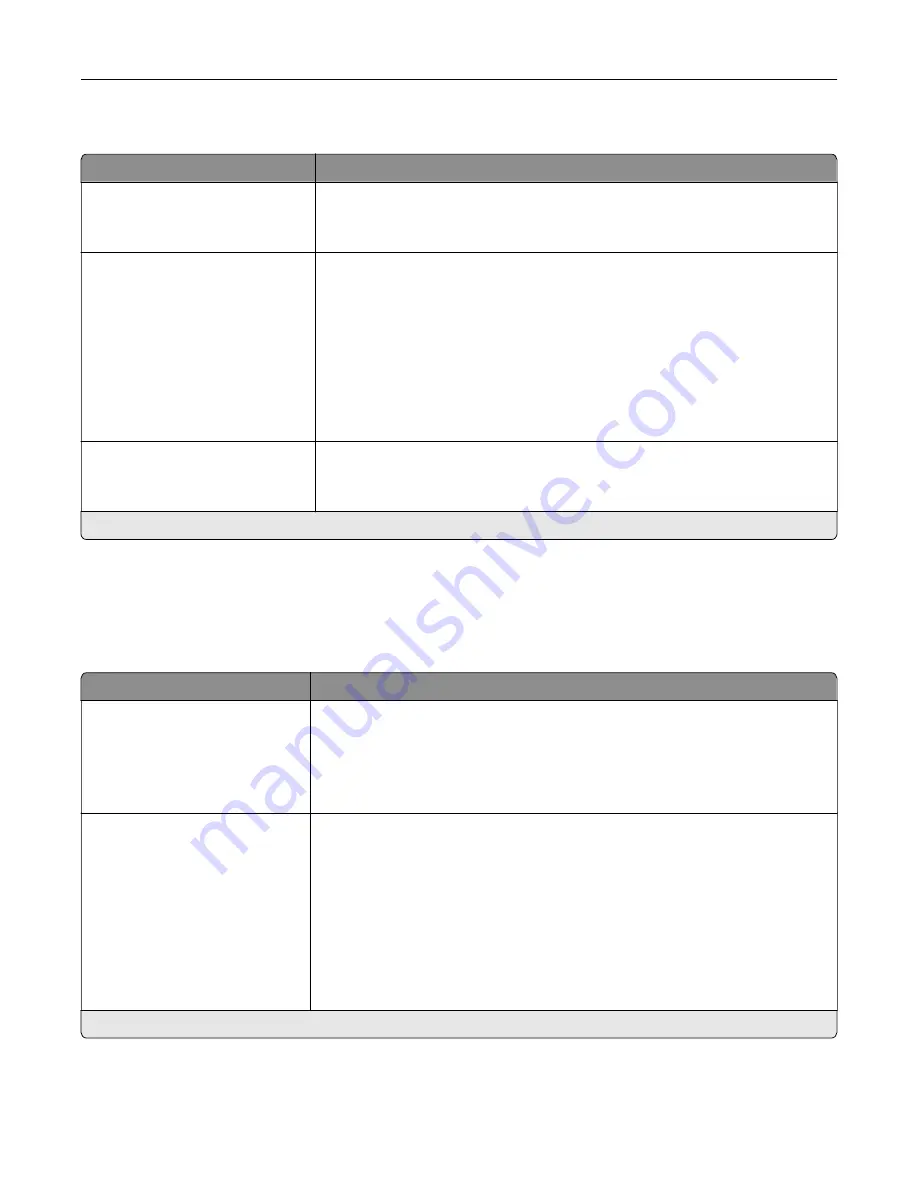
Bin Configuration
Menu item
Description
Output Bin
Standard Bin*
Bin [x]
Specify the output bin.
Configure Bins
Mailbox*
Link
Link Optional
Type Assignment
Configure the mode of operation for the output bins.
Notes:
•
Mailbox allows the standard bin and any optional bin to be selected
individually.
•
Link allows all output bins to be linked together as though they were one
large bin.
•
Link Optional treats all optional bins as one large output bin.
•
Type Assignment assigns each paper type a bin or a linked bin set.
Custom Bin Names
Standard Bin
Bin [x]
Assign a name for the bin.
Note:
An asterisk (*) next to a value indicates the factory default setting.
Copy
Copy Defaults
Menu item
Description
Content Type
Text
Text/Photo*
Photo
Graphics
Improve the output result based on the content of the original document.
Content Source
Black and White Laser
Color Laser*
Inkjet
Photo/Film
Magazine
Newspaper
Press
Other
Improve the output result based on the source of the original document.
Note:
An asterisk (*) next to a value indicates the factory default setting.
Understanding the printer menus
96
Содержание XC6152
Страница 65: ...5 Touch Scan Here If necessary change the scan settings 6 Scan the document Scanning 65 ...
Страница 161: ... Scanner glass pad 3 Open door E Maintaining the printer 161 ...
Страница 162: ...4 Wipe the following areas ADF glass in door E Maintaining the printer 162 ...
Страница 163: ... ADF glass pad in door E 5 Close the door and then close the scanner cover Maintaining the printer 163 ...
Страница 173: ...2 Remove the waste toner bottle 3 Remove the imaging unit 4 Remove the photoconductor unit Maintaining the printer 173 ...
Страница 175: ...Replacing an imaging unit 1 Open door A 2 Remove the waste toner bottle Maintaining the printer 175 ...
Страница 179: ...3 Remove the pick roller 4 Unpack the new pick roller Maintaining the printer 179 ...
Страница 189: ...4 Insert the new transfer roller 5 Remove the white packing material 6 Close door B Maintaining the printer 189 ...
Страница 196: ...2 Open door G 3 Remove the staple cartridge 4 Unpack the new staple cartridge Maintaining the printer 196 ...
Страница 198: ...2 Open door G 3 Pull out the staple cartridge holder Maintaining the printer 198 ...
Страница 216: ...2 Open door G 3 Pull out the staple cartridge holder Clearing jams 216 ...
Страница 274: ...4 Remove the paper bail 5 Remove the standard bin insert Upgrading and migrating 274 ...


