background image


 Related service information

 279

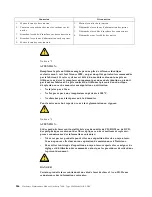
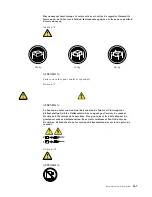
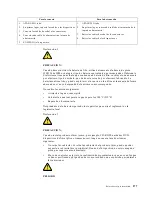
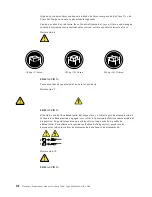
No coloque ningún objeto que pese más de 82 kg (180 libras) encima de los 
dispositivos montados en bastidor.

Send us your comments!

We want to know your opinion about this manual (part number 09N1030).  Your input 
will help us to improve our publications.

Please photocopy this survey, complete it, and then fax it to IBM HMM Survey at 
919-543-8167 (USA)

.

Name:  _________________________________________

Phone number:  __________________________________

Thank you for your response!

1.

Do you like this manual?   

 Yes        

 No    

_________________________________________

_________________________________________

2.

What would you like to see added, changed, or deleted in this manual?

_________________________________________

_________________________________________

3.

What is your service experience level?  

 Less than five years


 More than five years

4.

Which Servers to you service most? 

_________________________________________

_________________________________________

_________________________________________

_________________________________________

Содержание 86655RY - Netfinity 7600 - 8665

Страница 1: ...IBM Hardware Maintenance Manual Netfinity 7600 Type 8665 Models 1RY 2RY ...

Страница 2: ......

Страница 3: ...IBM Hardware Maintenance Manual Netfinity 7600 Type 8665 Models 1RY 2RY ...

Страница 4: ...eriodically made to the information herein these changes will be incorporated in new editions of the publication IBM may make improvements and or changes in the product s and or the program s described in this publication at any time This publication was developed for products and services offered in the United States of America IBM may not offer the products services or features discussed in this...

Страница 5: ...This manual is intended for trained servicers who are familiar with IBM PC Server products Important safety information Be sure to read all caution and danger statements in this book before performing any of the instructions Leia todas as instruções de cuidado e perigo antes de executar qualquer operação Prenez connaissance de toutes les consignes de type Attention et Danger avant de procéder aux ...

Страница 6: ...odas las declaraciones de precaución y peligro ante de llevar a cabo cualquier operación Online support Use the World Wide Web WWW to download Diagnostic BIOS Flash and Device Driver files File download address is http www us pc ibm com files html IBM online addresses The HMM manuals online address is http www us pc ibm com cdt hmm html The IBM PC Company Support Page is http www us pc ibm com sup...

Страница 7: ...lity program 43 Choices available from the Configuration Setup main menu 44 Using passwords 48 Power on password 48 Administrator password 48 Using the SCSISelect utility program 49 Starting the SCSISelect utility program 49 Choices available from the SCSISelect menu 50 Installing options 53 Major components of the Netfinity 7600 53 Component locations 54 I O board component locations 54 Processor...

Страница 8: ...r 121 System Partition Access 121 System Profile 121 Update Connector Manager 121 Web Manager Configuration 122 Delaying Netfinity Manager startup on OS 2 systems 122 Getting more information about Netfinity Manager 122 Installation options 123 Automated installation 123 Customized installation 125 FRU information service only 127 Diagnostic switch card 127 Disconnecting the shuttle 128 Front LED ...

Страница 9: ...ures for one defunct drive 190 More than one defunct DDD drive all logical drives in critical or OK state 190 More than one defunct DDD drive and one or more arrays offline 190 Channel record table 191 Reference information 192 Understanding RAID technology 192 Stripe unit size 193 Supported RAID levels 193 Drive state descriptions 202 Acronyms terms and definitions 210 Symptom to FRU index 215 Be...

Страница 10: ...viii Hardware Maintenance Manual Netfinity 7600 Type 8665 Models 1RY 2RY ...

Страница 11: ...he failing system is not part of a shared DASD cluster A system might be part of a cluster if The customer identifies the system as part of a cluster One or more external storage units are attached to the system and at least one of the attached storage units is additionally attached to another system or unidentifiable source One or more systems are located near the failing system If the failing sy...

Страница 12: ...rmation LED panel System Error LED if on see Diagnostic panel LEDs on page 218 Check the System Error Log If an error was recorded by the system see Chapter Symptom to FRU index on page 215 Start the Diagnostic Programs See Diagnostic programs and error messages on page 24 Check for the following responses a One beep b Readable instructions or the Main Menu 3 DID YOU RECEIVE BOTH OF THE CORRECT RE...

Страница 13: ...h a three year limited warranty and 90 Day IBM Start Up Support If you have access to the World Wide Web you can obtain up to date information about the server model and other IBM server products at the following World Wide Web address http www ibm com pc us netfinity Features and specifications The following provides a summary of the features and specifications for the Netfinity 7600 server Micro...

Страница 14: ...nology IBM ServeRAID controller three channels Acoustical noise emissions Sound power idling 6 3 bel maximum Sound power operating 6 3 bel maximum Sound pressure operating 48 dBa maximum Environment Air temperature Server on 10º to 35º C 50º to 95º F Altitude 0 to 914 m 3000 ft Server on 10º to 32º C 50º to 89 6º F Altitude 914 m 3000 ft to 2133 m 7000 ft Server off 10º to 43º C 50º to 110º F Maxi...

Страница 15: ...ot plug PCI adapters without turning off the server If the hot add feature is supported by the operating system and the PCI adapter you can also add PCI adapters in these slots without turning off the server Redundant cooling and power capabilities The redundant cooling and hot swap capabilities of the fans in the server enable continued operation if one of the fans fails because you can replace a...

Страница 16: ...installed and provides the correct configuration program and device drivers In addition the ServerGuide CDs include a variety of application programs for the server Reliability availability and serviceability Three of the most important features in server design are reliability availability and serviceability RAS These factors help to ensure the integrity of the data stored on the server that the ...

Страница 17: ...sk activity light Each of the hot swap drives has a hard disk activity light When this green light is flashing the drive is being accessed 3 CD ROM eject load button Press this button to eject or retract the CD ROM tray 4 CD ROM drive in use light When this light is on the CD ROM drive is being accessed 5 Diskette eject button Press this button to eject a diskette from the drive 6 Diskette drive i...

Страница 18: ...ity program the wake up feature will turn on the server at the set time If AC power is present the server is off and ring signal detect is enabled in the Configuration Setup utility program you can turn on the server by telephone input The Netfinity Advanced System Management Processor also can turn on the server You can turn off the server in several ways You can turn off the server by pressing t...

Страница 19: ...server power cords from the electrical outlets or from the uninterruptible power device 2 POST complete light This green light is on when the power on self test POST completes without any errors 3 Hard disk drive activity light This green light flickers when there is activity on a hard disk drive 4 Information light When this amber light is on the server power supplies are nonredundant or some oth...

Страница 20: ...us light When this green light is on there is an active connection on the Ethernet port 8 Ethernet speed 100 Mbps When this green light is on the Ethernet speed is 100 Mbps When the light is off the Ethernet speed is 10 Mbps 9 Processor activity lights One or more of these green lights are on when there is microprocessor activity The number of lights that are on indicates the number of microproces...

Страница 21: ...n in this section refer to Chapter Symptom to FRU index on page 215 for more information Diagnostic tools overview The following tools are available to help you identify and resolve hardware related problems POST beep codes error messages and error logs The power on self test POST generates beep codes and messages to indicate successful test completion or the detection of a problem See POST on pag...

Страница 22: ...ll not occur the next time you run the test POST beep codes POST generates beep codes to indicate successful completion or the detection of a problem One beep indicates the successful completion of POST More than one beep indicates that POST detected a problem For more information see Beep symptoms on page 215 POST error messages POST error messages occur during startup when POST finds a problem w...

Страница 23: ...ng power on self test POST the ServeRAID controller compares the stored configuration information to the configuration that is actually present If a discrepancy exists one or more status messages appear after POST completes but before the operating system loads Notes 1 When the ServeRAID controller requires your input a list of function keys will appear below the message 2 Where the Action informa...

Страница 24: ...tion BIOS code detected a bad or failed battery backup write cache Action Press F9 to remove the battery backup write cache from the configuration or press F10 to exit without change Battery Backup Write Cache Replacement Explanation The ServeRAID controller detects that the battery backup write cache is defective Action Press F8 if you replaced the battery backup write cache or press F10 if you h...

Страница 25: ...ive RAID level 1 and RAID level 5 logical drives are present and performance in a degraded mode is acceptable The ServeRAID controller will assign the drive a state of defunct but the server can complete startup However the array will remain in critical mode and the potential for data loss will exist until you replace and rebuild the defunct drive To prevent the loss of data replace and rebuild th...

Страница 26: ... the backplane and to the physical drive Also ensure that all cables inside the server are connected properly 2 The hot swap drive trays are seated properly in the drive bay 3 If you have not already attempted to rebuild the drive try rebuilding it See Rebuilding a defunct drive on page 22 for more information After you perform these steps if the physical drive does not function properly replace t...

Страница 27: ...ean that you need to replace the drive Before you replace the drive ensure that 1 All cables are connected properly to the backplane or processor or I O board and to the physical drive Also ensure that all cables inside the server are connected properly 2 The hot swap drive trays are seated properly in the drive bay 3 If you have not already attempted to rebuild the drive try rebuilding it See Reb...

Страница 28: ... menu 2 Select Advanced Functions from the Main Menu 3 Select Copy the Configuration from Drives to the Controller Unrecoverable configuration error Explanation The configuration data stored in NVRAM does not match the configuration data stored in the EEPROM Action 1 Press Ctrl I to access the ServeRAID Mini Configuration menu 2 Select Advanced Functions from the Main Menu 3 Select Restore to the ...

Страница 29: ... and follow the instructions that appear on the screen 00 02 Explanation Invalid NVRAM configuration Action Start the IBM ServeRAID Support CD and follow the instructions that appear on the screen 00 03 Explanation Invalid flash and NVRAM configuration Action Start the IBM ServeRAID Support CD and follow the instructions that appear on the screen 01 08 Explanation No configuration was found in dri...

Страница 30: ...m and it has valid configuration and online rebuild and ready standby drives are not responding Action Press F4 F5 F7 or F10 03 B8 Explanation A drive was imported from another system and it has valid configuration and online rebuild hot spare standby hot spare and ready standby drives are not responding Action Press F4 F5 F7 or F10 03 C8 Explanation A drive was imported from another system and it...

Страница 31: ...ives are not responding Action Press F4 F5 or F10 07 3C Explanation Online rebuild ready standby and hot spare standby hot spare drives are not responding and a drive was found at the incorrect SCSI ID Action Press F4 F5 F6 or F10 07 48 Explanation Online rebuild drives are not responding and unidentified drives were found Action Press F4 F5 or F10 07 4C Explanation Online rebuild drives are not r...

Страница 32: ...build ready standby and hot spare standby hot spare drives are not responding and unidentified drives were found Action Press F4 F5 or F10 07 7C Explanation Online rebuild ready standby and hot spare standby hot spare drives are not responding a drive was found at the incorrect SCSI ID and unidentified drives were found Action Press F4 F5 F6 or F10 09 00 Explanation No error occurred Action No act...

Страница 33: ... been successfully completed On IBM servers when a hot spare drive is available the rebuild operation will begin automatically without the requirement to replace the failed drive To start a hot swap rebuild do the following 1 Without removing the drive completely gently remove the physical drive from the server using the handle of the hot swap tray If necessary refer to the documentation that come...

Страница 34: ...roller is the same as the controller you are replacing Be sure to use the same controller name partner name and SCSI initiator ID for the controller you are replacing 2 For detailed instructions refer to the Hardware Maintenance Manual for the ServeRAID controller being serviced If the failed controller is in a hot plug slot refer to the documentation that comes with the server for instructions fo...

Страница 35: ...ollowing Passed This result occurs when the diagnostic test completes without any errors Failed This result occurs when the diagnostic test discovers an error User Aborted This result occurs when you stop the diagnostic test before it is complete Not Applicable This result occurs when you specify a diagnostic test for a device that is not present Aborted This result occurs when the test could not ...

Страница 36: ...SB interface test and the USB external loopback test only if there are no USB devices attached e You can view server configuration information such as system configuration memory contents interrupt request IRQ use direct memory access DMA use device drivers and so on by selecting Hardware Info from the top of the screen When the tests have completed you can view the Test Log by selecting Utility f...

Страница 37: ...Ds are part of the light path diagnostics built into the server By following the path of lights you can quickly identify the type of system error that occurred Power supply LEDs The AC and DC power LEDs on the power supply provide status information about the power supply See Installing a hot swap power supply on page 76 for the location of these LEDs See Power checkout on page 31 for more informa...

Страница 38: ...rver is not turned on the power LED is blinking on the front of the server Action Press the power control button to start the server 2 The power supply has failed Action Replace the power supply Off Off There is an ac power problem Possible causes 1 There is no ac power to the power supply Actions Verify that The electrical cord is properly connected to the server The electrical outlet functions p...

Страница 39: ...e problem if an error causes the server to shut down If the system error LED on the information LED panel is not lit and no diagnostics panel LEDs are lit it means that the light path diagnostics have not detected a system error If the system error LED on the information LED panel is lit it means that a system error was detected Check to see which of the LEDs on the diagnostics panel inside the se...

Страница 40: ...nel B 1 If the TEMP LED is also on take the actions listed for that LED 2 If the amber status LED on one of the hot swap hard disk drives is on replace the drive MEM A memory error occurred 1 Check the DIMM error LEDs on the memory board 2 Replace the DIMM indicated by the lit DIMM error LEDs CPU One of the microprocessors has failed or a microprocessor is installed in the wrong connector 1 Check ...

Страница 41: ... Power error messages on page 237 Temperature checkout Proper cooling of the system is important for proper operation and system reliability For a typical Netfinity server you should make sure Each of the drive bays has either a drive or a filler panel installed Each of the power supply bays has either a power supply or a filler panel installed The top cover is in place during normal operation The...

Страница 42: ...tte into the diskette drive 5 Restart the server 6 The system begins the power on self test POST Select 1 Update POST BIOS from the menu that contains various flash update options 7 When you are asked if you would like to move the current POST BIOS image to the backup ROM location type N Attention Typing Y will copy the corrupted BIOS into the secondary page 8 When you are asked if you would like ...

Страница 43: ...the information in Before you begin on page 60 2 Follow any special handling and installation instructions supplied with the battery 3 Turn off the server and all attached devices and disconnect all external cables and power cords see Safety information on page 249 then remove the top cover 4 Locate the battery on the processor board see Processor board component locations on page 55 5 Remove adap...

Страница 44: ... Error symptoms on page 225 If you cannot find the problem there go to Starting the diagnostic programs on page 25 to test the server If you have just added new software or a new option and the server is not working do the following before using the error symptoms table Remove the software or device that you just added Run the diagnostic tests to determine if the server is running correctly Reinst...

Страница 45: ...he correct device drivers supplied with the server Check for operating system specific causes for the problem Make sure that the device drivers on the client and server are using the same protocol Test the Ethernet controller How you test the Ethernet controller depends on which operating system you are using see the Ethernet controller device driver README file Ethernet controller troubleshooting...

Страница 46: ...river load parameters If necessary remove any LED parameter settings when you load the device drivers Data is incorrect or sporadic Check the following Make sure that you are using Category 5 cabling when operating the server at 100 Mbps Make sure that the cables do not run close to noise inducing sources like fluorescent lights The Ethernet controller stopped working when another adapter was adde...

Страница 47: ... Make sure the IRQ settings are correct in the Configuration Setup Utility program for information on setting the interrupt requests If the IRQ settings are correct go to Starting the diagnostic programs on page 25 to run the diagnostic programs PCNTNW NW 066 The cable might be disconnected from the adapter Explanation The cable might be disconnected from the server Ethernet port Action Verify tha...

Страница 48: ...Action Restart the server If the problem persists go to Starting the diagnostic programs on page 25 to run the diagnostic programs PCNTNW NW 091 The hardware configuration conflicts Explanation You tried to load a new frame type for the existing controller The hardware assumptions made in doing so are incorrect This error can also occur if you try to specify a mode such as redundancy that conflict...

Страница 49: ...one necessary message is for information only Table 4 NDIS Windows NT driver messages for the Ethernet controller PermaNet Server No Secondary Adapter Found Grouping Mode is disabled Explanation The failover option requires an adapter that is compatible with the device driver of the Ethernet controller on the system board No such adapter was found Action Make sure the correct adapter is installed ...

Страница 50: ...driver cannot find an Ethernet controller Action Verify that the Ethernet controller is enabled If the Ethernet controller is enabled run the diagnostic programs pnt0 13 add_intr_handler failed Interrupts already enabled Explanation The interrupt request IRQ that was specified or the IRQ that was found conflicts with other devices in the server Action Modify the hardware settings pnt0 14 Cannot lo...

Страница 51: ...ed Vector already occupied Explanation The interrupt request IRQ that was specified or the IRQ that was found conflicts with other devices in the server Action Modify the hardware settings pnt0 24 add_intr_handler failed Vector already shared at different IPL Explanation The interrupt request IRQ that was specified or the IRQ that was found conflicts with other devices in the server Action Modify ...

Страница 52: ...42 Hardware Maintenance Manual Netfinity 7600 Type 8665 Models 1RY 2RY ...

Страница 53: ...isk array subsystem before you install the operating system See Chapter Installing and configuring ServeRAID controllers on page 139 for more detailed information ServerGuide CDs The ServerGuide CDs include software setup and installation tools specifically designed for IBM Netfinity servers You can use these CDs during the initial installation of the server to configure the server hardware and si...

Страница 54: ...ar on this summary screen You cannot edit the fields This choice appears on both the full and limited Configuration Setup Utility menus System Information Select this choice to display information about the server Changes that you make on other menus might appear on this summary screen You cannot edit any fields The System Information choice appears only on the full Configuration Setup Utility mai...

Страница 55: ...ent Processor clock time leave the value set at its default of 0 System Security Select this choice to set passwords or a system owner s name This choice appears only on the full Configuration Setup Utility main menu You can implement two levels of password protection Power on Password Select this choice to set or change a power on password See Using passwords on page 48 for more information Admin...

Страница 56: ...st that checks for changes in the master boot record at startup You also can choose to run POST in the enhanced mode or the quick mode Advanced Setup Select this choice to change values for advanced hardware features such as cache control and PCI configuration This choice appears only on the full Configuration Setup Utility main menu A warning message appears above the choices on this menu to aler...

Страница 57: ...the server will have no video capability However turning the server off and on three times without completing POST results in a default startup that enables video again Memory Settings Select this choice to manually disable or enable a bank of memory If a memory error is detected during POST or memory configuration the server can automatically disable the failing memory bank and continue operating...

Страница 58: ...tion Setup Utility program and change the power on password Change the position of the password override switch as described in Setting the password override switch Remove the battery and then install the battery Setting the password override switch When a power on password is set POST does not complete until you enter the password If you forget the power on password you can regain access to the s...

Страница 59: ...ice from the menu Press Esc to return to the previous menu Press the F5 key to switch between color and monochrome modes if the monitor permits 5 Follow the instructions on the screen to change the settings of the selected items then press Enter Table 6 Power on and administrator password features Type of password Results Power on password Enter the password to complete the system startup All choi...

Страница 60: ...this choice to configure SCSI device parameters Before you can make updates you must know the ID of the device whose parameters you want to configure Note The Maximum Sync Transfer Rate represents the transfer rate for Ultra SCSI devices The transfer rate for Ultra 3 SCSI LVD devices is 160 0 The transfer rate for Ultra 2 SCSI LVD devices is 80 0 The transfer rate for Fast SCSI devices is 20 0 Adv...

Страница 61: ...acing a failing hard disk drive Note If the server has a PCI RAID adapter installed refer to the RAID adapter documentation for instructions for performing low level formats on hard disk drives attached to the adapter To start the Low Level Format program 1 If the hard disk is working make a backup copy of all the files and programs on the hard disk drive See the operating system information for i...

Страница 62: ...y 7600 Type 8665 Models 1RY 2RY Note Hard disks normally contain more tracks than their stated capacity to allow for defective tracks A message appears on the screen if the defect limit is reached If this happens replace the hard disk drive ...

Страница 63: ...plug components This means that you can install or remove the components while the system is running provided that your system is configured to support this function For complete information about installing or removing a hot swap or hot plug component see the information provided in the detailed procedures in this document The blue color on components and labels indicates touch points where a com...

Страница 64: ...ule 5 I O board 6 Shuttle Component locations This section provides illustrations of the I O board processor board and memory board component locations I O board component locations The following illustration shows the location of the input output I O connectors on the I O board Note The illustrations in this document might differ slightly from your hardware ...

Страница 65: ...or J32 8 SCSI external connector J21 9 Parallel port connector J33 10 ASM Interconnect connector J10 11 Serial port B connector J15 12 Serial port A connector J16 13 Management port connector J18 Processor board component locations The following illustration shows the location of the LEDs connectors and jumpers on the processor board Processor board LEDs The following illustration shows the locati...

Страница 66: ... LED CR8 4 Microprocessor 4 error LED CR4 5 Battery 6 PCI 7 VRM 4 error LED CR10 8 VRM 3 error LED CR5 9 VRM 2 error LED CR7 10 VRM 1 error LED CR6 Processor board connectors The following illustration shows the connectors 1 Microprocessor 1 connector 2 Microprocessor 2 connector 3 Microprocessor 3 connector 4 Microprocessor 4 connector 5 Memory board connector ...

Страница 67: ... The following illustration shows the jumpers 1 Jumper block J8 Reserved 2 Jumper block J9 Reserved 3 Jumper block J10 J16 4 Flash ROM page swap jumper block J56 5 Power on password override jumper block J48 6 Battery 7 Power on control jumper block J23 8 3 3 V standby power for slot 2 J20 9 3 3 V standby power for slot 1 J47 10 Advanced System Management Processor reset jumper block J59 ...

Страница 68: ...12 4 Reserved J11 Memory board component locations The illustrations in this section show certain locations on the memory board Memory board connectors The following illustration shows the location of the DIMM connectors on the memory board SMI NMI PCIA PCIB PS3 PS4 SP OVER SPEC MEM NON RED FAN TEMP VRM CPU DASD1 PS2 PS1 PCIC 1 2 3 4 A 5 6 7 8 9 10 11 12 13 14 ...

Страница 69: ... Connector 2 J2 3 Connector 3 J3 4 Connector 4 J4 5 Connector 5 J5 6 Connector 6 J6 7 Connector 7 J7 8 Connector 8 J8 9 Connector 9 J9 10 Connector 10 J10 11 Connector 11 J11 12 Connector 12 J12 13 Connector 13 J13 1 2 3 4 5 6 7 8 9 10 11 12 ...

Страница 70: ... CR15 8 DIMM 12 error LED CR16 9 DIMM 13 error LED CR11 10 DIMM 14 error LED CR14 11 DIMM 15 error LED CR10 12 DIMM 16error LED CR9 13 Processor board connector 14 DIMM 8 error LED CR8 15 DIMM 7 error LED CR7 16 DIMM 6 error LED CR3 17 DIMM 5 error LED CR6 Before you begin Before you begin to install options in the server read the following information Become familiar with the safety and handling ...

Страница 71: ... to replace the device without turning off the server Hot add devices allow you to add an identical device without turning off the server In the past you would need to turn off the server and disconnect power to perform these operations With the hot plug features you can remove the top cover of the server with the power on The server supports hot plug hot add and hot swap devices and is designed t...

Страница 72: ...dge of the top cover 2 Slide the top cover slightly toward the rear of the server Lift the cover off the server and set the cover aside Attention For proper cooling and airflow replace the top cover before turning on the server Operating the server for extended periods of time over 30 minutes with the top cover removed might damage server components Removing the media bay bezel 1 Media bay bezel ...

Страница 73: ...l away from the server Working with adapters You can install up to six PCI adapters in the expansion connectors on the processor board All six of the slots are peripheral component interconnect PCI expansion slots The server comes with an integrated super video graphics array SVGA video controller which is not removable If you want to disable this controller and use a video adapter instead you can...

Страница 74: ... universal PCI adapters Note Universal PCI adapters support both 3 3V and 5 0V operation Slots 1 and 2 support 3 3 V and universal non hot swap PCI adapters only The server uses a rotational interrupt technique to configure PCI adapters Because of this technique you can install a variety of PCI adapters that currently do not support sharing of PCI interrupts The system scans PCI slots 1 through 6 ...

Страница 75: ...rmine which expansion slot you will use for the adapter Note You can install hot plug PCI adapters in PCI slots 3 6 only 4 Disable the selected PCI slot from the operating system Refer to the documentation that comes with the operating system for information about disabling a hot plug PCI slot Disabling the PCI slot turns off the power light for that PCI slot Attention Make sure the power light fo...

Страница 76: ...apter in the server be sure that it is completely and correctly seated in the processor board connector Incomplete insertion might cause damage to the processor board or the adapter c Lower the tab over the top corner of the adapter Rotate the adapter retention latch clockwise until it snaps into place d Lower the rear retainer clip over the top of the adapter until it snaps into place 9 Connect a...

Страница 77: ... swap drive that you plan to install must be mounted in a hot swap drive tray The drive must have a single connector attachment SCA connector Hot swap drive trays come with hot swap drives Internal drive bays Internal drives are installed in bays Your server comes with one CD ROM drive and one 3 5 inch 1 44 MB diskette drive The left front bays support 5 25 inch half high removable media drives An...

Страница 78: ...ust follow the instructions in Connecting external options on page 81 in addition to the instructions in this section A 16 bit wide low voltage differential LVD SCSI cable connects the hard disk drive backplane to the ServeRaid adapter located in a PCI slot on the processor board An additional 16 bit two drop SCSI cable comes with the server It is located in the bottom of the server media bay and ...

Страница 79: ... bezel The drive placement guide indicates the placement for slim high and half high drives The guide also shows the SCSI ID assigned to the drive b Ensure the tray handle is open that is perpendicular to the drive c Align the drive assembly with the guide rails in the bay d Gently push the drive assembly into the bay until the drive stops e Push the tray handle to the closed locked position f Che...

Страница 80: ...ity and cooling are both protected by having the left front bays covered or occupied When you install a drive save the filler panel from the bay in case you later remove the drive and do not replace it with another 5 Touch the static protective bag containing the drive to any unpainted metal surface on the server then remove the drive from the bag and place it on a static protective surface 6 Remo...

Страница 81: ...erver The connectors are keyed and can be inserted only one way 13 If you are installing another 5 25 inch drive do so now Otherwise continue with step 14 14 Connect the shuttle a Slide the shuttle back into the server b Disengage the retaining levers from the notches on the chassis c Move the retaining levers toward the front of the server d Secure the retaining levers in the horizontal position ...

Страница 82: ... must save the new configuration information in the Configuration Setup Utility program Refer to Using the Configuration Setup Utility program on page 43 for more information Install the DIMMs in the order provided in Table 7 For the locations of the DIMM connectors see Memory board component locations on page 58 Refer to the following illustration when installing memory Table 7 DIMM installation ...

Страница 83: ... DIMMs repeat the following steps for each DIMM that you install a Turn the DIMM so that the pins align correctly with the DIMM connector b Insert the DIMM by pressing the DIMM straight into the connector Be sure that the retaining clips snap into the closed position 8 Install the memory board assembly a Hold the memory board assembly and align it over the memory board connector b Insert the memor...

Страница 84: ...rocessor installed The microprocessor is installed in microprocessor connector J2 and is the startup boot processor A microprocessor installed in microprocessor connector J3 is processor 2 a microprocessor installed in microprocessor connector J4 is processor 3 a microprocessor installed in microprocessor connector J5 is processor 4 If more than one microprocessor is installed the highest numbered...

Страница 85: ...l the microprocessor X X T T X X Three microprocessors installed Microprocessor connectors VRM connectors J2 P1 J3 P2 J4 P3 J5 P4 J37 VRM 1 J38 VRM 2 J39 VRM 3 J41 VRM 4 X X X T X X X Four microprocessors installed Microprocessor connectors VRM connectors J2 P1 J3 P2 J4 P3 J5 P4 J37 VRM 1 J38 VRM 2 J39 VRM 3 J41 VRM 4 X X X X X X X X Table 9 Microprocessor and VRM installation order Microprocessor...

Страница 86: ...or card in the appropriate microprocessor connector and to remove the VRM for that microprocessor b Carefully close the latches to seat the VRM in the connector 8 Install the processor housing cover and push down on the two pop rivets 9 If you have other options to install or remove do so now otherwise go to Completing the installation on page 79 Installing a hot swap power supply CAUTION Never re...

Страница 87: ...e power cord to an easily accessible power source To install an additional power supply 1 Review Before you begin on page 60 2 Remove the filler panel 3 Place the handle on the power supply in the open position 4 Slide the power supply into the chassis and close the handle 5 Plug one end of the power cord into the power supply then plug the other end of the cord into a properly grounded electrical...

Страница 88: ...ng illustration to replace a hot swap fan To replace a hot swap fan assembly 1 Review the information in Before you begin on page 60 2 If you are replacing fan assembly 1 2 or 3 a Remove the top cover Attention To ensure proper system cooling keep the cover removed for no more than 30 minutes during this procedure b Press the fan release latch and lift the fan assembly out of the server c Slide th...

Страница 89: ...the top cover reconnect all the cables that you disconnected and for certain options run the Configuration Setup Utility program Follow the instructions in this section Attention For proper cooling and airflow install the top cover before turning on the server Operating the server for extended periods of time over 30 minutes with the top cover removed might damage server components Installing the ...

Страница 90: ...he bezel snap into place Installing the top cover To install the server top cover 1 Before installing the cover check that all cables adapters and other components are installed and seated correctly and that you have not left loose tools or parts inside the server 2 Lower the cover with the rear edge of the cover about 25 mm 1 inch back from the rear edge of the server 3 Slide the cover forward 4 ...

Страница 91: ...p Utility program to save the new configuration information See Chapter Configuring the server on page 43 If you have installed or removed a hard disk drive refer to Chapter Installing and configuring ServeRAID controllers on page 139 for information about reconfiguring the disk arrays Connecting external options Review the information in Before you begin on page 60 Also read the documentation tha...

Страница 92: ...onitor screen 2 When the message Press F1 for Configuration Setup appears press F1 Note The Devices and I O Ports choice appears only on the full configuration menu If you set two levels of passwords you must enter the administrator password to access the full configuration menu 3 From the main menu select Devices and I O Ports then press Enter 4 Select the parallel port then use the arrow keys to...

Страница 93: ...10 Parallel port connector pin number assignments Pin I O SPP ECP Signal EPP Signal 1 O STROBE WRITE 2 I O Data 0 Data 0 3 I O Data 1 Data 1 4 I O Data 2 Data 2 5 I O Data 3 Data 3 6 I O Data 4 Data 4 7 I O Data 5 Data 5 8 I O Data 6 Data 6 9 I O Data 7 Data 7 10 I ACK ACK 11 I BUSY WAIT 12 I PE paper end PE paper end 13 I SLCT select SLCT select 14 O AUTO FD feed AUTO FD 15 I ERROR ERROR 16 O INI...

Страница 94: ... server Note If you attach a standard non USB keyboard to the keyboard connector the USB ports and devices will be disabled during the power on self test POST The following table shows the pin number assignments for the keyboard connector on the rear of the server Table 11 Video port connector pin number assignments Pin Signal 1 Red 2 Green or monochrome 3 Blue 4 Monitor ID bit 2 5 Ground 6 Ground...

Страница 95: ...r of the server Refer to Chapter Installing and configuring ServeRAID controllers on page 139 The server has a dual channel Ultra 2 small computer system interface SCSI controller This controller supports two independent SCSI channels one external and one internal Each of these channels supports up to 15 SCSI devices You can use the external LVD SCSI channel connector on the rear of the server to ...

Страница 96: ...not attempt to transfer data simultaneously SCSI devices that are connected to different SCSI channels can have duplicate SCSI IDs The hot swap drive backplane controls the SCSI IDs for the internal hot swap drive bays However when you attach SCSI devices to the external SCSI connector you must set a unique ID for the device Refer to the information that is provided with the device for instruction...

Страница 97: ...tch the monitor screen 2 When the message Press F1 for Configuration Setup appears press F1 3 From the main menu select Devices and I O Ports then press Enter Note The Devices and I O Ports choice appears only on the full configuration menu If you set two levels of passwords you must enter the administrator password to access the full configuration menu 16 DIFFSENS 50 Ground 17 Term power 51 Term ...

Страница 98: ... the USB ports and devices will be disabled during the power on self test POST 2 If you install a USB keyboard that has a mouse port the USB keyboard emulates a mouse and you will not be able to disable the mouse settings in the Configuration Setup Utility program 3 Check to make sure your NOS supports USB devices USB cables and hubs You need a 4 pin cable to connect devices to USB 1 or USB 2 If y...

Страница 99: ...pports half duplex HDX and full duplex FDX modes at both speeds The Ethernet controller is a PCI Plug and Play device You do not need to set any jumpers or configure the controller for the operating system before you use the Ethernet controller However you must install a device driver to enable the operating system to address the Ethernet controller The device drivers are provided on the ServerGui...

Страница 100: ...h hot plug support or independently If you are not using hot plug support go to Windows NT Server failover setup on page 91 Windows NT Server hot plug setup IBM Netfinity Hot Plug PCI for Windows NT Server 4 0 package is available for download from the IBM Web site at http www pc ibm com support Enter the brand type of Server click on Downloadable files and look for Hot Plug The IBM Netfinity Hot ...

Страница 101: ...pters tab 5 Highlight one of the adapters that will be in the redundant pair and then click the Properties button 6 Check the Grouping box This will show the possible combinations for redundant pairs 7 Select the adapter pair you want and then select OK Note that the integrated Ethernet controller is located at PCI C Two options are available for recovering from a failover condition The options ar...

Страница 102: ...d while the Ethernet traffic was being handled by the secondary Ethernet controller the traffic does not automatically switch back to the primary adapter when the primary adapter comes back online In this case issue the command LOAD d path PCNTNW SCAN where d and path are the drive and path where the driver is located This command causes the device driver to locate the primary adapter and switch t...

Страница 103: ...rs This function enables you to connect the Advanced System Management Processors of several rack mounted servers so that they can communicate with each other in half duplex mode Cabling the server Refer to the following illustration for the location of input and output connectors Refer to the following illustration for an example of proper cable routing Installing the server in a rack Refer to th...

Страница 104: ...94 Hardware Maintenance Manual Netfinity 7600 Type 8665 Models 1RY 2RY ...

Страница 105: ...tfinity Manager provides powerful hardware systems management capabilities including access to all systems on the network that are running Netfinity Manager or Client Services for Netfinity Manager In addition to all standard Client Services for Netfinity Manager functions Netfinity Manager also features bidirectional file and directory transfers remote screen captures and remote command line sess...

Страница 106: ...m requirements The minimum system requirements for Netfinity Manager vary based on which supported operating system is running on your system If you are installing Netfinity Manager for OS 2 see Netfinity Manager for OS 2 system requirements If you are installing Netfinity Manager for Windows 95 or Windows 98 see Netfinity Manager for Windows 95 and Windows 98 system requirements on page 97 If you...

Страница 107: ... PCOMM 4 1 or later SNA stack Note Systems using Netfinity Manager with Microsoft SNA Server cannot communicate with systems running the Microsoft SNA Server client Netfinity Manager supports only server to server communications between systems running Microsoft SNA Server software However Netfinity Manager systems running Microsoft SNA Server can communicate with Netfinity Manager systems using a...

Страница 108: ...pace All other system requirements are the same as for Netfinity Manager for Windows NT Notes 1 Serial Connection Control will not function on systems that do not have a properly installed and configured modem 2 To most effectively manage Windows NT systems any user that will be using Netfinity Manager on a Windows NT system locally or remotely must have administrator level access to the system St...

Страница 109: ...elect Client Services for Netfinity Manager from the Available Applications list and then refer to the Client Services for Netfinity Manager User s Guide for additional installation instructions e Click Install Product to start the installation process 4 Choose a drive and directory from which the Netfinity Manager program files will be copied Type in the Directory to Install from field the drive ...

Страница 110: ...erial Connection Control service named Dynamic Connection Manager will be installed instead of Serial Connection Control For more information on Advanced System Management and the Dynamic Connection Manager service see the Advanced System Management Information section of this server library Capacity Manager Click Capacity Management to install the Capacity Management service on this system Capaci...

Страница 111: ...process Network communication drivers and the following Netfinity Manager services are installed Alert Manager Alert on LAN Configuration available only on systems running Windows 95 or later or Windows NT 4 0 or later Capacity Management available only on systems running Windows NT 4 0 or later Cluster Manager available only on systems running Windows NT 4 0 or later Critical File Monitor DMI Bro...

Страница 112: ...tallation configuration allows for network access enter information regarding the communication protocols that are supported by the system The Network Driver Configuration window will appear Follow these steps to continue configuring the system a Enter a System Name Enter a name for the system in the System Name field This name will help other Netfinity Manager users identify the system on the net...

Страница 113: ...inity Manager Options optional Click on the Options button to open the Netfinity Manager Options window The Netfinity Manager Options window contains special options that affect Netfinity Manager network operations Available options include Force Remote Logons If the Force Remote Logons option is enabled the system will not be able to save the User ID Password combinations that were used when acce...

Страница 114: ... that Netfinity Manager will attempt to communicate with a remote system that is not responding If Netfinity Manager does not establish contact with the remote system within this time it cancels the communication attempt The Network Timeout default setting is 15 seconds This default setting might not need to be altered g Save the configuration and continue Click Save to save the configuration Then...

Страница 115: ...is being installed see ODBC database support on page 111 DB2 database support Support for DB2 database export is automatically configured during installation of the Netfinity Manager However the database system itself must be configured Instructions for configuring the database follow A raw data dump to a file is also available and will run without a database System requirements Netfinity Manager ...

Страница 116: ...the active drive Type D and then press Enter 4 Type the following command at the OS 2 prompt NETFINDB CREATE DBNAME databasename DRIVE d where databasename is the name of the database and d is the drive where the database will be located Note If any part of the database already exists the utility program will create only the portions of the database that are missing 5 Press Enter Activating the da...

Страница 117: ...ere privilegecode is one of the following privilege codes ALL ALL PRIVILEGES Note Grants all the appropriate privileges except CONTROL on the database ALTER CONTROL DELETE INDEX INSERT REFERENCES SELECT UPDATE tablename is the name of the table as specified during database installation A listing of the Netfinity database table names can be found in the Netfinity User s Guide Appendix H Netfinity R...

Страница 118: ...letters might be different b Make the CD ROM drive the active drive Type D and then press Enter c Type the following command NETFINDB GRANT ID id PUBLIC DBNAME databasename PRIV privilegecode where id is the user ID to be granted access databasename is the name of the database as specified during NETFINDB execution privilegecode is one of the following privilege codes ALL ALTER CONTROL DELETE INDE...

Страница 119: ... ROM drive in this example the CD ROM drive is E 2 Start an OS 2 window or full screen session 3 Make the CD ROM drive the active drive Type E and press Enter 4 Type the following command at the OS 2 prompt NETFINDB DELETE DBNAME databasename where databasename is the name of the database as specified during NETFINDB execution 5 Press Enter To configure Netfinity Manager to discontinue export data...

Страница 120: ...ocal from the Servers selection list Note When installing the database on a remote server select the name of the remote server from the Servers list 7 Type in the Filename field NETFINDB NSF 8 Type in the Title field Netfinity Database 9 Click New to create the database and close the New Database window 10 Double click the Netfinity Database icon in the Lotus Notes workspace 11 Click Database in t...

Страница 121: ...n contained in the part of the Netfinity Manager database that has been selected is now listed in the window For more detailed information about any displayed data item double click the data item 4 Some data items can be expanded to reveal additional information These items are identified by a plus sign in the left side border of the Notes window beside the name of the data item To expand the data...

Страница 122: ...s NT when exporting to MS SQL NETFIN must be the owner of the database or be given table create rights 2 Create the database with the appropriate relationship with the NETFIN ID 3 Make a database ODBC source either using the ODBC tools shipped with the operating system or the database 4 On Windows NT configure the Netfinity Support Program to export data using the ODBC database a Open Services fro...

Страница 123: ... click OK to open the Database Server window The following table actions are also available Delete To remove the Netfinity Manager table groups from the database click Delete and then click OK to open the Database Server window Grant Permits access to a database for a specified user ID To grant access a Click Grant b In the User ID field type the user ID that will be permitted to access the databa...

Страница 124: ...ier name of the Netfinity Manager database 7 In the Password field type the password that enables access to the Netfinity Manager database 8 Click OK As the information is processed a Creating tables status message should be displayed When the operation completes a Requested Action Completed message should be displayed Supported and certified databases The following tables show databases and opera...

Страница 125: ...es Sybase Driver Version 10 0 3T4 Yes Sybase Driver Version 10 0 3T4 Note The above applies to Netfinity Manager Release 5 2 0 and later Table 19 Supported Netfinity Databases for OS 2 Reference by operating system and database client version Product OS 2 Warp Connect OS 2 Warp 4 0 IBM DB2 Version 2 1 2 Yes Yes IBM DB2 Universal Database 5 0 Yes Yes ODBC IBM DB2 Version 2 1 2 Yes DB2 Driver Yes DB...

Страница 126: ... Netfinity Manager database support see Netfinity Manager database support on page 105 c The Netfinity Manager folder also contains a Netfinity Database Administration object You can use Netfinity Database Administration to configure Netfinity Manager database support For more information on Database Administration see ODBC Database Support in Netfinity Manager Quick Beginnings 2 Start the Netfini...

Страница 127: ...ertain system configurations These services are Alert on LAN Configuration available only on systems running Windows 95 or later or Windows NT 4 0 or later Capacity Management available only on systems running Windows NT 4 0 or later Cluster Manager available only on systems running Windows NT 4 0 or later DMI Browser requires DMI Service Layer ECC Memory Setup requires ECC memory Predictive Failu...

Страница 128: ... type and severity of the alert the ID of the application that generated the alert as well as any text that was generated and any action taken by the Alert Manager Individual or multiple alerts can be selected from the log and printed for later reference or deleted once problems are corrected This service is available for both stand alone and network use Alert on LAN configuration Use the Alert on...

Страница 129: ... defined schedule File Transfer Use the File Transfer service to easily send receive or delete files or entire directories to and from remote Netfinity Manager systems on the network Power On Error Detect The Power On Error Detect service can warn you immediately when a remote Netfinity Manager system has start up problems enabling you to react quickly to problems and minimize downtime Predictive ...

Страница 130: ... start programs open and close windows enter commands and much more Screen View The Screen View service takes a snapshot of the system graphic display or any remote system running Netfinity Manager or Client Services for Netfinity Manager and displays it on the screen These snapshots can be saved as bitmaps and viewed later Security Manager The Security Manager service can prevent unauthorized acc...

Страница 131: ...is continually collected from the time the system starts A sophisticated data handling technique is used to weigh the individual values average concurrent samples and post single values that accurately reflect long term system activity This technique allows system activity records to be maintained without creating enormous data files This service is available for both stand alone and network use S...

Страница 132: ... NETFBASE EXE includes a parameter WAIT that you can use to specify the number of seconds that NETFBASE EXE will wait before starting During Netfinity Manager installation the Netfinity Manager Network Interface object is placed in the Startup folder To configure Netfinity Manager to wait a specified number of seconds before starting 1 Shut down the Netfinity Manager Network Interface if it is run...

Страница 133: ...ger for SCO UnixWare NFMGRQB PDF Netfinity Manager Quick Beginnings Installation and setup information for Netfinity Manager NFMGRUG PDF Netfinity Manager User s Guide Detailed information on how to use Netfinity Manager NFMGRCR PDF Netfinity Manager Command Reference Detailed information on Netfinity Manager command line functions NFCSVCQB PDF Client Services for Netfinity Manager Quick Beginning...

Страница 134: ...le when creating a source directory to distribute Netfinity Manager for OS 2 copy all of the files from the OS2 SERVICES directory into the source directory 3 Copy the files from the appropriate Netfinity Manager directory For example when creating a source directory to distribute Netfinity Manager for OS 2 copy all of the files from the OS2 MANAGER directory into the source directory After an ins...

Страница 135: ...during installation There can be no more than eight choices Each choice takes up two lines The first line is the text that is displayed next to the installation configuration radio button The second line is a list of the options in the third section that will be installed when this choice is selected for installation For example IBM SysMgt Install Script Version 2 Do not remove this comment line N...

Страница 136: ... comment by the installation program All options must have a different Option Name This is used only for identification Dll entrypoint Used to determine whether an option is valid for a given target machine In most cases it should be the reserved string NULL The easiest way to customize an installation is to simply put a semicolon in front of any service that you want to remove from the installati...

Страница 137: ...ource from the electrical outlet Attention The presence of ac standby power might result in damage to the hardware unless you disconnect the power cord for each power source from the electrical outlet 3 Remove the top cover see Removing the top cover on page 62 4 DIsconnect the shuttle see Disconnecting the shuttle on page 128 and move it back slightly 5 Disconnect the front LED card assembly cabl...

Страница 138: ...dby power might result in damage to the hardware unless you disconnect the power cord for each power source from the electrical outlet 3 Remove the top cover see Removing the top cover on page 62 4 Flip the top end of each diagonal side latch inward 5 Move each latch toward the rear of the shuttle until the latch is vertical 6 Fold the hinged top end of each latch outwards at the notch of the chas...

Страница 139: ...able to the diagnostic switch card 5 Remove the two retaining screws that secure the board in place 6 Remove and replace the board I O Legacy board Review the information in Before you begin on page 60 Attention Existing system configuration will be lost If possible save the existing system configuration or obtain a previously saved copy After replacing the I O Legacy board flash the system with t...

Страница 140: ...r source from the electrical outlet 3 Remove the top cover see Removing the top cover on page 62 4 Disconnect the shuttle see Disconnecting the shuttle on page 128 5 Remove the shuttle see Removing the shuttle on page 135 6 Remove the four shuttle screws two on each side 7 Push in on the shuttle touchpoints 8 Separate the shuttle from the I O Legacy board 9 To replace the I O Legacy board reverse ...

Страница 141: ... surface such as a static protective package 4 Remove the memory modules DIMMs from the memory card assembly and seat them in the new memory card assembly See Installing memory module kits on page 71 Note Be sure to put the memory modules in the same positions on the replacement assembly as they occupied on the assembly that has been removed from the server 5 Install the memory card assembly a Hol...

Страница 142: ...ectrical outlet 3 Remove the top cover see Removing the top cover on page 62 4 Disconnect the switch card cable from the Processor PCI board 5 Disengage the switch card a Press the switch card latches toward the front and sides of the server b Push the latches through the notches 6 When the switch card latches have been disengaged from the notches gently pull the switch card free and lift it up an...

Страница 143: ...ttle Removing the shuttle on page 135 5 Remove the hot swap power supplies reverse the steps in Installing a hot swap power supply on page 76 6 Turn the two retaining screws one quarter turn 7 Lift the power backplane assembly 8 To replace the power backplane assembly reverse this procedure Note When replacing the power backplane assembly you must align the bottom of the assembly with the notches ...

Страница 144: ... the shuttle see Disconnecting the shuttle on page 128 5 Remove the shuttle see Removing the shuttle on page 135 6 Disconnect the power cable 7 Disconnect the front fan cable 8 Disconnect the rear fan cable 9 Remove any hot plug adapters reverse the steps in Installing a hot plug adapter on page 64 10 Remove microprocessors voltage regulator modules and terminator cards reverse the steps in Instal...

Страница 145: ...ply from the electrical outlet 3 Remove the top cover see Removing the top cover on page 62 4 Disconnect the shuttle see Disconnecting the shuttle on page 128 5 Place one hand on the handle at the front portion of the shuttle and place the other hand on the ledge at the rear of the shuttle 6 Lift the shuttle at an angle with the rear of the shuttle being removed first and remove the shuttle from t...

Страница 146: ...ing the shuttle on page 135 6 Remove the vertical hot swap fan assembly 7 Grasp the handhold and lift the SCSI backplane assembly with backerplate up and out of the server 8 To install the SCSI backplane assembly reverse the above procedure SCSI daughter card Review the information in Before you begin on page 60 1 Retaining pins 2 SCSI daughter card 1 Power off the server if it is on 2 Disconnect ...

Страница 147: ...FRU information service only 137 7 Pry the SCSI daughter card off of the four retaining pins 8 To install a SCSI daughter card reverse the above procedure ...

Страница 148: ...138 Hardware Maintenance Manual Netfinity 7600 Type 8665 Models 1RY 2RY ...

Страница 149: ...cluded at the end of the chapter Features and connector locations of ServeRAID 4H controller This section contains important information on the controller features and connector locations Controller features Standard features of the ServeRAID 4H controller are as follows Connector locations This section provides illustrations of the SCSI channel connectors and cable connectors for the ServeRAID 4H...

Страница 150: ...ces to the Channel 1 Channel 2 Channel 3 and Channel 4 connectors Note The ServeRAID 4H controller does not support configurations that use both the internal and external connectors on the same channel concurrently For example you cannot use both external Channel 1 and internal Channel 1 CAUTION The ServeRAID 4H controller uses a lithium battery CAUTION When replacing the lithium battery use only ...

Страница 151: ...ows Connector locations This section provides illustrations of the SCSI channel connectors and cable connectors for the ServeRAID 4L controller The light emitting diodes LEDs on the controllers indicate activity on the SCSI channels and provide diagnostic information for trained service technicians SCSI channel connector The ServeRAID 4L controller has one independent SCSI channel connector Channe...

Страница 152: ...ntroller uses the module P N 38L3386 containing a lithium battery CAUTION When replacing the lithium battery use only IBM Part Number 38L3386 or an equivalent type battery recommended by the manufacturer If your system has a module containing a lithium battery replace it only with the same module type made by the same manufacturer The battery contains lithium and can explode if not properly used h...

Страница 153: ...t emitting diodes LEDs on the controllers indicate activity on the SCSI channels and provide diagnostic information for trained service technicians SCSI channel connectors The ServeRAID 4M controller has two independent SCSI channel connectors Channel 1 and Channel 2 Each of these SCSI channels supports up to 15 physical devices Feature ServeRAID 4M Arrays max 8 Battery backup cache Yes Cache memo...

Страница 154: ... uses the module P N 38L3386 containing a lithium battery CAUTION When replacing the lithium battery use only IBM Part Number 38L3386 or an equivalent type battery recommended by the manufacturer If your system has a module containing a lithium battery replace it only with the same module type made by the same manufacturer The battery contains lithium and can explode if not properly used handled o...

Страница 155: ...See Downloadable files from the World Wide Web on page 163 for additional information Note Be sure to read the instructions and restrictions for this software program Also when installing the ServeRAID Manager program you must choose to install the IBM ServeRAID Hot Replace Wizard To perform a hot replace operation start the IBM ServeRAID Hot Replace Wizard You can start this program from within e...

Страница 156: ...s provided with the operating system for using these features Refer to Using a ServeRAID 4x controller in a server with Hot plug PCI features on page 145 If you intend to perform a hot add operation using Windows NT 4 0 use the documentation that is provided with the IBM server Hot Plug for Windows NT 4 0 package 2 If your server model does not support Hot plug PCI turn off the server and disconne...

Страница 157: ...r by either tightening the expansion slot screw on the top of the controller or closing the latch depending on your server 9 Connect the SCSI cables to the controller If you intend to attach external devices only go to step 13 on page 148 Otherwise continue with step 10 10 Connect one end of a 68 pin ANSI American National Standards Institute standard cable separately purchased or already in your ...

Страница 158: ...erveRAID 4L controller will have a slightly different appearance 11 Connect the other end of the SCSI cable to the Active PCI backplane or to a SCSI device in the server See your server documentation or the system label inside the server cover for the location of the SCSI connector on the backplane 12 If you have physical drives to install install them now See your server documentation for drive i...

Страница 159: ...ng ServeRAID controllers 149 15 If you want to attach an external SCSI device to the ServeRAID controller continue with Connecting external devices on page 150 Otherwise go to Step 2 Updating BIOS and firmware code on page 151 ...

Страница 160: ...connector on the ServeRAID controller Notes a See Features and connector locations of ServeRAID 4H controller on page 139 for the channel connector locations of the 4H controller Features and connector locations of ServeRAID 4L controller on page 141 for the channel connector locations of the 4L controller and Features and connector locations of ServeRAID 4M controller on page 143 for the channel ...

Страница 161: ...If the BIOS and firmware code do not require updating the IBM ServeRAID ROM Update Wizard automatically exits and the ServeRAID Manager program opens Continue with Step 3 Configuring ServeRAID controllers If the BIOS and firmware code require updating the IBM ServeRAID ROM Update Wizard asks if you want to update You decide whether to update your controllers but you must update all the controllers...

Страница 162: ...mation mode In Configuration mode you can create disk arrays create logical drives and define your hot spare drives When this mode is active a limited set of functions is available from the menu and tool bars See Using Configuration mode on page 154 for more information In Information mode you can view and modify the existing device and configuration information for your ServeRAID subsystem When t...

Страница 163: ... on your ServeRAID controller If you do not want to configure your ServeRAID controller click Cancel This will switch the program from Configuration mode to Information mode If the ServeRAID Manager program detects that all ServeRAID controllers in the server are configured the program starts in Information mode and a window similar to the following opens ...

Страница 164: ...g Using Configuration mode Using Information mode on page 162 Using Configuration mode You can use Configuration mode to create up to eight independent disk arrays for each ServeRAID controller Configuration mode provides two configuration options Express configuration and Custom configuration see Figure 7 on page 153 You can also use Custom configuration to create spanned arrays and configure the...

Страница 165: ...om Configuration mode to Information mode 2 In the Main Tree click the new controller 3 Click Actions ÓChange stripe unit size 4 Click the new stripe unit size for your installation on the menu Using Express configuration To use Express configuration Note If the Express configuration mode or Custom configuration mode buttons do not display on the right panel click Create arrays on the tool bar 1 I...

Страница 166: ...figuration click Modify arrays or Modify logical drives 5 Click Apply to accept and save the configuration The configuration is saved in the ServeRAID controller and in the physical drives 6 If you have multiple controllers for each controller repeat steps 1 on page 155 through step 5 7 When you have completed configuration you can change to Information mode and change controller settings See Usin...

Страница 167: ...right panel click Create arrays on the tool bar 1 In the Main Tree click the ServeRAID controller that you want to configure 2 Click the Custom configuration radio button 3 Click Next The Create arrays window opens Figure 10 Create arrays window 4 Using the right mouse button click the drive or SCSI channel icons in the Main Tree to select the drives that you want to add to your arrays delete from...

Страница 168: ...opens Continue with step 8 on page 159 If you are creating spanned arrays the Create spanned arrays window opens Figure 11 Create spanned arrays window 6 Using the right mouse button click the array icons in the Main Tree to select the arrays that you want to add or delete to your spanned arrays then select a choice from the pop up list 7 After you select the arrays for your spanned arrays click N...

Страница 169: ...ct Remove from new array or Delete new array Remove a specific hot spare drive or all newly defined hot spare drives To do this click Back then using the right mouse button click the Hot spare drive icon in the Main Panel on the right and then select Remove new hot spare drive or Remove all new hot spare drives 9 Select a RAID level for the logical drive from the RAID pull down menu in the Main Pa...

Страница 170: ...erveRAID controller found by system BIOS during startup will be your startup boot drive 11 If free space is available and you want to define another logical drive click Add in the Main Panel Figure 13 Adding another logical drive 12 Repeat steps 9 on page 159 through 11 for each logical drive that you want to define in this array then continue with step 13 13 If you are defining multiple arrays cl...

Страница 171: ...iple controllers for each controller repeat steps 1 on page 157 through step 16 18 When you have completed configuration you can change to Information mode and change controller settings See Using Information mode on page 162 for more information If you do not want to change any settings exit the ServeRAID Manager program and remove the CD from the CD ROM drive 19 Restart the server Note If you ar...

Страница 172: ...the plus box next to the object in the Main Tree to expand that portion of the tree 2 Click the icon for the server ServeRAID controller array logical drive hot spare drive or physical drive to view its current settings Detailed information about the selected device will display in the Main Panel on the right Obtaining ServeRAID updates IBM periodically makes updated versions of the ServeRAID firm...

Страница 173: ...ing system you are using in the ServeRAID installation ServeRAID files needed to install Microsoft Cluster Service MSCS when using Microsoft Windows NT or Windows 2000 and an IBM ServeRAID 4x Ultra160 SCSI controller These files are available in the following directory d PROGRAMS WINNT CLUSTER where d is the CD ROM drive The IBM ServeRAID Device Drivers diskette contains the following Device drive...

Страница 174: ... the PCI slots for the first ServeRAID controller that is one of the following types A ServeRAID 4M or ServeRAID 4L Another ServeRAID controller model Then the startable ServeRAID Manager program lists the controllers of the first type scanned before the controllers of the other type The ServeRAID Mini Configuration program also uses this procedure to order controllers For example a server has fou...

Страница 175: ...to perform a limited set of the configuration functions without using the IBM ServeRAID Support CD To access the Mini Configuration program 1 Turn on the server If the server already is running shut down the operating system and restart the server 2 When the ServeRAID Mini Configuration prompt appears press Ctrl I 3 If your server contains more than one ServeRAID controller a selection screen will...

Страница 176: ...erveRAID controller Rebuild Rate shows the current speed setting for rebuilds High Medium or Low Number of Defunct drives shows the current number of defunct physical drives Number of Offline drives shows the current number of offline logical drives Number of Critical drives shows the current number of critical logical drives Config Updates shows the number of times that the configuration has been...

Страница 177: ...s choice deletes the existing configuration information sets all functional physical drives attached to the controller to the ready state and deletes all logical drives defined for the controller Copy the Configuration from Drives to Controller reads the most common configuration from the drives in the server and copies it to the ServeRAID controller Configure BIOS Settings is used to modify the B...

Страница 178: ... To run the IPSSEND program with no parameters If you are using Windows NT 4 0 Windows 2000 or OS 2 1 Type c ipsadm ipssend where c is the drive letter of the drive where Windows NT 4 0 Windows 2000 or OS 2 is installed 2 Press Enter If you are using NetWare 1 From the console type load ipssend 2 Press Enter If you are using Linux OpenServer or UnixWare 1 Type usr bin ipssend 2 Press Enter If you ...

Страница 179: ...erating systems Windows NT Windows 2000 OS 2 NetWare Linux OpenServer UnixWare and DOS Command ipssend rebuild controller dch dsid nch nsid where controller is the ServeRAID controller number 1 12 dch is the channel number for the defunct drive 1 2 3 or 4 dsid is the SCSI ID for the defunct drive 0 15 nch is the channel number for the new drive 1 2 3 or 4 nsid is the SCSI ID for the new drive 0 15...

Страница 180: ... reassignments and PFA errors appears upon completion of the verification Supported operating system DOS Command ipssend certify controller channel sid where controller is the ServeRAID controller number 1 12 channel is the channel number for the device 1 2 3 or 4 sid is the SCSI ID for the device 0 15 eraseevent Use the eraseevent function to clear all logged entries in the designated event log S...

Страница 181: ...a was being transferred on the SCSI bus This usually indicates a problem with the SCSI cable connectors or terminators Soft A SCSI device detected a check condition event Hard The SCSI controller detected an unexpected event The controller is the most likely cause Misc The ServeRAID controller detected an event that was most likely caused by the device The device event log also provides Predictive...

Страница 182: ...ay in seconds between the startup of these groups of drives Supported operating systems DOS Command ipssend startdely controller options where controller is the ServeRAID controller number 1 12 options is one of the following displays the concurrent drive startup count and the delay time A number 1 16 that specifies the new concurrent drive startup count A number 1 16 that specifies the new concur...

Страница 183: ... the device 1 2 3 or 4 sid is the SCSI ID for the device 0 15 getconfig Use the getconfig function to display the ServeRAID controller configuration information This includes information about the firmware version initiator ID and rebuild rate logical drive status RAID level and size and physical device type SCSI ID and PFA error Supported operating systems Windows NT Windows 2000 OS 2 NetWare Lin...

Страница 184: ... the screen During operation IPSMON logs various messages Each message contains an alert code and a location specifier The alert code begins with the message type and number for example INF WRN or CRT followed by the message number The location specifier comes after the alert code A followed by the controller number SID followed by the SCSI ID if required C followed by the channel number if requir...

Страница 185: ... server is operational again it can be placed back into the cluster the resources are reallocated between the two servers and the cluster resumes normal operations A controller is a device that coordinates and controls the operation of one or more input and output devices such as workstations and synchronizes the operation of such devices with the operation of a system as a whole IBM ServeRAID Clu...

Страница 186: ...RAID 4H controller You can use the ServeRAID Manager program to check the ownership of a physical drive on another server or to add or remove a logical drive in the cluster The ServeRAID Manager program supports three features for cluster functions Validate cluster Configure for clustering View shared drives Note Make sure that the ServeRAID Manager program is installed on the server Figure 15 A d...

Страница 187: ...e drive in both servers Adding logical drives to a cluster If you want to add logical drives to a cluster do the following 1 Install the hard disk drives in the server or shared expansion enclosure For installation information refer to the documentation that is included with the hard disk drive and the server Attention Physical drives that are configured by one controller in the pair must appear a...

Страница 188: ...d 8 Click OK Validating a cluster Use this feature to determine if your cluster is configured correctly Note You must have the ServeRAID Manager program installed on all servers in the cluster for this feature to work To validate a cluster do the following 1 In the Main Tree click a server in the cluster 2 Click Actions ÓValidate cluster A window similar to the following opens Figure 16 Configure ...

Страница 189: ...The progress indicator reports the progress of the validation 5 If you want to stop the validation before it completes click Cancel Otherwise if the ServeRAID Manager program finds problems with the ServeRAID cluster configuration it reports the problems in the Problems found message field If there are no problems with the ServeRAID cluster configuration the message field reports only the cluster ...

Страница 190: ... This section lists the ServeRAID 4 controller error codes messages and the error procedures ServeRAID 4 Controller error codes messages The error codes messages are displayed on the screen in a line of text immediately after the adapter BIOS version If POST detects changes in the controller configuration or detects a controller hardware problem messages appear on the screen Refer to POST ISPR err...

Страница 191: ... ServeRAID BIOS Copyright IBM Corp 1995 2000 Ver 3 00 12 08 14 2000 __________________________________ Press Ctrl I to access the Mini Configuration Program Initializing ServeRAID Controller 1 in Slot 1 Power on self test can take up to 59 Second s test Failed Controller is not responding properly Run Diagnostics Error Code XXXX YY BIOS not loaded no devices found Installation stopped The sample B...

Страница 192: ...ServeRAID problems when servicing the computer A complete list of error codes is in the Symptom to FRU index on page 215 Note Where the ISPR Error Procedures refer to a SCSI backplane see the Hardware Maintenance Manual for the system you are servicing EF10 Default ISPR 1 No ISPR Error Present 9ZXX thru BZXX SCSI bus error caused either by cables termination defective drives etc 1 Isolate between ...

Страница 193: ...e system comprising the SCSI channel for jumper details e Check for proper cabling configuration in systems that use DASD status cables Reconnect all cables removed in step 1 above f Disconnect one drive at a time attached to the channel identified in step a on page 182 then reboot to determine which drive is causing the error g Replace SCSI cable h Replace SCSI backplane FFFF or other code not li...

Страница 194: ... physical replacement on page 187 Using and understanding the ServeRAID Monitor Log on page 188 Recovery from ServeRAID controller failure on page 189 Recovery procedures on page 189 Note The following information applies only to drives that are part of the same array Drive replacement rebuilding a defunct drive A hard disk drive goes defunct when there is a loss of communication between the contr...

Страница 195: ... do the following 1 Without removing the drive completely gently remove the hard disk drive from the server using the handle of the hot swap tray If necessary refer to the documentation that comes with your server on removing a hard disk drive 2 Wait 20 seconds to allow the disk drive to completely spin down Note When power is removed from a hot swap drive the drive immediately parks the heads loc...

Страница 196: ...s in a hot plug slot refer to the documentation that comes with the server for instructions for replacing the controller Guidelines for the rebuild operation The replacement hard disk drive must have a capacity equal to or greater than the failed drive If the hard disk drive being rebuilt is part of a non redundant array the non redundant logical drive is blocked You must unblock any non redundant...

Страница 197: ...id any potential data loss For example this could occur in the event of a power loss to any of the components in the SCSI ServeRAID subsystem In this case the ServeRAID controller will err on the side of safety and will no longer write to that drive although the drive may not be defective in any way It is recommended to use a software replace to recover data when multiple Defunct DDD drives occur ...

Страница 198: ...d the heading ServeRAID Defunct DDD event log 6 Mark hard disk drive online in order starting from the bottom of this log 7 Rebuild the last drive Using and understanding the ServeRAID Monitor Log The ability to read the ServeRAID log generated by ServeRAID monitor is a most important part of recovering an array when one or more drives are marked Defunct DDD From the ServeRAID log you can determin...

Страница 199: ...ermine the correct order to software replace on page 187 Before you perform any actions on the hardware make a photocopy of the Channel Record table Table 22 on page 191 Use Netfinity Manager or ServeRAID monitor to fill in the copy of the Channel Record table at the end of this manual with the current status of all the drives both internal and external This table provides a four channel diagram t...

Страница 200: ...rive information window One Defunct Drive should show an array letter while the other should not Perform the following steps to bring the logical drive from CRT to OKY status 1 Highlight the Drive and right click 2 Choose Replace Defunct Drive 3 A pop up message will appear Follow the instructions and replace the drive 4 Repeat these steps for each Defunct Drive More than one defunct DDD drive and...

Страница 201: ...he original drive that failed that is the inconsistent drive If you do not replace the inconsistent drive last the system uses it to rebuild the last drive that went defunct and data can be corrupted as a result Therefore it is extremely important to perform steps 2 and 3 carefully 4 Repeat step 3 for each drive beginning at the bottom of the log and moving to the top 5 Once you have set all but t...

Страница 202: ...to the operating system as a single drive This grouping technique greatly enhances logical drive capacity and performance beyond the physical limitations of a single physical drive When you group multiple physical drives into a logical drive the ServeRAID controller can transfer data in parallel from the multiple drives in the array This parallel transfer yields data transfer rates that are many t...

Страница 203: ...onments which typically involve multiple small blocks of data might be optimal when the stripe unit size is set to 8 KB or 16 KB The collection of stripe units from the first drive of the array to the last drive of the array is called a stripe Supported RAID levels Disk arrays are used to improve performance and reliability The amount of improvement depends on the application programs that you run...

Страница 204: ...vel 0 logical drive is lost Although the risk of data loss is present you might want to assign RAID level 0 to one of the logical drives to take advantage of the speed this RAID level offers You can use this logical drive to store data that you back up each day and for which safety is not of primary importance that is data that you can re create easily You also might want to use a RAID level 0 log...

Страница 205: ...el 1 array Because the data is mirrored the capacity of the logical drive when assigned RAID level 1 is 50 of the array capacity The following illustration shows an example of a RAID level 1 logical drive Start with two physical drives Create an array using the two physical drives Then create a logical drive within that array The data is striped across the drives creating blocks ...

Страница 206: ...combines mirroring with data striping This RAID level stripes data and copies of the data across all of the drives in the array As with the standard RAID level 1 the data is mirrored and the capacity of the logical drive is 50 percent of the array capacity of the grouping of physical drives in the array RAID level 1E requires a minimum of 3 drives and supports a maximum of 16 drives The following ...

Страница 207: ...rive for data parity storage RAID level 5 offers both data protection and increased throughput RAID level 5 gives you higher capacity than RAID level 1 but RAID level 1 offers better performance RAID level 5 requires a minimum of 3 drives and supports a maximum of 16 drives The following illustration is an example of a RAID level 5 logical drive Then create a logical drive within that array The da...

Страница 208: ...of the data parity denoted by also is striped and it shifts from drive to drive A parity block contains a representation of the data from the other blocks in the same stripe For example the parity block in the first stripe contains data representation of blocks 1 and 2 If a physical drive fails in the array the ServeRAID controller switches read and write requests to the remaining functional drive...

Страница 209: ... 5 this RAID level stripes data and parity across all of the drives in the array When an array is assigned RAID level 5E the capacity of the logical drive is reduced by the capacity of two physical drives in the array that is one for parity and one for the spare RAID level 5E offers both data protection and increased throughput in addition to the built in spare drive Note For RAID level 5E you can...

Страница 210: ...an array However RAID levels 00 10 1E0 and 50 include more physical drives by managing an array of arrays or a spanned array The operating system uses the spanned array logical drive the same as a regular array logical drive The data is striped across the drives creating blocks in the logical drive The storage of the data parity denoted by is striped and it shifts from drive to drive as it does in...

Страница 211: ...sing two physical drives Then create a spanned array labeled as 1 that spans the three arrays A sub logical drive is created within each array A B and C Then the data is striped across the physical drives in the array creating blocks Notice that in each array the data on the drive on the right is a copy of the drive on the left This is because the sub logical drives A B and C are RAID level 1 in a...

Страница 212: ...ans the sub logical drive is and the spanned array logical drive is 00 RAID level 0 RAID level 0 10 RAID level 1 RAID level 0 1E0 RAID level 1E RAID level 0 50 RAID level 5 RAID level 0 Drive State Meaning Defunct A physical drive in the online hot spare or rebuild state has become defunct It does not respond to commands which means that the ServeRAID controller cannot communicate properly with th...

Страница 213: ...drive might contain damaged data You must either re create reinstall or restore the data from the most recent backup disk or tape to the RAID level 0 logical drive Critical Migrating A logical drive in the critical state that is undergoing a logical drive migration LDM Critical System The ServeRAID controller uses this reserved state during a logical drive migration LDM when the logical drive is i...

Страница 214: ...rors Combination failures on page 205 Catastrophic drive failures How They Occur Catastrophic drive failures occur when all data on a drive including the ECC data written on the drive to protect information is completely inaccessible due to mechanical or electrical problems Grown sector media errors How They Occur Grown sector media errors occur due to the following Latent imperfections on the dis...

Страница 215: ...g bad sectors Error Correction Code ECC Predictive Failure Analysis PFA Remapping bad sectors Sector media errors that show up over time usually only affect a single 512 byte block of data on the disk This sector can be marked as bad the location can then be reassigned or remapped to a spare sector of the drive Most drives reserve one spare sector per track of data and can perform this operation a...

Страница 216: ...the Using the IPSSEND program Note In the following command replace controller with the ServeRAID controller number At a command prompt type the following ipssend getevent controller device Frequently asked questions regarding the Device Event Table In the Device Event Table what are hard events The hard event count entry in the device event table is a count of events detected by the SCSI I O proc...

Страница 217: ...sure that the maximum cable lengths for the SCSI interface are not exceeded No further action is necessary if there are only a small number of random events A large number of events on a particular channel or to a particular target may require replacement of the backplane or SCSI cabling It is possible but unlikely that the ServeRAID controller has caused the parity errors In the Device Event Tabl...

Страница 218: ... attempts to read data in a read request it determines that Record 1 of Disk 1 has a bad sector If the media error is minor the drive corrects or remaps the information using the drive ECC information which is transparent to the RAID array If the disk cannot recreate the information from the ECC information on the drive the controller determines if the data is still lost as it was without RAID sup...

Страница 219: ...ide data protection The RAID 5 arrays write data out to drives in stripe units The size of the stripe unit can be configured to 8KB 16KB 32KB 64KB Synchronization performs the following operations Reads all the data bits in each stripe unit Calculates the parity for that data Compares the calculated parity with the existing parity for all stripe units in the array Updates the existing parity if in...

Страница 220: ...t the array level using RAID parity information if necessary Automatic data scrubbing is enabled by defaults Note You do not need to synchronize RAID level 0 or 1 logical drives before storing data Data scrubbing continuously reads all sectors of RAID 1 and RAID 5 logical drives in the background while the system is running If a defective sector is found it is automatically repaired As a result of...

Страница 221: ...ID family of controllers a hot spare HSP drive is a drive designated to be a replacement for the first Defunct DDD drive that occurs The state of the drive appears as HSP When a Defunct DDD drive occurs and a HSP is defined the hot spare drive takes over for the drive that appears as Defunct DDD The HSP drive is rebuilt to be identical to the Defunct DDD drive During the rebuilding of the HSP driv...

Страница 222: ...ess memory NVRAM Random access memory that retains its contents after electrical power is shut off NVRAM Non volatile random access memory OFL Offline a good drive that replaces a defunct drive in a RAID level 1 or level 5 array This drive is associated with the array but does not contain any data Drive status remains OFL during the rebuild phase OKY Good functional state The ServeRAID adapter s l...

Страница 223: ...AID 5 the capacity of the logical drive is reduced by one physical drive size because of parity storage The parity is spread across all drives in the array If one drive fails the data can be rebuilt If more than one drive fails but one or none of the drives are actually defective then data may not be lost You can use a process called software replacement on the non defective hard drives SID SCSI I...

Страница 224: ...modes WB Write back write back WB The write policy mode that sends a completion status to the system when the data is entered into memory Compare with write through write operation An output operation that sends a processed record to an output device or an output file write policy The mode set by the system controller that determines when the completion status is sent to the system it can be eithe...

Страница 225: ...e most likely cause is listed first Use this Symptom to FRU index to help you decide which FRUs to have available when servicing the computer The POST BIOS displays POST error codes and messages on the screen Beep symptoms Beep symptoms are short tones or a series of short tones separated by pauses intervals without sound See the following examples Note One beep after successfully completing POST ...

Страница 226: ...failure and checksum checks failed 1 Battery 2 I O Legacy board 2 2 4 CMOS configuration info validation failed 1 Battery 2 I O Legacy board 2 3 1 Screen initialization failed 1 Jumper on J6 2 I O Legacy Board 2 3 2 Screen memory failed 1 I O Legacy board 2 3 3 Screen retrace failed 1 I O Legacy board 2 3 4 Search for video ROM failed 1 I O Legacy board 2 4 1 Video failed screen believed operable ...

Страница 227: ... Cable 3 3 3 No operational memory in system 1 Install or reseat the memory modules then power on the system see Using the Configuration Setup Utility program on page 43 2 If problem persists restart the system 3 times Note Restarting the system three times will load default settings 3 DIMMs 4 Memory Board 5 Processor PCI Board 6 I O Legacy Board Two Short Beeps Information only the configuration ...

Страница 228: ... the system error log from a remote connection such as MOST 4 The memory card DIMM error LEDs processor error LEDs and VRM error LEDs turn off when the system is powered down One Long and Two Short Beeps 1 Video adapter if present 2 I O Legacy Board Two Long and Two Short Beeps 1 Video adapter No Beep Symptom FRU Action No beep and the system operates correctly 1 Diagnostic LED Panel No Beeps occu...

Страница 229: ...tor module 2 Processor PCI Board DASD LED on Check amber drive LED for a failing hard drive 1 Be sure the fans are operating correctly and the air flow is good 2 Failing drive 3 SCSI Backplane FAN LED on 1 Check individual fan LEDs 2 Replace respective fan 3 Fan Cable 4 Processor PCI Board 5 I O Legacy Board 6 Power Backplane Board MEM LED on The LED next to the failing DIMM is on 1 Failing DIMM s...

Страница 230: ...r supply 3 If off replace power supply 3 2 Power Backplane PS4 LED on 1 Check the DC Good LED on power supply 4 If off replace power supply 4 2 Power Backplane SMI LED on 1 Reboot the system TEMP LED on 1 Ambient temperature must be within normal operating specifications See Features and specifications on page 3 and Temperature error messages on page 236 2 Ensure fans are operating correctly 3 Exa...

Страница 231: ...ed during USB test 1 Remove USB devices from USB1 and USB2 2 Re run test 3 I O Legacy Board 020 XXX 000 Failed PCI Interface test 1 Processor PCI Board 2 System Board 020 XXX 001 Failed Hot Swap Slot 1 PCI Latch test 1 PCI Hot Swap Latch Assembly 2 Processor PCI Board 020 XXX 002 Failed Hot Swap Slot 2 PCI Latch test 1 PCI Hot Swap Latch Assembly 2 Processor PCI Board 020 XXX 003 Failed Hot Swap S...

Страница 232: ...processor test 1 VRM for Optional Microprocessor 4 2 Optional Microprocessor 165 XXX 000 Failed Service Processor test 1 Check error log for any I2C messages see I2C bus fault messages on page 239 2 Remove ac power from system for 20 seconds then rerun service processor test If problem persists proceed to step 3 3 I O Legacy Board Before replacing the I O Legacy Board ensure that I O Legacy Board ...

Страница 233: ...XX 000 Failed IDE CD ROM test 1 CD ROM Drive Cables 2 CD ROM Drive 3 I O Legacy Board 217 XXX 000 Failed BIOS Fixed Disk test Note If RAID is configured the fixed disk number refers to the RAID logical array 1 Fixed Disk 1 217 XXX 001 Failed BIOS Fixed Disk test Note If RAID is configured the fixed disk number refers to the RAID logical array 1 Fixed Disk 2 217 XXX 002 Failed BIOS Fixed Disk test ...

Страница 234: ...ing Tape Drive 1 Tape Cartridge if user executed the Read Write Tape Drive test XXX 256 2 SCSI or power cable connected to the tape drive with SCSI ID NN 3 Tape drive with SCSI ID NN refer to Help and Service Information appendix of tape drive s User Guide 4 I O Legacy Board or SCSI Controller run SCSI Controller diagnostic to determine of SCSI bus is functioning properly 264 XXX 999 Errors on mul...

Страница 235: ...power on control jumper on J23 is on pins 1 and 2 2 Power Switch Assembly 3 I O Legacy Board Diskette drive in use light stays on or the system bypasses the diskette drive or the diskette drive does not work 1 If there is a diskette in the drive verify that a The diskette drive is enabled in the Configuration Setup utility program b The diskette is good and not damaged Try another diskette if you ...

Страница 236: ... press Ctrl Alt Delete Watch the screen for any POST errors Check the System Error Log for any listed problems If the system powers up with no errors a Power Switch Assembly 2 Remove the adapters and disconnect the cables and power connectors to all internal and external devices Power on the system If the DC Good LED comes on replace the adapters and devices one at a time until you isolate the pro...

Страница 237: ...1 Run Configuration Setup 2 DIMM 3 Processor PCI Board 175 Hardware error 1 I O Legacy Board 2 Processor PCI Board 176 Computer cover or cable cover was removed without a key being used 1 Run Configuration Setup 2 I O Legacy Board 3 C2 Security Switch 177 178 Security hardware error 1 Run Configuration Setup 2 I O Legacy Board 184 Power on password corrupted 1 Run Configuration Setup 2 I O Legacy ...

Страница 238: ...2 I O Legacy Board 303 Keyboard controller error 1 I O Legacy Board 2 Keyboard 602 Invalid diskette boot record 1 Diskette 2 Diskette Drive 3 Cable 4 I O Legacy Board 604 Diskette drive error 1 Run Configuration Setup and Diagnostics 2 Diskette Drive 3 Drive Cable 4 I O Legacy Board 605 Unlock error 1 Diskette drive 2 Drive cable 3 I O Legacy board 662 Diskette drive configuration error 1 Run Conf...

Страница 239: ...ower to the system wait 20 seconds then re connect the ac power Wait 30 seconds then power on the system 1 I O Legacy Board 2 Processor PCI Board 1601 The system is able to communicate to the Service Processor but the Service Processor failed to respond at the start of POST Do the following before replacing a FRU 1 Remove the ac power to the system wait 20 seconds then re connect the ac power Wait...

Страница 240: ...ration error 1 Video Adapter if installed 2 I O Legacy Board 5962 IDE CD ROM configuration error 1 Run Configuration Setup 2 CD ROM Drive 3 CD ROM Power Cable 4 IDE Cable 5 I O Legacy Board 6 Battery 8603 Pointing Device Error 1 Pointing Device 2 I O Legacy Board 00012000 Machine check architecture error 1 Processor 2 Optional Processor 3 Processor PCI Board 00019501 Processor 1 is not functioning...

Страница 241: ...2 Failing Adapter 3 I O Legacy Board 00180300 No more memory above 1MB for PCI adapter 1 Run Configuration Setup 2 Failing Adapter 3 I O Legacy Board 00180400 No more memory below 1MB for PCI adapter 1 Run Configuration Setup 2 Failing Adapter 3 I O Legacy Board 00180500 PCI option ROM checksum error 1 Remove Failing PCI Card 2 I O Legacy Board 00180600 PCI device built in self test failure 1 Run ...

Страница 242: ...3 1 Ensure all processors are the same stepping level and cache size 2 Processor 3 01298004 No update data for processor 4 1 Ensure all processors are the same stepping level and cache size 2 Processor 4 01298101 Bad update data for processor 1 1 Ensure all processors are the same stepping level and cache size 2 Processor 1 01298102 Bad update data for processor 2 1 Ensure all processors are the s...

Страница 243: ... and controller by disconnecting all SCSI cables from suspect card and reboot CAUTION Do not press F5 Doing so changes the customer s configuration If an ISPR error is still present perform the following actions until the error is no longer present a Reseat the controller b Replace the controller Notes a The controller detects a configuration change Do not choose Save Changes Instead press F10 to ...

Страница 244: ...er step 2 replace the controller or the system board with integrated controller FFFF or other code not listed 1 Isolate between SCSI subsystem and controller by disconnecting all SCSI cables attached to the suspect controller and reboot If ISPR code is EF10 after disconnecting cables follow the steps below until the error is eliminated a Identify which channel is causing the error by reconnecting ...

Страница 245: ...ve jumpers 2 ServeRAID 3HB Adapter Controller 4xxx timer cache memory controller error 1 Install download jumpers flash latest level BIOS and firmware for adapter Remove jumpers 2 ServeRAID 3HB Adapter Controller 5xxx cache memory controller error 1 Install download jumpers flash latest level BIOS and firmware for adapter Remove jumpers 2 ServeRAID 3HB Adapter Controller 6xxx cache DRAM error 1 Re...

Страница 246: ...ge Action DASD X Over Temperature level critical Direct Access Storage Device bay X was over temperature 1 Ensure system is being properly cooled see Temperature checkout on page 31 DASD Over recommended Temperature sensor X level warning the DASD backplane had an over temperature condition 1 Ensure system is being properly cooled see Temperature checkout on page 31 DASD under recommended temperat...

Страница 247: ...er supply X 1 See Power checkout on page 31 Power supply X DC good fault level critical power good signal not detected for power supply X 1 Replace power supply X Power supply X fan fault level critical fan fault in power supply X 1 Replace power supply X Power supply X fault level critical overcurrent condition exists 1 See Power checkout on page 31 Power supply X 12V fault level critical overcur...

Страница 248: ... fault level critical overcurrent condition on 12 volt X voltage bus 1 See Power checkout on page 31 5V fault level critical overcurrent condition on 5 V subsystem 1 See Power checkout on page 31 240 VA bus fault level critical overcurrent or overvoltage condition in power subsystem 1 See Power checkout on page 31 Message Action System powered off due to X current over max value level critical sys...

Страница 249: ...el critical DASD area reported temperature outside recommended operating range 1 Ensure system is being properly cooled see Temperature checkout on page 31 System shutoff due to high ambient temperature level critical high ambient temperature 1 Ambient temperature must be within normal operating specifications see Features and specifications on page 3 System shutoff due to system board under tempe...

Страница 250: ... Replace I O Legacy Board Failure reading I2C device Check devices on bus 4 1 Reseat Power Backplane DASD power cable 2 Reseat I O Legacy Board 3 Replace Power Backplane DASD power cable 4 Replace DASD Backplane 5 Replace Power Backplane 6 Replace I O Legacy Board Failure reading I2C device Check devices on bus 5 1 Reseat CPUs 2 Reseat Processor PCI Board 3 Replace CPUs 4 Replace Processor PCI Boa...

Страница 251: ...computer Modem printer mouse or non IBM devices Each adapter Hard disk drives Memory Modules Minimum requirement 512 MB 4x128 MB DIMMs Note Minimum operating requirements are a 1 Power Supply b Power Backplane c Processor PCI Board with pins 2 and 3 on J23 connected together to bypass the power switch default is pins 1 and 2 d I O Legacy Board Verify that connection to Processor PCI Board is secur...

Страница 252: ...242 Hardware Maintenance Manual Netfinity 7600 Type 8665 Models 1RY 2RY ...

Страница 253: ...ckplane assembly all models 37L6329 4 Hot swap power supply 250W all models 36L8819 5 Power supply filler assembly 2 all models 00N6405 6 Chassis all models 37L6316 7 Front bezel all models 37L6335 8 Hard disk drive bezel filler assembly all models 37L0198 9 Blank 5 25 bezel assembly all models 00N6407 10 40X CD ROM all models 19K1517 11 1 44MB diskette drive all models 76H4091 12 Trim bezel all m...

Страница 254: ...etfinity 7600 Type 8665 Models 1RY 2RY Part B 13 Front LED card assembly all models 37L6328 14 Diagnostic switch card all models 37L6327 Index System Netfinity 7600 Type 8665 Models 1RY 2RY 3RY 4RY 5RY FRU No 1 2 3 4 5 6 7 8 9 10 11 12 ...

Страница 255: ...y w bracket all models 37L6324 12 I O fan assembly w bracket all models 37L6326 Processor terminator case all models 10L6936 Processor retention bracket all models 37L6319 40X CD ROM 2nd source all models 36L8791 CD ROM 5 25 rail all models 00N6412 Misc hot swap kit 2 all models contains PCI handles 4 blank fillers 4 PCI clamps 4 M3x5 screw 5 insulator 5 switch housing 1 card guide 2 guide retaine...

Страница 256: ... Single PCI switch all models 00N6830 Slide assembly all models 00N6839 Power switch cover all models 09N7764 Floppy disk drive bracket all models 12J3065 Misc hot plug kit 3 all models includes I O bracket Guide Insulator Guidance module Retainer and Hot swap PCI card retainer 33L3707 Status lens cover all models 36L9783 Processor backplane 37L6337 ServeRAID 4M Japan models 4RY 5RY 00N9543 ServeR...

Страница 257: ...US 37L2585 Thailand 37L2587 French Canadian 37L0913 Power cord FRU No China PRC 01K9851 Japan 01K9853 Thailand 12J5120 Israel 12J5122 Bangladesh Burma India Pakistan South Africa Sri Lanka 12J5124 Chile Ethiopia Italy Libya Somalia 12J5126 Argentina Australia New Zealand Papua New Guinea Paraguay Uruguay Western Samoa 12J5128 Antigua Bahrain Brunei Channel Islands Cyprus Dubai Fiji Ghana Hong Kong...

Страница 258: ...erlands New Caledonia Niger Norway Poland Portugal Romania Senegal Slovakia Spain Sudan Sweden Syria Togo Tunisia Turkey former USSR Vietnam former Yugoslavia Zaire Zimbabwe 55H6643 Denmark Switzerland Liechtenstein 55H6646 Bahamas Barbados Bermuda Bolivia Brazil Canada Cayman Islands Colombia Costa Rica Dominican Republic Ecuador El Salvador Guatemala Guyana Haiti Honduras Jamaica Korea South Lib...

Страница 259: ...ects that you think are too heavy for you Do not perform any action that causes hazards to the customer or that makes the equipment unsafe Before you start the machine ensure that other service representatives and the customer s personnel are not in a hazardous position Place removed covers and other parts in a safe place away from all personnel while you are servicing the machine Keep your tool c...

Страница 260: ...ou can then operate the switch or unplug the power cord quickly Do not work alone under hazardous conditions or near equipment that has hazardous voltages Disconnect all power before Performing a mechanical inspection Working near power supplies Removing or installing main units Before you start to work on the machine unplug the power cord If you cannot unplug it ask the customer to power off the ...

Страница 261: ...dent occurs Use caution do not become a victim yourself Switch off power Send another person to get medical aid Safety inspection guide The intent of this inspection guide is to assist you in identifying potentially unsafe conditions on these products Each machine as it was designed and built had required safety items installed to protect users and service personnel from injury This guide addresse...

Страница 262: ...o that the machine the part the work mat and the person handling the part are all at the same charge Notes 1 Use product specific ESD procedures when they exceed the requirements noted here 2 Make sure that the ESD protective devices you use have been certified ISO 9000 as fully effective When handling ESD sensitive parts Keep the parts in protective packages until they are inserted into the produ...

Страница 263: ...mber 1 translations for that caution statement appear in this section under statement 1 Be sure to read all caution and danger statements before performing any of the instructions Statement 1 DANGER Electrical current from power telephone and communication cables is hazardous To avoid a shock hazard Do not connect or disconnect any cables or perform installation maintenance or reconfiguration of t...

Страница 264: ...2 F Repair or disassemble Dispose of the battery as required by local ordinances or regulations Statement 3 CAUTION When laser products such as CD ROMs DVD ROM drives fiber optic devices or transmitters are installed note the following Do not remove the covers Removing the covers of the laser product could result in exposure to hazardous laser radiation There are no serviceable parts inside the de...

Страница 265: ...he device and the power switch on the power supply do not turn off the electrical current supplied to the device The device also might have more than one power cord To remove all electrical current from the device ensure that all power cords are disconnected from the power source Statement 10 18 kg 37 lbs 32 kg 70 5 lbs 55 kg 121 2 lbs Some laser products contain an embedded Class 3A or Class 3B l...

Страница 266: ...e cabos de alimentação de telefone e de comunicações é perigosa Para evitar risco de choque Não conecte ou desconecte cabos e não realize instalação manutenção ou reconfiguração deste produto durante uma tempestade com raios Conecte todos os cabos de alimentação a tomadas elétricas corretamente instaladas e aterradas Conecte todos os equipamentos ao qual esse produto será conectado a tomadas corre...

Страница 267: ...idades de CD ROM unidades de DVD dispositivos de fibra ítica transmissores etc estiverem instalados observe o seguinte Não remova as tampas A remoção das tampas de um produto a laser pode resultar em exposição prejudicial à radiação de laser Nenhuma peça localizada no interior do dispositivo pode ser consertada A utilização de controles ou ajustes ou a execução de procedimentos diferentes dos espe...

Страница 268: ... o com segurança Instrução 5 CUIDADO Os botões Liga Desliga localizados no dispositivo e na fonte de alimentação não desligam a corrente elétrica fornecida ao dispositivo O dispositivo também pode ter mais de um cabo de alimentação Para remover toda a corrente elétrica do dispositivo assegure que todos os cabos de alimentação estejam desconectados da fonte de energia elétrica CUIDADO Instrução 10 ...

Страница 269: ...Related service information 259 Não coloque nenhum objeto com peso superior a 82 kg 180 lbs sobre dispositivos montados em rack ...

Страница 270: ...260 Hardware Maintenance Manual Netfinity 7600 Type 8665 Models 1RY 2RY ...

Страница 271: ...Related service information 261 ...

Страница 272: ...262 Hardware Maintenance Manual Netfinity 7600 Type 8665 Models 1RY 2RY ...

Страница 273: ...Related service information 263 ...

Страница 274: ...264 Hardware Maintenance Manual Netfinity 7600 Type 8665 Models 1RY 2RY ...

Страница 275: ...n d installation d entretien ou de reconfiguration de ce produit au cours d un orage Branchez tous les cordons d alimentation sur un socle de prise de courant correctement câblé et mis à la terre Branchez sur des socles de prise de courant correctement câblés tout équipement connecté à ce produit Lorsque cela est possible n utilisez qu une seule main pour connecter ou déconnecter les câbles d inte...

Страница 276: ...ou de DVD des périphériques contenant des fibres optiques ou des émetteurs récepteurs prenez connaissance des informations suivantes N ouvrez pas ces produits pour éviter une exposition directe au rayon laser Vous ne pouvez effectuer aucune opération de maintenance à l intérieur Pour éviter tout risque d exposition au rayon laser respectez les consignes de réglage et d utilisation des commandes ai...

Страница 277: ...r ce produit Notice n 5 ATTENTION Le bouton de mise sous tension hors tension de l unité et l interrupteur d alimentation du bloc d alimentation ne coupent pas l arrivée de courant électrique à l intérieur de la machine Il se peut que votre unité dispose de plusieurs cordons d alimentation Pour isoler totalement l unité du réseau électrique débranchez tous les cordons d alimentation des socles de ...

Страница 278: ...chließen Alle angeschlossenen Geräte ebenfalls an Schutzkontaktsteckdosen mit ordnungsgemäß geerdetem Schutzkontakt anschließen Signalkabel möglichst einhändig anschließen oder lösen Keine Geräte einschalten wenn die Gefahr einer Beschädigung durch Feuer Wasser oder andere Einflüsse besteht Die Verbindung zu den angeschlossenen Netzkabeln Telekommunikationssystemen Netzwerken und Modems ist vor de...

Страница 279: ...D ROM Laufwerke DVD Laufwerke Einheiten mit Glasfaserkabeln oder Transmitter installiert ist beachten Sie folgendes Das Entfernen der Abdeckungen des CD ROM Laufwerks kann zu gefährlicher Laserstrahlung führen Es befinden sich keine Teile innerhalb des CD ROM Laufwerks die vom Benutzer gewartet werden müssen Die Verkleidung des CD ROM Laufwerks nicht öffnen Steuer und Einstellelemente sowie Verfah...

Страница 280: ...en Server nicht unterbrochen Der Server könnte auch mehr als ein Netzkabel aufweisen Um die gesamte Stromversorgung des Servers auszuschalten muß sichergestellt werden daß alle Netzkabel aus den Netzsteckdosen herausgezogen wurden Hinweis 10 ACHTUNG Keine Gegenstände die mehr als 82 kg wiegen auf Rack Einheiten ablegen Importante Tutti gli avvisi di attenzione e di pericolo riportati nella pubblic...

Страница 281: ... ad una presa elettrica correttamente cablata e munita di terra di sicurezza Quando possibile collegare o scollegare i cavi di segnale con una sola mano Non accendere qualsiasi apparecchiatura in presenza di fuoco acqua o se sono presenti danni all apparecchiatura stessa Scollegare i cavi di alimentazione i sistemi di telecomunicazioni le reti e i modem prima di aprire i coperchi delle unità se no...

Страница 282: ...e D Lgs 22 del 5 2 9 e successive disposizioni nazionali e locali Avviso 3 ATTENZIONE Quando si installano prodotti laser come ad esempio le unità DVD CD ROM a fibre ottiche o trasmettitori prestare attenzione a quanto segue Non rimuovere i coperchi L apertura dei coperchi di prodotti laser può determinare l esposizione a radiazioni laser pericolose All interno delle unità non vi sono parti su cui...

Страница 283: ...entazione posto sull alimentatore erev refid a non disattiva la corrente elettrica fornita all unità L unità potrebbe disporre di più di un cavo di alimentazione Per disattivare la corrente elettrica dall unità accertarsi che tutti i cavi di alimentazione siano scollegati dalla sorgente di alimentazione Avviso 10 ATTENZIONE Non poggiare oggetti che pesano più di 82 kg sulla parte superiore delle u...

Страница 284: ...274 Hardware Maintenance Manual Netfinity 7600 Type 8665 Models 1RY 2RY ...

Страница 285: ...Related service information 275 ...

Страница 286: ...rica No conecte ni desconecte ningún cable ni realice las operaciones de instalaciín mantenimiento o reconfiguraciín de este producto durante una tormenta Conecte cada cable de alimentaciín a una toma de alimentaciín eléctrica con conexiín a tierra y cableado correctos Conecte a tomas de alimentaciín con un cableado correcto cualquier equipo que vaya a estar conectado a este producto Si es posible...

Страница 287: ...laración 3 PRECAUCIÓN Cuando instale productos láser como por ejemplo CD ROM unidades DVD dispositivos de fibra íptica o transmisores tenga en cuenta las advertencias siguientes No retire las cubiertas Si retira las cubiertas del producto láser puede quedar expuesto a radiaciín láser perjudicial Dentro del dispositivo no existe ninguna pieza que requiera mantenimiento El uso de controles o ajustes...

Страница 288: ...ión 4 PRECAUCIÓN Tome medidas de seguridad al levantar el producto Declaración 5 PRECAUCIÓN El botín de control de alimentaciín del dispositivo y el interruptor de alimentaciín de la fuente de alimentaciín no apagan erev refid a la corriente eléctrica suministrada al dispositivo Es posible también que el dispositivo tenga más de un cable de alimentaciín Para eliminar la corriente eléctrica del dis...

Страница 289: ...e number __________________________________ Thank you for your response 1 Do you like this manual Yes No _________________________________________ _________________________________________ 2 What would you like to see added changed or deleted in this manual _________________________________________ _________________________________________ 3 What is your service experience level Less than five yea...

Страница 290: ...e type and models 2 Have the same BIOS level 3 Have the same adapters attachments in the same locations 4 Have the same address jumpers terminators cabling 5 Have the same software versions and levels 6 Have the same Reference Diagnostics Diskette version 7 Have the same configuration options set in the system 8 Have the same setup for the operation system control files Comparing the configuration...

Страница 291: ...ther companies MMX and Pentium are trademarks or registered trademarks of Intel Corporation UNIX is a trademark or registered trademark of The Open Group in the United States and other countries Windows NT is a trademark or registered trademark of Microsoft Corporation HelpCenter HelpFax IBM OS 2 NetBAY3 Netfinity Netfinity Manager ThinkPad SystemXtra Notes Lotus Development Corporation ...

Страница 292: ...282 Hardware Maintenance Manual Netfinity 7600 Type 8665 Models 1RY 2RY ...

Страница 293: ......

Страница 294: ...IBM Part Number 09N1030 Printed in the United States of America on recycled paper containing 10 recovered post consumer fiber 09N1030 0409N1030 1P P N ...

Отзывы: