INTRODUCTION –
7
IMPORTANT – BEFORE GETTING STARTED
• Make sure the temperature of the environment
surrounding the machine is in between the 40°F –
104°F (5°C – 40°C).
• In the case of lightning, make sure to turn-off the
embroidery machine
• Set up the embroidery machine near an electrical outlet.
• Keep the machine free of dust.
• Do not keep liquid near the embroidery machine.
• Make sure all packaging materials have been removed.
• Make sure all base feet are at the same height.
• Make sure all base feet are locked.
• Exercise caution when removing parts.
• Do not plug the embroidery machine into the socket
until the machine is set-up and ready to begin.
• Wear glasses and gloves when lubricating the
embroidery machine.
• Do not block the ventilation of the embroidery
machine.
• Make sure the embroidery machine is not in direct
sunlight.
• Set the embroidery machine two inches (2”) away from
the wall.
• Lift the embroidery machine with at least two people.
• Lift the embroidery machine from he bottom – ONLY.
• Make sure there are no objects underneath the
embroidery machine
• Make sure there are no objects within the moving range
of the embroidery machine.
• Set the embroidery machine on a leveled, balanced and
durable surface.
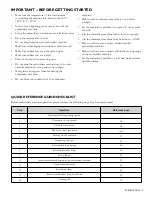
QUICK REFERENCE GUIDE/CHECKLIST
Before embroidery machine operation, please confirm the following steps have been performed.
Step
Operation
Reference page
1
Important: Before getting started
7
2
Threading of top thread
18
3
Check thread tension
26
4
Bobbin in the rotary hook
16-17
5
Turning on the machine
13
6
Importing a design
33
7
Select embroidery design
34
8
Select embroidery hoop
34
9
Hoop fabric
23
10
Attach embroidery hoop onto the embroidery machine
22
11
Check embroidery area
36
12
Start embroidery
42
13
Remove embroidery hoop and fabric
22
14
Turning off
13


