background image

FCC Hearing-Aid Compatibility (HAC) Regulations for Wireless Devices

On July 10, 2003, the U.S. Federal Communications Commission (FCC) Report and Order in WT Docket 01-309 
modified the exception of wireless phones under the Hearing Aid Compatibility Act of 1988 (HAC Act) to require 
digital wireless phones be compatible with hearing-aids. The intent of the HAC Act is to ensure reasonable 
access to telecommunications services for persons with hearing disabilities.

While some wireless phones are used near some hearing devices (hearing aids and cochlear implants), users 
may detect a buzzing, humming, or whining noise. Some hearing devices are more immune than others to this 
interference noise, and phones also vary in the amount of interference they generate.

The wireless telephone industry has developed a rating system for wireless phones, to assist hearing device 
users find phones that may be compatible with their hearing devices. Not all phones have been rated. Phones 
that are rated have the rating on their box or a label located on the box.

The ratings are not guarantees. Results will vary depending on the user’s hearing device and hearing loss. If your 
hearing device happens to be vulnerable to interference, you may not be able to use a rated phone successfully. 
Trying out the phone with your hearing device is the best way to evaluate it for your personal needs.

M-Ratings: Phones rated M3 or M4 meet FCC requirements and are likely to generate less interference to 
hearing devices than phones that are not labeled. M4 is the better/higher of the two ratings. 

Mogul

 is rated M3.

Hearing devices may also be rated. Your hearing device manufacturer or hearing health professional may help 
you find this rating. Higher ratings mean that the hearing device is relatively immune to interference noise. The 
hearing aid and wireless phone rating values are then added together. A sum of 5 is considered acceptable for 
normal use. A sum of 6 is considered for best use. 

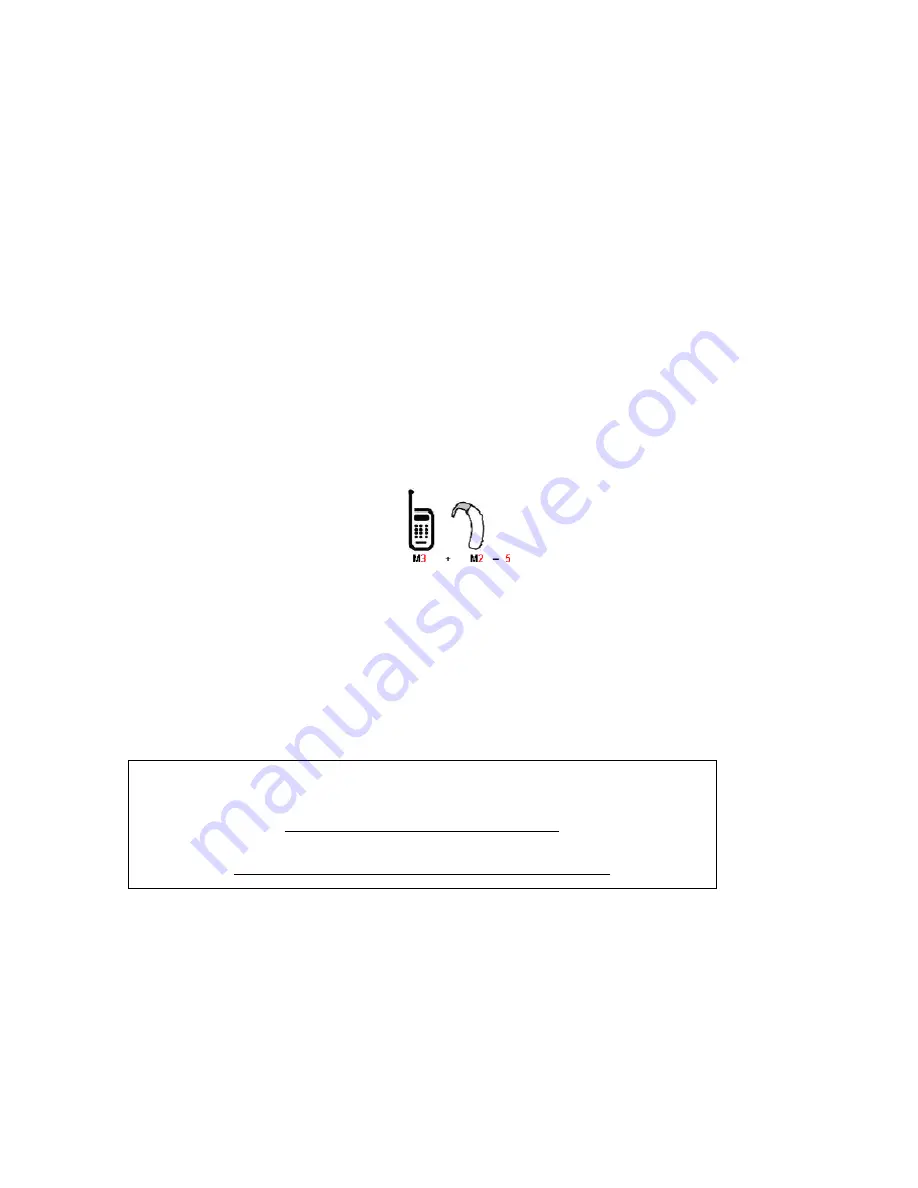
In the above example, if a hearing aid meets the M2 level rating and the wireless phone meets the M3 level 
rating, the sum of the two values equal M5. This should provide the hearing aid user with “normal usage” while 
using their hearing aid with the particular wireless phone. “Normal usage” in this context is defined as a signal 
quality that is acceptable for normal operation. 

The M mark is intended to be synonymous with the U mark. The T mark is intended to be synonymous with the 
UT mark. The M and T marks are recommended by the Alliance for Telecommunications Industries Solutions 
(ATIS). The U and UT marks are referenced in Section 20.19 of the FCC Rules. The HAC rating and measurement 
procedure are described in the American National Standards Institute (ANSI) C63.19 standard.

For information about hearing aids and digital wireless phones

FCC Hearing Aid Compatibility and Volume Control:

http://www.fcc.gov/cgb/dro/hearing.html

Gallaudet University, RERC:

http://tap.gallaudet.edu/DigWireless.KS/DigWireless.htm

176     Appendix

Содержание Mogul

Страница 1: ...int Power VisionSM Smart Device Mogul by HTC www sprint com 2007 Sprint Nextel All rights reserved SPRINT the NEXTEL name and logo and other trademarks are trademarks of Sprint Nextel Printed in the U S A ...

Страница 2: ...tems Inc in the United States and other countries Copyright 2008 Adobe Systems Incorporated Copyright 2008 Macromedia Netherlands B V Macromedia Flash Macromedia Flash Macromedia Flash Lite and Reader are trademarks and or registered trademarks of Macromedia Netherlands B V or Adobe Systems Incorporated Copyright 2008 JATAAYU SOFTWARE P LTD All Rights Reserved Copyright 2008 Dilithium Networks Inc...

Страница 3: ...ilitytodowhatever you want whenever you want This powerful combination brings you access to more products more services and more of what you need to do more of what you want Welcome to a future full of possibility Welcome to the new Sprint Welcome and thank you for choosing Sprint ...

Страница 4: ... 4 Using Letter Recognizer 27 2 5 Using Block Recognizer 28 2 6 Using Transcriber 29 2 7 Using Symbol Pad 30 2 8 Using Notes to Draw Write and Record Voice Notes 31 2 9 Searching Information 32 Section 3 Using Phone Features 33 3 1 Using the Phone 34 3 2 Making a Call 35 3 3 Receiving a Call 37 3 4 Smart Dialing 38 3 5 Using Call Forwarding 40 3 6 In Call Options 41 3 7 Additional Dialing Informat...

Страница 5: ...Synchronizing via Bluetooth 73 5 6 Synchronizing Music and Videos 74 Section 6 Organizing Contacts Appointments Tasks and Other Information 75 6 1 Contacts 76 6 2 Calendar 78 6 3 Tasks 80 6 4 Notes 82 Section 7 Exchanging Messages 85 7 1 Messaging 86 7 2 Text Messages 87 7 3 Setting Up Email Accounts 89 7 4 Using Email 91 Section 8 Working With Company Email and Meeting Appointments 95 8 1 Synchro...

Страница 6: ...mm Manager 124 11 2 Connecting to the Internet 125 11 3 Internet Explorer Mobile 129 11 4 Using Bluetooth 130 11 5 Using Your Device as a Modem Internet Sharing 134 Section 12 Experiencing Multimedia 137 12 1 Using the Built in Camera 138 12 2 Using Pictures Videos 147 12 3 Using Windows Media Player 151 Section 13 Managing Your Device 157 13 1 Adding and Removing Programs 158 13 2 Using Task Mana...

Страница 7: ...Section 14 Using Other Applications 165 14 1 Using Java 166 14 2 Using Voice Speed Dial 169 Appendix A 1 Specifications 172 A 2 Regulatory Notices 174 A 3 Additional Safety Information 183 Index 189 ...

Страница 8: ......

Страница 9: ...1 1 Setting Up Service 1 2 Your Device 1 3 Battery Information 1 4 Starting Up 1 5 The Today Screen 1 6 Programs 1 7 Settings Section 1 Getting Started In This Section ...

Страница 10: ... Touch Message Access a feature that lets you access messages simply by pressing and holding the 1 key bypassing the need for you to enter your passcode Note If you are concerned about unauthorized access to your voicemail account Sprint recommends you enable your voicemail passcode Sprint Account Passwords As a Sprint customer you enjoy unlimited access to your personal account information your v...

Страница 11: ...reen dial Sign on to your account at www sprint com Call us toll free at 1 888 211 4727 Consumer customers or 1 888 788 4727 Business customers Write to us at Sprint Customer Service P O Box 8077 London KY 40742 Automated Billing Information For your convenience your phone gives you access to billing information on your Sprint account This information includes balance due payment received invoicin...

Страница 12: ...ides assistance when placing collect calls or when placing calls billed to a local telephone calling card or third party To access Sprint Operator Services From the Phone screen dial For more information or to see the latest in products and services visit us online at www sprint com ...

Страница 13: ...ange for CDMA standby SMS message CDMA network status notification battery charging status 5 Web Key Press to open Internet Explorer Mobile 6 Hardware Keyboard This is a QWERTY style keyboard just like the computer keyboard Slide the touch screen panel to the left to reveal the keyboard For more information see Using the Hardware Keyboard in Section 2 Note The protective film on the sliding keyboa...

Страница 14: ...ess this multi directional control up down left or right to move through menus and program instructions carry out the selection by pressing ENTER the center button 12 OK Key Press to confirm your data entries or to exit the program in use 13 End Key Press to end a call or to return to the Today screen ...

Страница 15: ...ress to start Voice Speed Dial press and hold to record a voice note 4 WLAN Switch Slide up to turn Wi Fi on down to turn Wi Fi off 5 Camera Use the camera to take still photos and record video clips 6 Flash Light Allows you to capture images even in a dark environment To turn on the flash tap the Flash icon when in Camera mode 7 Speaker Listen to media from here 8 Car Antenna Connector Connect yo...

Страница 16: ...s to turn off the power completely All functions including the phone will be unavailable for use 12 Comm Manager Key Press to open the Comm Manager Comm Manager lets you easily turn on off your device s connections such as Bluetooth Wi Fi and cellular data connection ringer phone etc 13 Camera Key Press and hold for two seconds to turn on the camera Press again to take a picture 14 Stylus and Styl...

Страница 17: ... for carrying your device 4 Infrared Port Exchange files or data with other devices wirelessly 5 RESET Button With the stylus press the RESET button to soft reset your device 6 Sync Connector Earphone Jack Connect the supplied power adapter to charge the battery or the USB Sync cable to synchronize data with your PC You can also plug in the provided splitter adapter to allow the power adapter and ...

Страница 18: ...press and hold the button to end the call 4 microSD Card The storage card is already installed in your device 5 Two Mini USB Adapter Lets you connect the supplied AC ohone charger and mini USB stereo headset to your device at the same time 6 2 5mm Headset Adapter Lets you connect the supplied AC phone charger and a standard 2 5mm stereo headset to your device at the same time 7 Pouch Comes with be...

Страница 19: ... the Audio connector of the two mini USB adapter 3 Connect the AC phone charger to the Power connector of the two mini USB adapter Connect to the device s sync connector Audio connector for connecting the mini USB stereo headset Power connector for connecting the AC phone charger To connect the AC phone charger and a standard 2 5mm stereo headset Use the 2 5mm headset adapter for the connection 1 ...

Страница 20: ...eat above 60o C 140o F or dispose of in fire or water Replace only with manufacturer specified batteries Recycle or dispose of used batteries according to the local regulations Installing and Charging the Battery New batteries are shipped partially charged Before you start using your device you need to install and charge the battery To install the battery 1 Press the battery cover latch downward to ...

Страница 21: ...your PC and to the sync connector on your device Note Do not remove the battery from the device while you are charging it using the AC phone charger As a safety precaution the battery stops charging when it overheats Low Battery When the low battery warning appears do the following Immediately save your current data Immediately charge the battery by using the AC phone charger Synchronize with your...

Страница 22: ...ab 2 Under On battery power make sure the Turn off device if not used for check box is selected 3 Select the battery timeout period and then tap OK You will still be able to receive messages and calls while your device is in sleep mode Pressing the Power Key again or new incoming calls messages will wake up your device Calibrating the Device Calibrating the device screen involves tapping the cente...

Страница 23: ...e while Landscape mode may be optimal for viewing longer document files To change the orientation tap Start Settings System tab Screen and select the orientation you want Portrait Landscape right handed or Landscape left handed To smooth the edges of screen fonts for many programs on the ClearType tab select the Enable ClearType check box To increase the readability or to see more content on the sc...

Страница 24: ...etting Started provides a list of how to s that you can reference to learn basic features and settings of your device 9 Tap to set owner information 10 Tap to access your voicemail 11 Indicates the incoming messages Tap to open Messaging 12 Tap to lock the device The icon changes to Tap Unlock on the Today screen to unlock again 13 Reminds you of the appointment s Tap to open Calendar 14 Displays ...

Страница 25: ... but idle Roaming Connection is active Connection is not active Synchronization in progress Synchronization error ActiveSync notification Wi Fi function enabled but device not connected to a wireless network yet Wireless network s detected Connecting to wireless network arrows moving Connected to wireless network Synchronizing via Wi Fi Vibration mode Sound on Sound off Alarm Battery is fully char...

Страница 26: ... Personal tab Menus 4 Access more programs 5 View and change settings 6 View Help information for the current screen 1 2 3 4 5 6 The Quick Menu The Quick Menu located at the top right corner of the Today screen shows the currently running programs You can quickly switch between running programs and stop programs when you do not need to use them 1 Stop all currently running programs 2 Customize Tas...

Страница 27: ...ch between calls and set up conference calling Help See Help topics for the current screen or program Programs screen Icon Description Games Play two pre installed games Bubble Breaker and Solitaire ActiveSync Synchronize information between your device and a PC or the Exchange Server Adobe Reader LE View PDF Portable Document Format files on your device AudiblePlayer Listen to the audiobooks maga...

Страница 28: ...Sprint Navigation Turn your phone to a navigation device Sprint TV Watch your favorite TV shows on the device Tasks Keep track of your tasks Voice Speed Dial Record voice tags so that you can dial a phone number or launch programs simply by speaking a word Voice SpeedDial Switch Enable or disable Voice Speed Dial to be launched when the Voice Command Key is pressed Windows Live Use this mobile ver...

Страница 29: ...erent events Today allows you to customize the appearance and the information to be displayed on the Today screen Voice Speed Dial allows you to create voice tags for voice dialing contacts as well as for launching programs System Tab Icon Description About allows you to specify a name for your device Also shows the Windows Mobile version and copyright information Backlight sets the backlight time...

Страница 30: ...se for displaying numbers currency date and time on your device Remove Programs allows you to remove programs that you installed on your device Screen allows you to change the screen orientation recalibrate the screen and change the screen text size Task Manager stops running programs and set the Exit button to end programs immediately when you tap the button For more information see Using Task Ma...

Страница 31: ... 1 Using the Hardware Keyboard 2 2 Entering Information 2 3 Using the Onscreen Keyboard 2 4 Using Letter Recognizer 2 5 Using Block Recognizer 2 6 Using Transcriber 2 7 Using Symbol Pad 2 8 Using Notes to Draw Write and Record Voice Notes 2 9 Searching Information ...

Страница 32: ...t you can type all uppercase letters press the Function Key first and then press The Shift Key Caps Lock LED lights up to indicate that Caps Lock mode is enabled To turn off Caps Lock mode press these buttons again To type a single uppercase letter press and then press the desired letter To enter a number or symbol labeled in color on the keys press and then press the corresponding key To open the ...

Страница 33: ... Panel icon to open a menu where you can select a text input method and customize input options After selecting a text input method the corresponding Input Panel is then displayed and you can use it to enter text To toggle between showing and hiding the Input Panel simply tap the Input Panel icon Example Input Panel Keyboard Input Selector arrow Input Panel icon Icon Input method Onscreen Keyboard...

Страница 34: ...apping keys on the keyboard that are displayed on the screen To enter text using the onscreen keyboard 1 In a program tap the Input Selector arrow and then tap Keyboard 2 Enter text by tapping keys on the onscreen keyboard To enlarge the onscreen keyboard 1 Tap the Input Selector arrow and then tap Options 2 In the Input method list select Keyboard 3 Tap Large Keys ...

Страница 35: ...numbers and symbols in the designated writing area Enter capital letters by writing in the ABC left area of the box Enter lower case letters by writing in the abc middle area of the box Enter numbers by writing in the 123 right area of the box Enter punctuation and symbols by tapping in either area of the box and then writing the desired character Note Letter Recognizer is available when text entr...

Страница 36: ... then tap Block Recognizer 2 Write characters numbers and symbols in the designated writing area Enter letters by writing in the abc left area of the box Enter numbers by writing in the 123 right area of the box Enter symbols and punctuation by tapping in either area of the box and then writing the desired character Note Block Recognizer is available when text entry is possible Tip For help with w...

Страница 37: ...ur stylus to write cursive or printed text Transcriber will wait until you pause and then convert your entry into typed text To enter punctuation and symbols Transcriber comes with an onscreen keyboard that provides an easy way to add punctuation or a special symbol to existing text In a program tap on the Transcriber toolbar The keyboard remains visible until you tap the button again Tips To repo...

Страница 38: ... select a symbol Tap to display the previous page of symbols Tap to display the next page of symbols Tap to close Symbol Pad without selecting any symbol This indicates the current page and the total number of symbol pages To open Symbol Pad and select a symbol 1 Create or open a document such as a Word document 2 Tap the Input Selector arrow and then tap Symbol Pad or Using the hardware keyboard ...

Страница 39: ...d Voice Notes Using Notes you can draw directly on the screen or write on the screen and save notes in your own handwriting You can also create a stand alone recording voice note or you can add a recording to a note For more information on what you can do with Notes see Notes in Section 7 ...

Страница 40: ...and tasks as well as in online Help To search for a file or an item 1 Tap Start Programs Search 2 In Search for enter the file name word or other information you want to search for 3 If you have looked for this item before tap the Search for arrow and select the item from the list 4 In Type select a data type to help narrow your search 5 Tap Search 6 The My Documents folder and subfolders are search...

Страница 41: ...e Phone 3 2 Making a Call 3 3 Receiving a Call 3 4 Smart Dialing 3 5 In Call Options 3 6 In Call Options 3 7 Additional Dialing Information 3 8 Phone Settings 3 9 Setting Additional Service Options 3 10 Voice and Data Roaming 3 11 Customizing Plus Code Dialing ...

Страница 42: ... phone function temporarily and still keep your device turned on and use other functions 1 Tap the Signal icon and then tap Comm Manager or Tap the Comm Manager icon on the Today screen 2 On the Comm Manager screen tap the Phone button to turn the phone off To resume call function tap the Phone button again on the Comm Manager screen To adjust the device volume 1 Tap the Speaker icon 2 Under Volum...

Страница 43: ...e Today screen and then do one of the following Tap the desired contact in the Contacts list and tap the phone number that you want to call Tap the desired contact and press the Talk Key twice once to send the number to the Phone screen and once to dial the number Tap and hold the desired contact and on the shortcut menu tap Call Work Call Home or Call Mobile To dial one of the phone numbers of a ...

Страница 44: ...a speed dial note that Location 1 is generally reserved for your voicemail To create a speed dial entry 1 On the Phone screen tap Menu Speed Dial 2 Tap Menu New 3 Tap a contact Tap the phone number for which you want to create a speed dial 4 In the Location box select an available location for the new speed dial Tips To create a speed dial entry from Contacts tap and hold the contact name tap Add ...

Страница 45: ...phone call a message will appear giving you an option to either answer or ignore the incoming call To answer the call tap Answer or press the Talk Key To reject the call tap Ignore or press the End Key To end a call Once an incoming or outgoing call is in progress you can tap End or press the End Key to hang up ...

Страница 46: ...umbers or contacts that match the sequence you have entered Below are some tips on how to use Smart Dialing to quickly find a desired phone number or contact To find a phone number Simply enter the first one or two digits to find a phone number in Call History Enter the first three digits or more if you want to find a phone number from the saved contacts on your device To find a contact name You can j...

Страница 47: ...er you want to call Tap and hold the contact to pop up the shortcut menu To send a text message to the selected contact tap and hold the contact and tap Send Text Message Tip To view or edit information associated with the selected contact tap the contact s name on the shortcut menu Setting Up Smart Dialing 1 On the Phone screen tap Menu Smart Dialing Options 2 On the Options tab select the Enable...

Страница 48: ...d To activate Call Forwarding 1 From the Phone screen tap 2 Enter the area code and phone number to which your future calls should be forwarded 3 Press the Talk Key You will see a message and hear a tone to confirm the activation of Call Forwarding To deactivate Call Forwarding 1 From the Phone screen tap 2 Press the Talk Key You will see a message and hear a tone to confirm the deactivation Note Yo...

Страница 49: ...e the first call or take an incoming call 2 Press the Talk Key to put the first call on hold and dial a second number 3 When you re connected to the second party press the Talk Key to begin the three way call To turn the speakerphone on or off The built in speakerphone on your device allows you to talk hands free or lets other people listen to the conversation During a call tap Speaker On or press a...

Страница 50: ...ess code for the location from which you are calling for example 011 for international calls placed from the United States Tip You can change the default international access code For more information see Customizing Plus Code Dialing 2 Enter the full phone number you want to dial and then tap Talk The full phone number includes country code area code without the leading zero if any and phone numb...

Страница 51: ...list To change the ring type You can change the way that you are notified of incoming calls For example you can choose to be notified by a ring a vibration or a combination of both 1 Tap Start Settings Personal tab Phone Phone tab 2 In the Ring type list tap the desired option To change the keypad tone You can change the tone you hear when entering a phone number on the keypad If set to Long tones t...

Страница 52: ... the smart device phone for users who are visually or hearing impaired Choose one of the following modes depending on the operation mode that is supported by the TTY device Full mode Send and receive text during an ongoing call VCO mode Voice Carry Over mode which allows users to send voice and receive text during an ongoing call HCO mode Hearing Carry Over mode which allows users to send text and...

Страница 53: ...n appears where you can set roaming options Phone Roaming screen To select roaming options Choose one of the following options Sprint Only to access the Nationwide Sprint PCS Network only and prevent roaming on other networks Automatic to seek service on the Sprint National Network Roaming Only to force the device to seek a roaming system To enable or disable notification and data roaming The Data ...

Страница 54: ...the following confirmation message when your device enters a roaming network Tap Roam or OK to allow data roaming Tap Cancel if you don t want to allow data roaming Note If this is your first time to data roam the Data Roam Guard will display a second message informing you about how to enable or disable data roaming notification ...

Страница 55: ...the sign at the beginning of phone numbers that you dial will be replaced as follows When you enter a long distance phone number that starts with 1 the will be removed and the rest of the number will be dialed For example if you entered 1 416 123 4567 the number to be dialed will be 14161234567 When you enter an international phone number that starts with a followed by a digit other than 1 the wil...

Страница 56: ...48 Section 3 Using Phone Features ...

Страница 57: ...Section 4 Setting Up Your Device In This Section 4 1 Basic Settings 4 2 Personalizing the Today Screen 4 3 Protecting Your Device 4 4 Other Settings ...

Страница 58: ...ce Reward if found 4 On the Options tab select the Notes check box and then tap OK Time and Date To set the time and date 1 Tap Start Settings System tab Clock Alarms Time tab 2 Select the correct time zone and change the date or time Note During synchronization the time on your device is updated to the time on your PC To set the time and date for a different location If you visit or communicate w...

Страница 59: ... files 3 Tap the file name of the picture you want to use 4 Tap OK To set options for displaying appointments on the Today screen If you have a large number of appointments you may want to specify the kinds of appointments that are displayed on the Today screen 1 Tap Start Settings Personal tab Today 2 Tap the Items tab 3 Select Calendar and then tap Options 4 Do any of the following Select Next app...

Страница 60: ...dow double click My Windows Mobile Based Device Windows Start Menu and then create the folders and shortcuts that you want You will see the added items after you synchronize To change the Start Menu display size The Large Start Menu feature enlarges the Start menu to make it easier to touch menu items with your fingers When the Large Start Menu is enabled recently accessed programs are displayed as...

Страница 61: ... 4 Tap OK The next time the device is turned on you will be prompted to enter your password Notes Each time an incorrect password is entered the time the device takes to respond will get longer and longer until the device appears to be not responding If you forget your password and cannot access your device anymore please contact your local authorized dealer to clear memory To change your password...

Страница 62: ...spaces Use the underscore character to separate words Display Settings To adjust the brightness of the backlight 1 Tap the Backlight icon on the Today screen or tap Start Settings System tab Backlight Brightness tab 2 Move the sliders right to increase and left to decrease the brightness To set the backlight to dim after a time delay 1 Tap the Backlight icon on the Today screen or tap Start Settin...

Страница 63: ...uggest words when entering text check box is selected 3 By default the suggested word list appears whenever you enter a space To make the word list appear after letters are entered select the number of letters that you want to be entered before displaying the word list 4 The suggested word list shows up to four words by default You can change the number of words to display in the suggested list 5 ...

Страница 64: ...ose how you want to be notified by selecting the appropriate check boxes 3 On the Notifications tab in Event tap an event name and choose how you want to be notified by selecting the appropriate check boxes You can choose from several options such as a special sound a message or a flashing light Tip Turning off sounds and the flashing light helps conserve battery power ...

Страница 65: ...uter In This Section 5 1 About Synchronization 5 2 Setting Up Windows Mobile Device Center on Windows Vista 5 3 Setting Up ActiveSync on Windows XP 5 4 Synchronizing With Your Computer 5 5 Synchronizing via Bluetooth 5 6 Synchronizing Music and Videos ...

Страница 66: ...ion software to your computer connect and synchronize your device with your computer by using one of the following methods Connect and synchronize using the supplied USB sync cable Upon connecting the sync cable to your device and your computer the synchronization process starts automatically Connect and synchronize using Bluetooth You must first set up a Bluetooth partnership between your device a...

Страница 67: ...updates and explore your device without synchronizing Outlook information 4 Select the information types that you want to synchronize and then click Next 5 Enter a device name and click Set Up When you finish the setup wizard Windows Mobile Device Center synchronizes your device automatically Notice that Outlook email messages and other information will appear on your device after synchronization U...

Страница 68: ...allation is complete click Done 6 On the Getting Started with Windows Mobile screen click Close Setting Up Synchronization in ActiveSync Follow the steps below to set up a synchronization partnership 1 Connect your device to your PC The Synchronization Setup Wizard automatically starts and guides you to create a synchronization partnership Click Next to proceed 2 To synchronize your device with yo...

Страница 69: ... to synchronize for each type either on your device or your PC Follow the steps below to change synchronization settings on your device Note Before changing synchronization settings on your device disconnect it from your PC 1 In ActiveSync on the device tap Menu Options 2 Select the check box for any items you want to synchronize If you cannot select a check box you might have to clear the check b...

Страница 70: ... PC may disconnect the connection with your device in favor of the Internet or network connection If this happens tap Start Settings Connections tab USB to PC and then clear the Enable advanced network functionality check box This makes your PC utilize a serial USB connection with your device The USB to PC icon appears on the Today Screen when a serial USB connection is used ...

Страница 71: ...ion see Using Bluetooth in Section 11 4 Tap Menu Connect via Bluetooth Make sure the Bluetooth function of both your device and the computer are turned on and set to visible mode 5 If this is the first time you have connected to this computer via Bluetooth you must first complete the Bluetooth wizard on your device and set up a Bluetooth partnership between your device and the computer For more info...

Страница 72: ...hronization settings must be set in Windows Media Player Before media can be synchronized you must do the following Install Windows Media Player Version 11 on the PC Windows Media Player 11 works only in Windows XP or later versions Connect your device to the PC with a USB Sync cable If your device is currently connected using Bluetooth you must end that connection before media can be synchronized...

Страница 73: ...Section 6 Organizing Contacts Appointments Tasks and Other Information In This Section 6 1 Contacts 6 2 Calendar 6 3 Tasks 6 4 Notes ...

Страница 74: ...up Windows Live on your device Adding New Contacts To add a contact on your device 1 Tap Contacts on the Today screen 2 Tap New and then enter the contact information 3 In the File as field choose how you want the contact name to appear in the Contacts list 4 To add a photo of the contact tap Select a picture and then select the picture file or tap Camera to take a photo of the contact This photo ap...

Страница 75: ...f available actions for a contact tap and hold the contact To see a list of contacts employed by a specific company tap Menu View By Company Then tap the company name To find a contact on your device There are several ways to find a contact in your Contacts list 1 Tap Contacts on the Today screen 2 If you are not in Name view tap Menu View By Name 3 Do one of the following Begin entering a name or ph...

Страница 76: ...If there is a time frame for the appointment select the start and end dates and time 5 Specify the type of category for your appointment so that it can be grouped with other related appointments Tap Categories and then select a preset category Business Holiday Personal or Seasonal or tap New to create your own category 6 When you are finished tap OK to return to the calendar Notes All day events do...

Страница 77: ...hedule meetings via email with contacts who use Outlook or Outlook Mobile 1 Tap Calendar on the Today screen 2 Schedule a new appointment or open an existing one and tap Menu Edit 3 Tap Attendees tap Add Required Attendee or Add Optional Attendee and add the contacts you want to invite You can specify if an attendee is required or optional only if your device is connected to a Microsoft Exchange 2...

Страница 78: ...ere to add a new task box enter a subject and press ENTER If the task entry box is not available tap Menu Options and select the Show Tasks entry bar check box To change the priority of a task Before you can sort tasks by priority you need to specify a priority level for each task 1 Tap Start Programs Tasks 2 Tap the task for which you want to change the priority 3 Tap Edit and select a priority l...

Страница 79: ...or sort the list to quickly find a specific task 1 Tap Start Programs Tasks 2 In the task list do one of the following Sort the list Tap Menu Sort by and tap a sort option Filter the list by category Tap Menu Filter and tap the category you want displayed Tap one of these categories Tip To filter your tasks further tap Menu Filter Active Tasks or Completed Tasks ...

Страница 80: ... tap one of the following Writing if you want to draw or enter handwritten text in a note Typing if you want to create a typed note 4 Tap OK To create a note 1 Tap Start Notes 2 In the note list tap New 3 Tap the Input Selector arrow to select the input method you want and enter your text 4 If the Input Selector arrow is not displayed tap the Input Panel icon 5 When you are finished tap OK to retur...

Страница 81: ...finished recording 6 If you are adding a recording to a note tap OK to return to the note list when finished 7 If you are recording in an open note an icon will appear in the note 8 If you are creating a stand alone recording the recording will appear in the note list Tip To quickly create a recording press and hold the Voice Command Key and then you can begin to record after a beep sound Release th...

Страница 82: ......

Страница 83: ...Section 7 Exchanging Messages In This Section 7 1 Messaging 7 2 Text Messages 7 3 Setting Up Email Accounts 7 4 Using Email ...

Страница 84: ...New message s To select a messaging account Tap Start Programs Messaging The Account Selection screen then appears where you can select an account or From within one account s message list for example Text Messages tap Menu Go To to switch to another messaging account Account Selection screen To configure message account settings Tap Menu Options on the Account Selection screen or Tap Menu Tools Op...

Страница 85: ...Spell Check 6 Tap Send Tips To enter symbols tap 123 using the onscreen keyboard To set the priority tap Menu Message Options If you are working offline email messages are moved to the Outbox folder and will be sent the next time you connect If you want to know when a text message is received before sending the message that you are composing tap Menu Message Options and then select the Request mess...

Страница 86: ...ges similar to a chat program with a contact on the screen To reply to a text message 1 In the Text Messages Inbox tap a message thread to open it 2 At the bottom of the screen type your reply message and then tap Send Type your message here To delete a message in the thread 1 In the Text Messages Inbox tap the message to open it 2 Select the message in the thread you want to delete 3 Tap Menu Del...

Страница 87: ...count on your device if you have an email account from an Internet service provider ISP or other email provider or a Web based account such as Gmail or Yahoo Mail Plus You can also add a work account that you access using a VPN server connection as a POP3 or an IMAP4 account 1 Tap Start Programs Messaging 2 Tap Setup E mail on the Account Selection screen 3 Enter the E mail address and Password fo...

Страница 88: ...d and receive messages Download messages Set the number of days of messages that you want to be downloaded to your device Send receive when I click Send By default messages are immediately delivered when you tap Send If you prefer to save outgoing messages to the Outbox folder first clear the check box In this case you will need to manually send messages by tapping Menu Send Receive Use automatic ...

Страница 89: ...Menu Message Options If you are working offline email messages are moved to the Outbox folder and will be sent the next time you connect To add an attachment to a message 1 In a new message tap Menu Insert and tap the item you want to attach Picture Voice Note or File 2 Select the file you want to attach or record a voice note Filtering the Inbox Message List When the Inbox on your device is full of...

Страница 90: ...pears below the subject of the message Tapping the attachment opens the attachment if it has been fully downloaded or marks it for download the next time you send and receive email Notes If there are multiple attachments in the message all attachments are downloaded For information about setting your device to automatically download file attachments see Customizing Email Settings If your company is...

Страница 91: ...p Download Internet pictures 7 Tap Menu and choose whether to reply to the sender s or forward the message 8 Enter your response and then tap Send Tip Email can contain hyperlinks to Web pages Synchronize Emails Synchronizing emails ensures that new emails are downloaded to the device Inbox folder emails in the Outbox folder are sent and emails deleted from the server are removed from your device ...

Страница 92: ...ed to the recipient list You can customize ActiveSync so that your email address will be excluded from the recipient list 1 In ActiveSync on your device tap Menu Options 2 Select the E mail information type and tap Settings 3 Tap Advanced 4 In the My e mail addresses text box enter your email address 5 Tap OK To automatically receive attachments with Outlook email messages 1 Tap Start Programs Act...

Страница 93: ...ny Email and Meeting Appointments In This Section 8 1 Synchronizing Your Device with the Exchange Server 8 2 Working With Company Email 8 3 Managing Meeting Requests 8 4 Finding Contacts in the Company Directory 8 5 Email Security ...

Страница 94: ... 1 Tap Start Programs Messaging Setup E mail 2 Enter the E mail address and Password for the email account and select the Save password option Tap Next 3 Clear the Try to get e mail settings automatically from the Internet option and tap Next 4 In Your e mail provider select Exchange server and tap Next 5 Tap Next again 6 Select the Attempt to detect Exchange Server Settings automatically option a...

Страница 95: ...ly For more information about connections see Section 11 After you finish setting up an Exchange Server connection your device automatically starts synchronization You can manually start synchronization anytime by tapping Sync in ActiveSync Note If you connect your device to your office computer via a USB or Bluetooth connection you can use this connection to the PC to pass through to the network an...

Страница 96: ...een added on the Exchange Server To make Direct Push work you need to have a data connection on your device You need to perform a full synchronization between your device and the Exchange Server first before Direct Push can be enabled Note The Direct Push feature works for your device only if your company is using Microsoft Exchange Server 2003 Service Pack 2 SP2 with Exchange ActiveSync or higher ...

Страница 97: ...cost Note Fetch Mail works for your device only if your company is using Microsoft Exchange Server 2007 or higher 1 Tap Start Programs Messaging Outlook E mail 2 Tap an email message to open it 3 By default only the first few kilobytes of the message are shown To download the whole message scroll to the bottom of the message and then tap Get the rest of this message 4 A Downloading message notice a...

Страница 98: ...a message 3 Tap Menu Follow Up and select one of the following options Set Flag Mark the message with a red flag to indicate that it needs follow up action Complete Flag Mark the message with a check mark to indicate that the issue or request in the email is already completed Clear Flag Remove the flag to unmark the message Note Email message reminders are displayed on your device if the messages ar...

Страница 99: ...file server you can view the document on your device Note You can view the document only if you have a Microsoft Outlook account that synchronizes with Microsoft Exchange Server 2007 or later Exchange Server must also be set up to allow access to SharePoint document libraries or internal file servers 1 Tap Start Programs Messaging 2 Select an email account and then open a message with a link to a Sh...

Страница 100: ... requested meeting by tapping View your calendar If the time of the meeting conflicts with your other appointments a Scheduling Conflict notice appears at the top of the email 3 Choose whether to edit your response email before sending and then tap OK 4 If you accepted the meeting request it will automatically be added as an appointment in Calendar on your device To view the list of meeting particip...

Страница 101: ...ange Server 1 Synchronize with Exchange Server if you have never done so 2 Do any of the following In Contacts tap Menu Company Directory In a new email message tap the To box or tap Menu Add Recipient and then tap Company Directory In a new meeting request using Calendar tap Attendees and then tap Company Directory at the top of the list 3 Enter a partial or full contact name and tap Search In th...

Страница 102: ...you are not using one of these versions or have not yet synchronized these options are unavailable You can encrypt a message with or without a certificate However to read an encrypted message you need a valid certificate to decrypt it To individually sign and encrypt a new message 1 Tap Start Programs Messaging Outlook E mail 2 Tap Menu New to create a new message 3 Tap Menu Message Options 4 From t...

Страница 103: ...r messages are protected from being viewed by anyone other than the intended recipients select the Encrypt all outgoing e mail messages check box 5 Tap Choose Certificate to select a certificate for signing or encrypting outgoing email messages Setting Permissions on an Email Message Another way of protecting your email messages is to send messages with restricted permissions using Information Right...

Страница 104: ......

Страница 105: ...Section 9 Using Windows Live In This Section 9 1 Windows Live 9 2 Live Messenger 9 3 Sending Photos to Your Windows Live Space ...

Страница 106: ...s Windows Live 2 Tap Sign in to Windows Live 3 On the next screen tap the links to read the Windows Live Term of Use and the Microsoft Privacy Statement After reviewing them tap Accept 4 Enter your Windows Live Mail or Hotmail address and password select the Save password checkbox and then tap Next 5 Choose whether to show the Windows Live search bar and applications on the Today screen and then t...

Страница 107: ...words in the search bar 2 Tap or Search Internet Explorer Mobile then launches and displays links to related Web sites The links are organized by category Local Allows you to perform a local search when you re trying to locate a specific place or street address Web Shows the results from the Web search which are links to all related Web sites Map Shows links to Web sites containing maps News Shows ...

Страница 108: ... Connecting to the Internet in Section 11 Launching the Messenger and Signing In To open Windows Live Messenger Mobile Do one of the following Tap Start Programs Messenger or On Windows Live or the Today screen tap the Left or Right arrow until you see Messenger and then tap it To sign in and out 1 To sign in tap Sign in on the messenger screen 2 If this is your first time signing in a message appe...

Страница 109: ...ons and even talk by sending a voice clip While chatting you can send and receive files directly from a message window You can also start conversations with several contacts and switch between their message screens or you can invite participants to join in a conversation To start and end conversations 1 In the contacts list select a contact and then tap Send IM to open a message screen Windows Live...

Страница 110: ...p 1 Select a contact and start a conversation 2 Tap Voice clip and then start talking 3 After you have spoken a message tap Send Personalizing the Messenger While in the Contacts list you can do the following Tap Menu Change status to set your current status such as Busy Out to lunch etc so that your contacts will know whether you re available Tap Menu Change appearance to change your display name...

Страница 111: ...Space If you created your own live space you can upload pictures to Spaces To upload pictures to your Windows Live Space 1 Tap Start Programs Pictures Videos 2 Select a picture and then tap Send to your space Section 9 Using Windows Live 113 ...

Страница 112: ......

Страница 113: ...Section 10 Working With Documents and Files In This Section 10 1 Microsoft Office Mobile 10 2 Adobe Reader LE 10 3 Copying and Managing Files 10 4 Using ZIP ...

Страница 114: ...ffice Excel To see a complete list of features that are not supported in Word Mobile and Excel Mobile see Help on your device Tips By default Word Mobile saves documents in docx format while Excel Mobile saves workbooks in xlsx format If you want to open these types of files on a computer that uses Microsoft Office 2000 Office XP or Office 2003 you need to download and install the File Format Converter...

Страница 115: ...e Press the Navigation Control up down right and left to move up or down a page or scroll through the pages Tap the space between the arrow keys and the scrollbar with your stylus to move one screen towards the desired position Tap and drag the scrollbar tab to quickly scroll through pages and jump to a desired page number Tap Tools Go To and select an option to go to a specific page in a multi pag...

Страница 116: ...ssword protected PDF files with up to 128 bit encryption When you open a password protected PDF file you will be prompted to enter the password before the file can be opened To use the toolbar You can also use the Adobe Reader LE toolbar to access the most commonly used functions The following table lists the toolbar controls This Control Does This Fits the page height to the screen Fits the page wid...

Страница 117: ...n your PC navigate to the folder that contains the file you want to copy b Right click the file and then click Copy c Right click the destination folder on your device and then click Paste Copying a file results in separate versions of a file on your device and PC Because the files are not synchronized changes made to one file will not affect the other If you want file changes to be automatically updated...

Страница 118: ...tically save files to a storage card In the Word Mobile Excel Mobile and Notes programs you may find it helpful to save all new documents notes and workbooks directly to a storage card 1 From the program file list tap Menu Options 2 With a storage card inserted in your device in the Save to box select the appropriate storage card to which you wish to automatically save new files 3 Tap OK Note In the fi...

Страница 119: ...s tap Menu Action and make sure Multi Select Mode is selected Select files by tapping each file Tap a selected file to deselect it To select all files tap Menu Action Select All 3 Tap Menu Action Extract 4 Choose a folder to which files will be extracted and then tap Extract To create a zip archive 1 Tap New or File New Archive 2 On the Save As screen enter a zip file name and choose a folder to which t...

Страница 120: ...122 Section 10 Working With Documents and Files ...

Страница 121: ...Section 11 Getting Connected In This Section 11 1 Comm Manager 11 2 Connecting to the Internet 11 3 Internet Explorer Mobile 11 4 Using Bluetooth 11 5 Using Your Device as a Modem Internet Sharing ...

Страница 122: ...2 Tap to toggle Bluetooth on or off Tap Settings Bluetooth to configure Bluetooth on your device 3 Tap to disconnect active data connections You cannot reconnect data connections in Comm Manager 4 Tap to toggle between enabling or disabling the phone function Tap Settings Phone to customize phone settings 5 Tap to toggle between automatically receiving as items arrive or manually retrieving Outloo...

Страница 123: ... places such as in a coffee shop or restaurant you will need access to the public wireless access points also referred to as hotspots for such places Note The availability and range of your device s Wi Fi signal depends on the infrastructure and other objects through which the signal passes To turn Wi Fi on or off At the lower left side of your device slide the WLAN switch upward The icons on the ...

Страница 124: ...b of the Wireless LAN Settings screen move the Power Save Mode slider to a position that optimizes performance with the least power consumption For example move the slider to the left Best Performance to have the optimal WLAN performance move to the right Best Battery to obtain the maximum battery usage 3 You can also select the Auto turn off WLAN if not connected check box to allow your device to...

Страница 125: ...the access point and the receiving device your device must be set with the same SSID user name and password Dial up In times when you are not within the coverage of a wireless network use the 1XRTT or EVDO dial up connection on your device to connect to the Internet or your corporate network Your device has two groups of connection settings Sprint and My Work Network The Sprint settings are used t...

Страница 126: ...ain provided by the network administrator 2 Tap Start Settings Connections tab Connections 3 In My Work Network follow the instructions for each type of connection 4 Complete the connection wizard and then tap Finish Starting a Data Connection After a data connection has been set up on your device you can then connect your device to the Internet The connection is started automatically when you beg...

Страница 127: ...options from the shortcut menu Tip For more information about using Internet Explorer Mobile please go to http www microsoft com windowsmobile help pocketpc browseinternet mspx Tap Menu Add to Favorites to save the current Web page in your Favorites folder Tap Menu View Zoom Level to select the select a zoom level Tap Menu Tools and choose to send the current Web page link view the page s properti...

Страница 128: ...on that device To create a connection between your device and another Bluetooth enabled phone to use that phone as a modem Bluetooth Modes Bluetooth on your device operates in three different modes On Bluetooth is turned on Your device can detect other Bluetooth enabled devices but cannot be detected by those devices Off Bluetooth is turned off In this mode you can neither send nor receive informa...

Страница 129: ...acters long 6 Tap Next 7 Wait for the paired device to accept the partnership The receiving party needs to enter the same passcode that you specified 8 The name of the paired device is then displayed You may edit and enter a new name for that device 9 Select the check boxes of services that you want to use from the paired device 10 Tap Finish To accept a Bluetooth partnership 1 Ensure that Bluetoot...

Страница 130: ...e title bar Note If the Bluetooth stereo headset becomes disconnected turn the headset on and repeat steps 1 to 3 above Tap and hold the name of the Bluetooth stereo headset and tap Set as Wireless Stereo Beaming Information Using Bluetooth You can beam information such as contacts calendar items tasks and files from your device to your computer or to another Bluetooth enabled device Note If your c...

Страница 131: ...ok select File Import and Export in Outlook to import it To beam information to a Bluetooth enabled device such as another smart device follow steps 3 to 6 in the above procedure Note If the device you want to beam to does not appear in the box make sure that it is turned on and visible To receive a Bluetooth beam Your device will not detect and notify you of incoming Bluetooth beams unless you se...

Страница 132: ...se a USB Sync cable connection you must first install Microsoft ActiveSync version 4 5 or later on the computer If you want to use a Bluetooth connection make sure your computer has built in Bluetooth capability If your computer does not have Bluetooth you can connect and use a Bluetooth adapter or dongle on your computer Before using Internet Sharing disable ActiveSync on your computer To set up y...

Страница 133: ...nnection c In the Bluetooth Personal Area Network Devices dialog box select your phone and then click Connect For Windows XP a Tap Start Control Panel Network Connections b Under Personal Area Network click the Bluetooth Network Connection icon c Under Network Tasks click View Bluetooth network devices d In the Bluetooth Personal Area Network Devices dialog box select your device and then click Co...

Страница 134: ...136 Section 11 Getting Connected ...

Страница 135: ...Section 12 Experiencing Multimedia In This Section 12 1 Using the Built in Camera 12 2 Using Pictures Videos 12 3 Using Windows Media Player ...

Страница 136: ...r on the screen Press the Navigation Control left or right Current capture mode The available capture modes of the camera are as follows Photo to capture standard still images Video to capture video clips with or without accompanying audio Contacts Picture to capture a still image with the option to immediately assign it as a Photo ID for a contact Picture Theme to capture still images and place t...

Страница 137: ...deo press again to stop recording To take consecutive shots in Sports mode press the Camera Key briefly and then move your device to follow the movement of your subject Press and hold when taking consecutive shots in Burst mode The Navigation Control Press the Navigation Control up or down to increase or decrease the zoom level Press the Navigation Control left or right to go to the previous or nex...

Страница 138: ...reen 8 Brightness Tapping the minus or plus icon decreases or increases the brightness level 9 Metering Mode Tap to toggle the metering mode between Center Area and Average 10 Flash Light Tap to turn on or off the flash light that is located at the back of your device Turn the flash light on when taking shots in dark environments 11 White Balance Tap to toggle between the different white balance set...

Страница 139: ...y pressing the Camera Key or Jog Wheel or the ENTER button on the Navigation Control Still images will be saved in JPEG format While capturing an image in the Picture Theme capture mode you can select a preset template To view and select from different templates tap on the Camera screen Depending on the chosen template one or more photos may need to be taken for the template Video Capture Mode In ...

Страница 140: ... via email 4 View Tap to view the image in the Pictures Videos program or play the captured video in Windows Media Player 5 Assign to Contacts Tap to associate the photo to a selected contact 6 Browse After you have taken photos in Sports or Burst mode the total number of consecutive shots is shown in the lower right corner of the Review screen Tap the up down arrow to browse through the sequence ...

Страница 141: ...pture size setting Zoom range Photo 2M 1600 x 1200 No zooming available 1M 1280 x 960 1 0x to 2 0x Large 640 x 480 1 0x to 2 0x Medium 320 x 240 1 0x to 4 0x Small 160 x 120 1 0x to 8 0x Video Medium 176 x 144 1 0x to 2 0x Small 128 x 96 1 0x to 2 0x Contacts Picture Large 480 x 640 1 0x to 2 0x Medium 240 x 320 1 0x to 4 0x Small 120 x 160 1 0x to 4 0x Picture Theme Determined by the current temp...

Страница 142: ... direction images will be stitched in a panorama Stitch Count Select the desired number of snapshots to be taken and stitched into a panorama Auto Stitch When the Auto Stitch is On the camera automatically stitches snapshots into one single file If Auto Stitch is Off the snapshots are saved as separate files Sports Settings menu Snapshots Select the number of consecutive shots to capture in Sports m...

Страница 143: ...Choose whether to display a grid on the Camera screen Showing a grid helps you frame and center your subject more easily and accurately Grid Keep Backlight Choose whether to turn the backlight on or off while using the camera This overrides your device backlight settings while you are using the camera Review Duration Set a time length for displaying the captured still or video image on the Review ...

Страница 144: ...es folder in the device s Main Memory If you transferred some templates to a storage card via File Explorer set this option to Main Card to specify that templates are located in both the main memory and on the storage card Adjust This option allows you to adjust camera display properties such as Contrast Saturation Hue and Sharpness 2 1 3 4 5 1 In the submenu tap one of the properties to adjust or...

Страница 145: ... Videos folder For more information about copying files from your PC to your device see ActiveSync Help on your PC Note You can also copy images GIF animation files and video files from your PC to your device using a memory card Insert the memory card into the memory card slot on your device and then copy the files from your PC to the folder you created on the memory card To view pictures 1 Tap Start ...

Страница 146: ...lide show Tap Menu Options and then tap Portrait pictures or Landscape pictures on the Slide Show tab Tap anywhere on the screen to display the Slide Show toolbar which you can use to stop or pause the slide show rotate the view and more To sort pictures and video clips If you store a large number of pictures or video clips on your device you may find it helpful to sort them to quickly find a specifi...

Страница 147: ... Set as Today Background 4 In Transparency level select a higher percentage for a more transparent picture or a lower percentage for a more opaque picture 5 Tap OK To send pictures and video clips via email You can send pictures and video clips to other devices via email 1 Ensure that Messaging is set up to send and receive messages 2 From the program select the item you want to send 3 Tap Menu Se...

Страница 148: ...hoose the contact from your Contacts list To customize more image settings 1 Tap Start Programs Pictures Videos 2 Select the picture for which you want to configure further settings 3 Tap Menu Options The Options screen appears allowing you to Resize a picture so that it can be sent more quickly through email Set the direction of rotation for the Rotate function Configure the view settings during sl...

Страница 149: ...e Profile H 263 Motion JPEG 3GPP2 wmv asf mp4 3gp avi 3g2 Windows Media Audio MP3 MIDI AMR Narrow Band AMR Wide Band AAC 3GPP2 wma mp3 mid midi rmi amr awb m4a gcp About the Controls 2 9 1 3 4 5 6 7 8 The following are available controls on the Windows Media Player Control Function 1 Plays Pauses a file 2 Displays the video full screen 3 Displays a Web site where you can find music and videos to p...

Страница 150: ...r device instead of dragging the file from a folder on your PC to a folder on your device for example This will ensure that the license is copied along with the protected file For more information about synchronizing files to your device and other mobile devices see desktop player Help Note You can view the protection status for a file by checking its file properties tapping Menu Properties Synchronizi...

Страница 151: ...ying Media To play items on your device Use the library on Windows Media Player Mobile to find and play songs videos and playlists that are stored on your device or removable storage card 1 If you are not on the Library screen tap Menu Library 2 On the Library screen tap the Library arrow near the top of the screen and then tap the media storage that you want use for example Storage Card 3 In most ...

Страница 152: ...tly playing file as well as any files that have been queued up to play next You can create a new playlist on your device by saving the current Now Playing playlist and by giving it a new name To save a new playlist 1 If you are not on the Library screen tap Menu Library 2 Tap to select a category for example My Music or My Playlists 3 Select a media file that you want and then tap Menu Queue Up This ...

Страница 153: ...on 13 Managing Your Device In This Section 13 1 Adding and Removing Programs 13 2 Using Task Manager 13 3 Managing Memory 13 4 Resetting Your Device 13 5 Checking System Information 13 6 Battery Saving Tips ...

Страница 154: ...ce and processor type 2 Read any installation instructions or documentation that comes with the program Many programs provide special installation instructions 3 Connect your device and PC 4 Double click the exe file If the executable file is an installation wizard follow the instructions on the screen The wizard will automatically install the program to your device If an installation wizard does no...

Страница 155: ...n to end running programs check box is not selected tapping the Exit button will only close a program screen The program is not ended and continues to run in the background 3 Choose an action for shutting down programs by tapping the button tapping and holding the button or both 4 Tap OK To close running programs from the Task Manager 1 Tap the Running tab 2 Select the check box of the programs th...

Страница 156: ...d hold the program name in the list and then tap Remove from Exclusive or In the Exclusive tab select the program name and tap Remove To sort running programs in the Quick Menu 1 Tap the Advanced tab 2 Select Program name or Memory usage to sort running programs by order of the program name or memory usage ...

Страница 157: ...nd then tap Cut Browse to the storage card folder and tap Edit Paste Delete unnecessary files Tap Start Programs File Explorer Tap and hold the file and then tap Delete Delete large files To find your largest files tap Start Programs Search In the Type list tap Larger than 64 KB and then tap Search In Internet Explorer Mobile delete temporary Internet files and clear history information For more informa...

Страница 158: ...a normal reset does not solve a system problem After a hard reset the device is restored to its default settings the way it was when you first purchased it and turned it on Any programs you installed data you entered and settings you customized on the device will be lost Only Windows Mobile software and other pre installed programs will remain To perform a hard reset 1 Press and hold both softkeys ...

Страница 159: ...e type or speed of the processor memory size etc you can check under Settings for device information To find the operating system version number Tap Start Settings System tab About The version of the operating system on your device is shown near the top of the About screen To get detailed device information Tap Start Settings System tab About ...

Страница 160: ...to external power whenever possible especially when using a storage card or when using a modem or other peripherals Adjust the backlight settings For more information see To set the backlight to dim after a time delay in Section 4 When you are out of range of wireless networks turn Wi Fi off Searching for networks consumes a lot of power For more information see Wi Fi in Section 11 Turn Bluetooth ...

Страница 161: ...Section 14 Using Other Applications In This Section 14 1 Using Java 14 2 Using Voice Speed Dial ...

Страница 162: ... Tap Continue 5 Confirm to start downloading 6 When finished tap OK To install from your device You can copy MIDlets or MIDlet suites from the PC to your device using the USB sync cable infrared or Bluetooth connection Copy them to the root folder or any subfolder on your device 1 On the Java screen tap Menu Install Local Files The program then searches for MIDlets or MIDlet suites on your device an...

Страница 163: ... is not running 1 Tap and hold the MIDlet and tap Erase Alternatively you can tap Menu Edit Erase 2 Tap OK to confirm Note To uninstall all MIDlets and folders from the current folder tap Menu Remove All To set MIDlet permission settings For each MIDlet already installed Java allows you to individually set permission options to perform certain actions A MIDlet can be enabled to perform these action...

Страница 164: ...he following permission options Always Allow Enables a MIDlet to perform the action Never Allow Prohibits a MIDlet from performing the action Ask Asks for your confirmation whenever a MIDlet attempts to perform the action 3 Tap Save Note Changes to permission settings for a MIDlet in a multi MIDlet suite will affect the settings for the whole suite 168 Section 14 Using Other Applications ...

Страница 165: ...n recording is completed a Voice Tag icon will be displayed on the right of the item 5 When you create a voice tag for the item you can do any of the following Tap the Record button to rebuild the voice tag Tap the Play button to play the voice tag Tap the Delete button to delete the voice tag Tip To ensure voice recognition accuracy please record your voice in a quiet place To create voice tag fo...

Страница 166: ...em cannot recognize your voice tag please speak clearly and reduce the surrounding noise and then try again To view and test the voice tags you have created 1 Tap Start Settings Personal tab Voice Speed Dial 2 The Voice Tag tab displays a list that contains all the voice tags you have created Select an item in the list and you can do one of the following Tap the Record button to rebuild the voice ...

Страница 167: ...Appendix In This Section A 1 Specifications A 2 Regulatory Notices A 3 Additional Safety Information ...

Страница 168: ...e Charger Voltage range frequency 100 240V AC 50 60 Hz DC output 5V and 1A Display LCD Type 2 8 transmissive TFT LCD with backlight LEDs touch sensitive screen Resolution 240 x 320 dot pixels with 64K colors Alignment Portrait and Landscape Cellular Radio Module Functionality CDMA2000 1xEVDO 1xRTT and IS 95A B voice or data Mode Dual band 800 and 1900 MHz Internal Antenna Yes Physical Dimensions 4...

Страница 169: ... Key RESET button WLAN switch Hardware Keyboard QWERTY keyboard with two additional softkeys and an ambient sensor that detects low light and automatically illuminates the keyboard LEDs The left LED shows the following A blinking Blue light for Bluetooth system notification of powered up and ready to transmit radio frequency signal A blinking Green light for Wi Fi status When both Bluetooth and Wi...

Страница 170: ...FCC Rules These limits are designed to provide reasonable protection against harmful interference in a residential installation This equipment generates uses and can radiate radio frequency energy and if not installed and used in accordance with the instructions may cause harmful interference to radio communications However there is no guarantee that interference will not occur in a particular ins...

Страница 171: ...e used Body worn accessories that cannot maintain 1 5 cm separation distance between the user s body and the back of the device and have not been tested for typical body worn operations may not comply with FCC RF exposure limits and should be avoided When carrying the device on you turning the display in towards the body will minimize RF exposure and maximize antenna efficiency Modifications The FCC...

Страница 172: ... M3 or M4 meet FCC requirements and are likely to generate less interference to hearing devices than phones that are not labeled M4 is the better higher of the two ratings Mogul is rated M3 Hearing devices may also be rated Your hearing device manufacturer or hearing health professional may help you find this rating Higher ratings mean that the hearing device is relatively immune to interference no...

Страница 173: ...he closer you are to a wireless base station antenna the lower the power output Before a device model is available for sale to the public it must be tested and certified to the FCC that it does not exceed the limit established by the government adopted requirement for safe exposure The tests are performed in positions and locations e g at the ear and worn on the body as required by the FCC for each...

Страница 174: ...al conditions may cause variations in handset receiving signal strength Also the transmission of the ALI information is subject in part to system constraints within the wireless network to which the E911 signal is transmitted and over which UT Starcom has no control Finally customers are advised that the Mogul s ALI capability is to be used for E911 purposes only For more information about placing...

Страница 175: ...EEE logo shown at the left on the product or on its box indicates that this product must not be disposed of or dumped with your other household waste You are liable to dispose of all your electronic or electrical waste equipment by relocating over to the specified collection point for recycling of such hazardous waste Isolated collection and proper recovery of your electronic and electrical waste e...

Страница 176: ...xternal power source A product should be operated only from the type of power source indicated on the electrical ratings label If you are not sure of the type of power source required consult your authorized service provider or local power company For a product that operates from battery power or other sources refer to the operating instructions that are included with the product Handle battery pa...

Страница 177: ... contains chemicals or particles such as grain dust or metal powders ROAD SAFETY Vehicle drivers in motion are not permitted to use telephony services with handheld devices except in the case of emergency In some countries using hands free devices as an alternative is allowed SAFETY PRECAUTIONS FOR RADIO FREQUENCY RF EXPOSURE Avoid using your device near metal structures for example the steel fram...

Страница 178: ...amplifiers that produce heat Avoid wet areas Never use the product in a wet location Avoid using your device after a dramatic change in temperature When you move your device between environments with very different temperature and or humidity ranges condensation may form on or within the device To avoid damaging the device allow sufficient time for the moisture to evaporate before using the device N...

Страница 179: ...traffic or other pedestrian hazards Using The Phone Function Of Your Smart Device While Driving Is Extremely Dangerous Talking on or using your smart device s phone while driving is extremely dangerous and is illegal in some states Remember safety comes first Check the laws and regulations on the use of phones in the areas where you drive Always obey them If you must use the phone function while dri...

Страница 180: ...hones may interfere with some hearing aids In the event of such interference you may want to consult your service provider or call the customer service line to discuss alternatives For more regulatory information about hearing devices see FCC Hearing Aid Compatibility HAC Regulations for Wireless Devices OTHER MEDICAL DEVICES If you use any other personal medical device consult the manufacturer of...

Страница 181: ...acilities vehicles using liquefied petroleum gas such as propane or butane areas where the air contains chemicals or articles such as grain dust or metal powders and any other area where you would normally be advised to turn off your vehicle s engine General Safety Your pocket PC is a high quality piece of equipment Before operating read all instructions and cautionary markings on the product batte...

Страница 182: ...w battery when its operating time gradually decreases after fully charging Properly dispose of the battery according to local regulations DON Ts Don t attempt to disassemble the battery it is a sealed unit with no serviceable parts Don t expose the battery terminals to any other metal object e g by carrying it in your pocket or purse with other metallic objects such as coins clips and pens This ca...

Страница 183: ...C cord or plug on an AC phone charger If the plug will not fit into the available outlet have a proper outlet installed by a qualified electrician Never allow any liquids or water to spill on an AC phone charger when it is connected to an AC power source Always use the authorized UT Starcom AC phone charger to avoid any risk of bodily injury or damage to your cellular phone or battery Never attempt ...

Страница 184: ......

Страница 185: ...Index ...

Страница 186: ...2 Clock Alarms 21 Comm Manager 22 Conference call 41 Connection connect to Internet 125 connect to private network 128 Contacts 76 Contacts Picture capture mode 138 Copy pictures and video clips from PC to device 147 D Delete pictures and videos 148 Digital Rights Management DRM 152 Dimensions and weight 172 E Edit picture 149 Excel Mobile 19 F File Explorer 19 G Games 19 GIF animation 147 H Handw...

Страница 187: ...r Mobile 152 Playlists 154 Play GIF animation 147 Play media 153 Play videos 148 PowerPoint Mobile 19 Programs ActiveSync 19 Adobe Reader LE 19 117 AudiblePlayer 19 Calculator 19 Camera 19 138 Comm Manager 22 Excel Mobile 19 File Explorer 19 Games 19 GetGood 19 Help 19 Internet Explorer Mobile 19 Internet Sharing 19 Java 19 166 Messaging 20 Messenger 20 Notes 19 On Demand 19 Phone 19 Pictures Vide...

Страница 188: ...ode 138 Start up 14 Still image capture modes 141 Storage card 32 Symbol Pad 30 System information 172 T Tasks 20 80 Text size 64 Transcriber 29 Troubleshoot Windows Media Player 154 U USB modem 134 V Video capture mode 141 View photo slideshows 148 pictures 147 Voice mail 36 Voice Speed Dial overview 20 169 Voice tags create for phone numbers 169 create for programs 169 use 170 W Windows Live 108...

Отзывы: