13
January 2004
POS-TO GO
PAGE
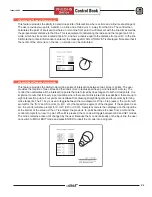
This is an incremental display that shows the travel distance remaining for the programmed move that the
machine is positioning to before it reaches that location. In rigid tapping, this number decreases to zero at the
bottom of the hole and then increases again as the reverse stroke occurs. When in the ZERO RET mode, this
display shows a diagnostic value. When in JOG mode, this display shows the total distance jogged.
D
Quick Zeroing Position Reference Display
-
The Pos-To Go display is also very handy as a quick zero reference. If
youre in the JOG mode, jogging an axes, and you want to see a quick zero reference. All you need to do is switch to
another Operation mode and then switch back to Handle Jog (Example: Pressing MDI and then back by pressing
HANDLE JOG). The POS-TO-GO will zero on all axes to begin showing a distance moved from a zero location. This
zero location may not be as secure as it would be if zeroing out the POS-OPER page. Though it is quicker and easier
to use, and most prefer this quick easy way to zero a location for reference.
OF
F
SET
DISPLAY
Tool length and part zero offsets are displayed and can be entered in the Offsets display. The same
offset number for both the Z length Geometry (H01) and tool Diameter compensation (D01) offsets
can be used, because a tool offset number contains separate columns for each. Work offsets can
also be specified for the fourth-axis
A
address in the work offset display, if enabled (Setting 30). The
fifth-axis
B
address can be specified and displayed, if enabled (Setting 78). Additional data fields are
made available for the fourth and fifth axis.
PAGE DOWN in the offset display will page through all possible tool offsets and then go into the work zero
offsets. If your at the top of the offset page, pressing PAGE UP will go into the Work Zero Offsets. Pressing the
OFSET key will also switch you back and forth between the too Length Geometry and Work Zero Offset
displays. The jog handle can also be used to scroll through the offsets in any of the operation modes, except
for JOG mode. If your in the Tool Length Geometry page, entering in a number and ARROW UP or ARROW
DOWN will quickly go to that offset number. Pressing HOME will send you back to the top of the offset page.
For each tool offset there is a Length Geometry value and a Wear value that are added together and used by
the control as one value. The initial setup value is entered into the geometry column by the setup person.
During operation, the operator makes minor wear adjustments to the wear column. This method allows the
operator to see actual tool wear by limiting it to the wear column. The geometry values can be entered auto-
matically by using the TOOL OFSET MESUR key during setup procedures. Note that this offset measurement
value is recognized with G43 (G43 H##). Refer to the Setup Procedures section for more information on how
to use the TOOL OFSET MESUR key.
Pressing OFSET will display Work Zero Offsets and then you can enter in the work offset value manually. You
can also enter in work offsets using the PART ZERO SET key. Refer to the Setup Procedures section for
more information on using this key.
When entering offset numbers, pressing F1 will set the value into the cursor selected register. Pressing WRITE
will add the value of your entry into the cursor selected register. This allows for adjustments to be made to the
offsets. Note that entering a negative value and pressing WRITE will decrease the value of the offset. Pressing
F2 will set the reverse value entered into an offset (If F2 DISK WR, is not at the bottom of the display). F2 is
not used very often in the offset display.
D
Clearing All Offsets
- When youre in the Tool Length Offset display, you can clear all the tool offsets by
pressing the
ORIGIN
key. The control will prompt ZERO ALL (Y/N)? to make sure this is what you really want
to do. If
Y
is pressed, all the offsets in that area will be zeroed. The Work Zero Offsets and in the Macro
Variables page in CURNT COMDS display can be cleared the same way.
(Any Mill Control ver. 10.02 and above; any Lathe Control ver. 3.00 and above.)
OFSET
Содержание EC Series
Страница 1: ...January 2004 ...
Страница 7: ...V I January 2004 ...
Страница 125: ...118 January 2004 ...
Страница 126: ......

