


2. Select the Patrol No. in the drop-down list of ”Patrol”.
3. Click the “Set” button to add key points for the patrol.
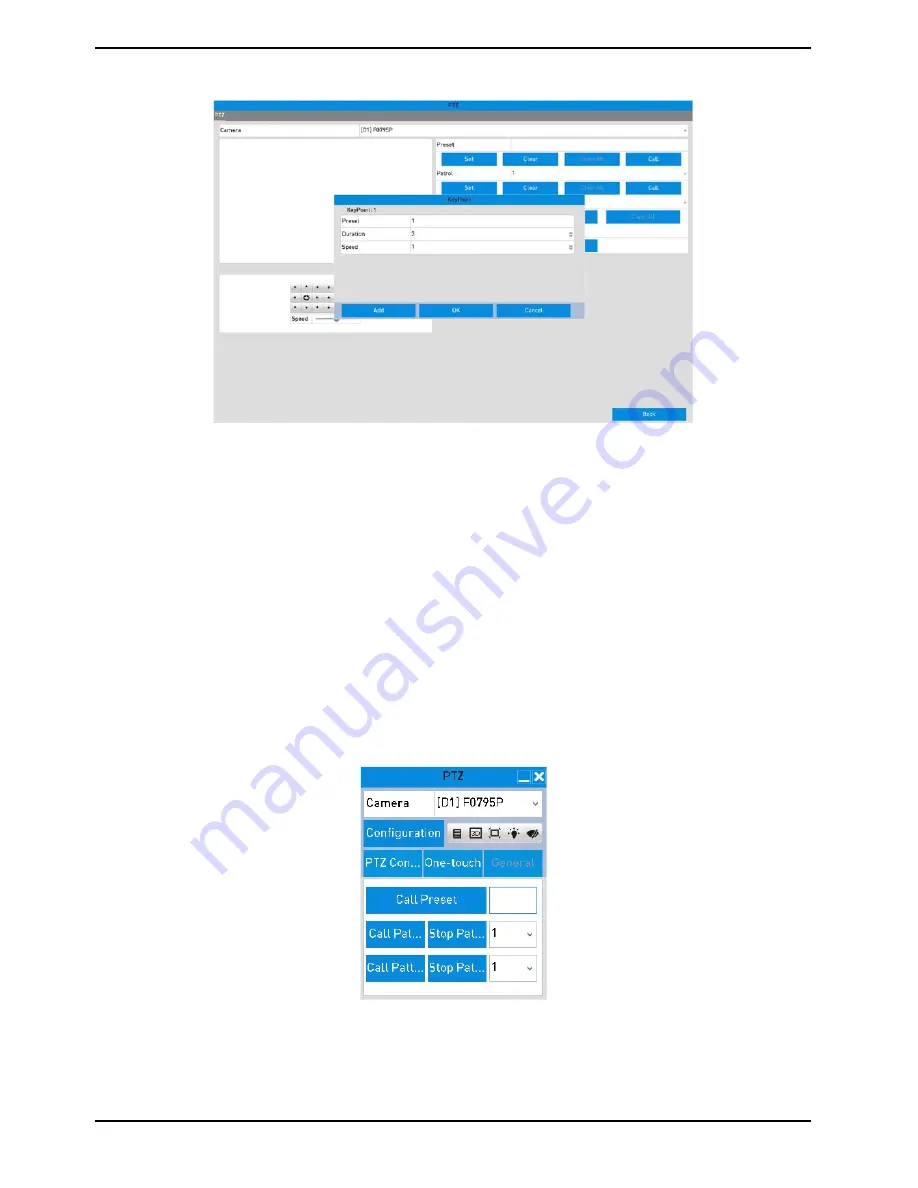
4. Con
fi
gure the key point parameters, such as the Key Point No., duration of staying for one key point and speed
of patrol. The key point is corresponding to the preset. The “Key Point” No. Determines the order which the PTZ
will follow while cycling through the patrol. The “Duration” refers to the time span for staying at the
corresponding key point. “Speed” defines the speed at which the PTZ will move from one key point to the next.
5. Click the “Add” button to add the next key point to the patrol, and you can click the “OK” button to save the key
point to the patrol.
You can delete all the key points by clicking the “Clear” button for the selected patrol, or click the “Clear All”
button to delete all the key points for all patrols.
7.2.4. Calling the Patrols
Calling a patrol makes the PTZ move according the predefined patrol path.
Steps:
1. Click the button “PTZ” in the lower-right corner of the PTZ setting interface;
Or press the PTZ button on the front panel or click the “PTZ Control” icon in the quick setting bar, or select the
PTZ option in the right-click menu to show the PTZ control panel.
2. Click the “>” button to show the general settings of the PTZ control.
3. Select a patrol in the dropdown list and click the “Call Patrol” button to call it.
4. You can click the “Stop Patrol” button to stop calling it.
46
English
Содержание GRN-R5128N
Страница 2: ......
Страница 12: ...4 Installation 4 1 Connections and Control Keys Front View 12 English...
Страница 18: ...18 English...
Страница 173: ...140 W Power Consumption 16 kg Weight 442 x 494 x 164 mm Dimensions wxhxd 173 English...


