


3. Choose the camera for PTZ setting in the “Camera” dropdown list.
4. Enter the parameters of the PTZ camera.
NOTE: All the parameters should be exactly the same as the PTZ camera parameters.
5. Click the “Apply” button to save the settings.
7.2. Setting the PTZ Presets, Patrols & Patterns
Before you start:
Please make sure that the presets, patrols and patterns should be supported by PTZ protocols.
7.2.1. Customising the Presets
Follow the steps to set the Preset location which you want the PTZ camera to point to when an event takes place.
Steps:
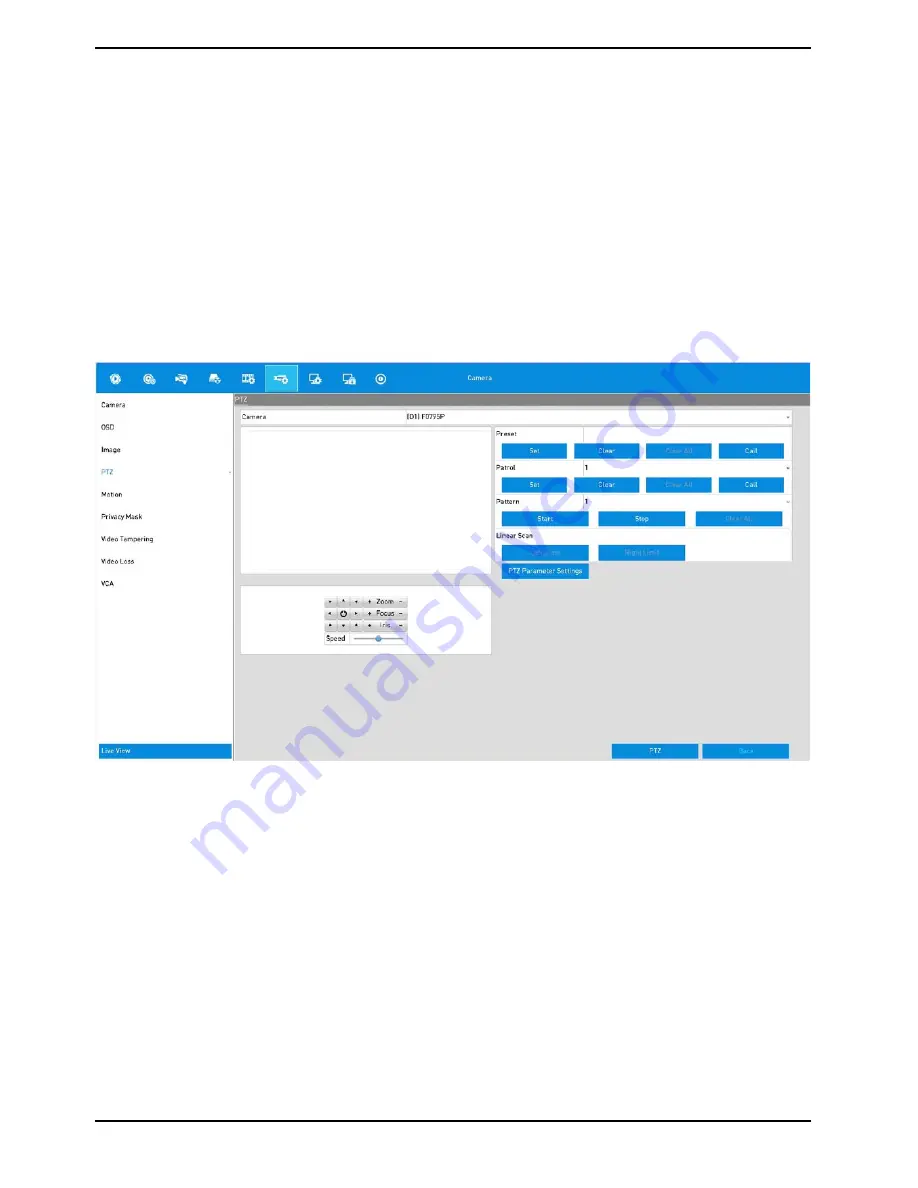
1. Enter the PTZ Control interface: Menu> Camera> PTZ
2. Use the directional button to wheel the camera to the location where you want to set the limit, and click the
“Left Limit” or “Right Limit” button to link the location to the corresponding limit.
NOTE: A speed dome starts a linear scan from the left limit to the right limit, and you must set the left limit on the
left side of the right limit, as well the angle from the left limit to the right limit should be no more than 180º.
44
English
Содержание GRN-R5128N
Страница 2: ......
Страница 12: ...4 Installation 4 1 Connections and Control Keys Front View 12 English...
Страница 18: ...18 English...
Страница 173: ...140 W Power Consumption 16 kg Weight 442 x 494 x 164 mm Dimensions wxhxd 173 English...


