


3. Add the allocated “NetHDD”.
4. Select the type from “NAS” or “IP SAN”.
5. Con
fi
gure the NAS or IP SAN settings.
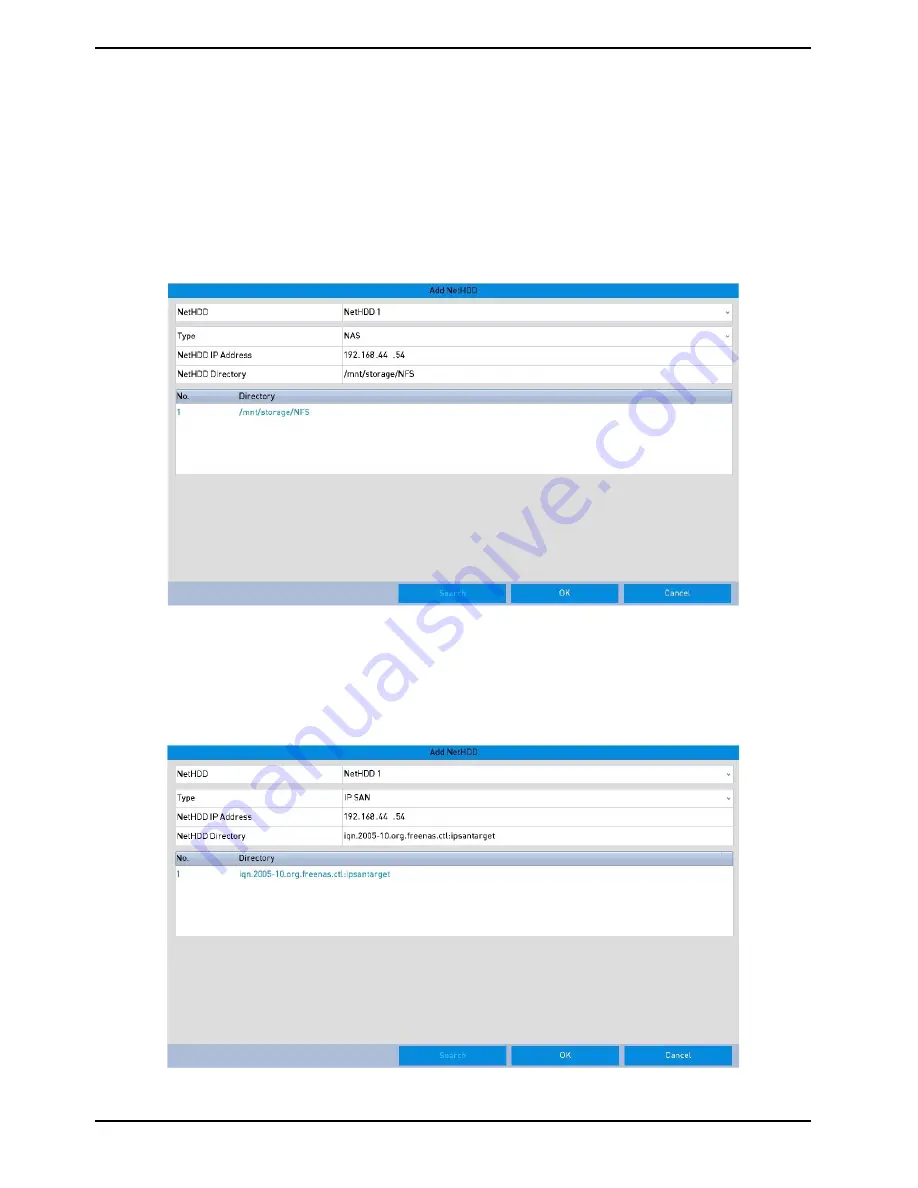
- Add an NAS disk:
1) Enter the NetHDD IP address in the text
fi
eld.
2) Click the “Search” button to search the available NAS disks.
3) Select the NAS disk from the list shown below.
Or you can just manually enter the directory in the text field of the NetHDD Directory.
4) Click the “OK” button to add the con
fi
gured NAS disk.
NOTE: Up to 8 NAS disks can be added (with a max. capacity of 8TB each).
- Add an IP SAN:
1) Enter the NetHDD IP address in the text
fi
eld.
2) Click the “Search” button to search the available IP SAN disks.
3) Select the IP SAN disk from the list shown below.
4) Click the “OK” button to add the selected IP SAN disk.
NOTE: Only 1 IP SAN disk can be added.
133
English
Содержание GRN-R5128N
Страница 2: ......
Страница 12: ...4 Installation 4 1 Connections and Control Keys Front View 12 English...
Страница 18: ...18 English...
Страница 173: ...140 W Power Consumption 16 kg Weight 442 x 494 x 164 mm Dimensions wxhxd 173 English...


