


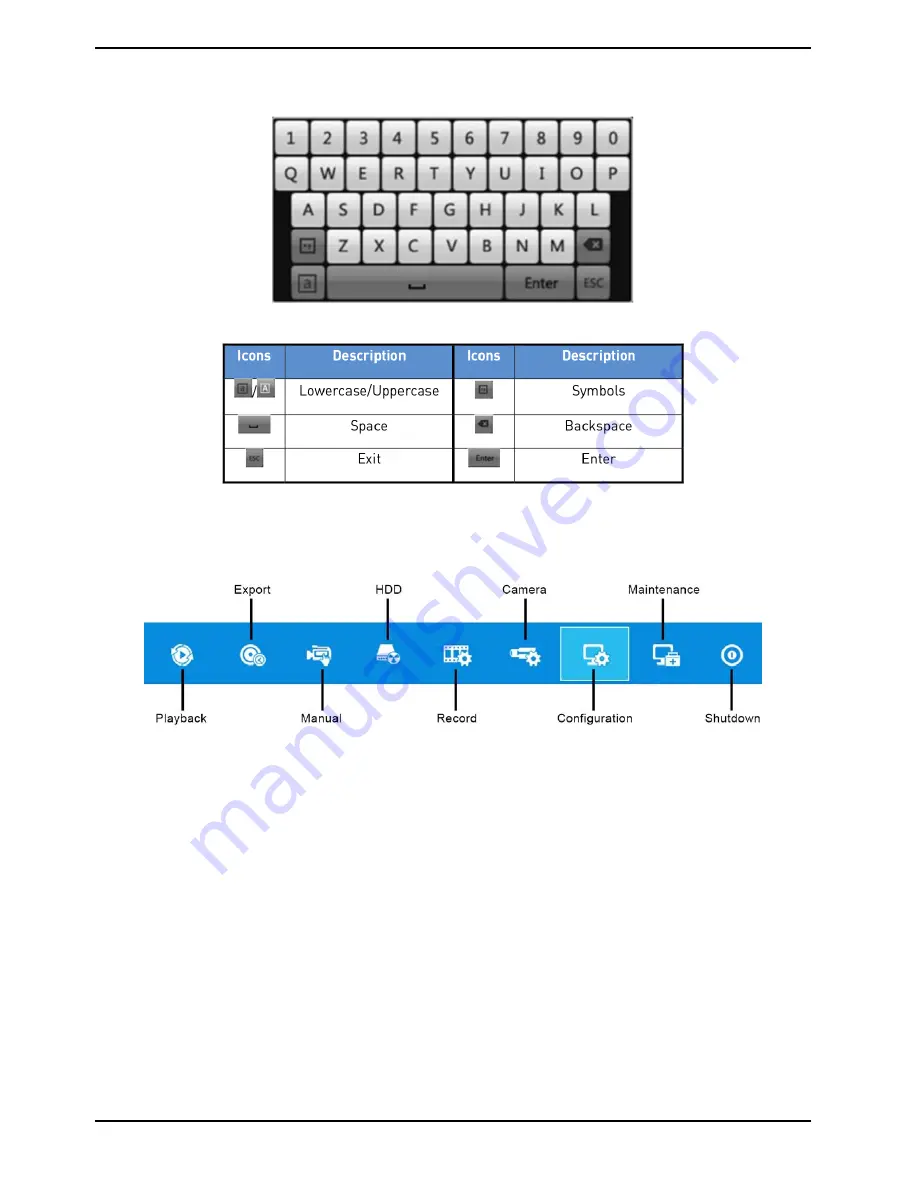
5.1.4. Soft Keyboard
Overview over the Soft Keyboard:
Description of the buttons on the Soft Keyboard:
5.2. Menu Overview
After entering the menu, the menu bar on the top of the screen can be clicked on to set other functions.
From the left to the right, the icon stand for Playback, Export, Manual, HDD, Record, Camera, Configuration,
Maintenance and Shutdown. And the current submenu you are in is marked in light green.
5.3. Starting Up and Shutting Down
Proper startup and shutdown procedures are crucial to expanding the life of the NVR/DVR.
Before you start:
Check that the voltage of the extra power supply is the same as the NVR/DVR’s requirement, and the ground
connection is working properly.
Starting up the NVR/DVR:
Steps:
1. Check whether the power supply is plugged into an electrical outlet. It is HIGHLY recommended that an
Uninterruptible Power Supply (UPS) is used in conjunction with the device. The Power indicator LED on the front
panel should be red, indicating the device gets the power supply.
2. Turn on the power switch on the rear panel if the device starts up for the
fi
rst time, or press the “Standby”
button on the front panel. The Power indicator LED should turn blue indicating that the unit begins to start up.
3. After startup, the Power indicator LED remains blue. A splash screen with the status of the HDD appears on
the monitor. The row of icons at the bottom of the screen shows the HDD status. ‘X’ means that the HDD is not
installed or cannot be detected.
21
English
Содержание GRN-R5128N
Страница 2: ......
Страница 12: ...4 Installation 4 1 Connections and Control Keys Front View 12 English...
Страница 18: ...18 English...
Страница 173: ...140 W Power Consumption 16 kg Weight 442 x 494 x 164 mm Dimensions wxhxd 173 English...


