


Genie Monochrome Series-GigE Vision Camera
Installing the Genie Camera
•
25
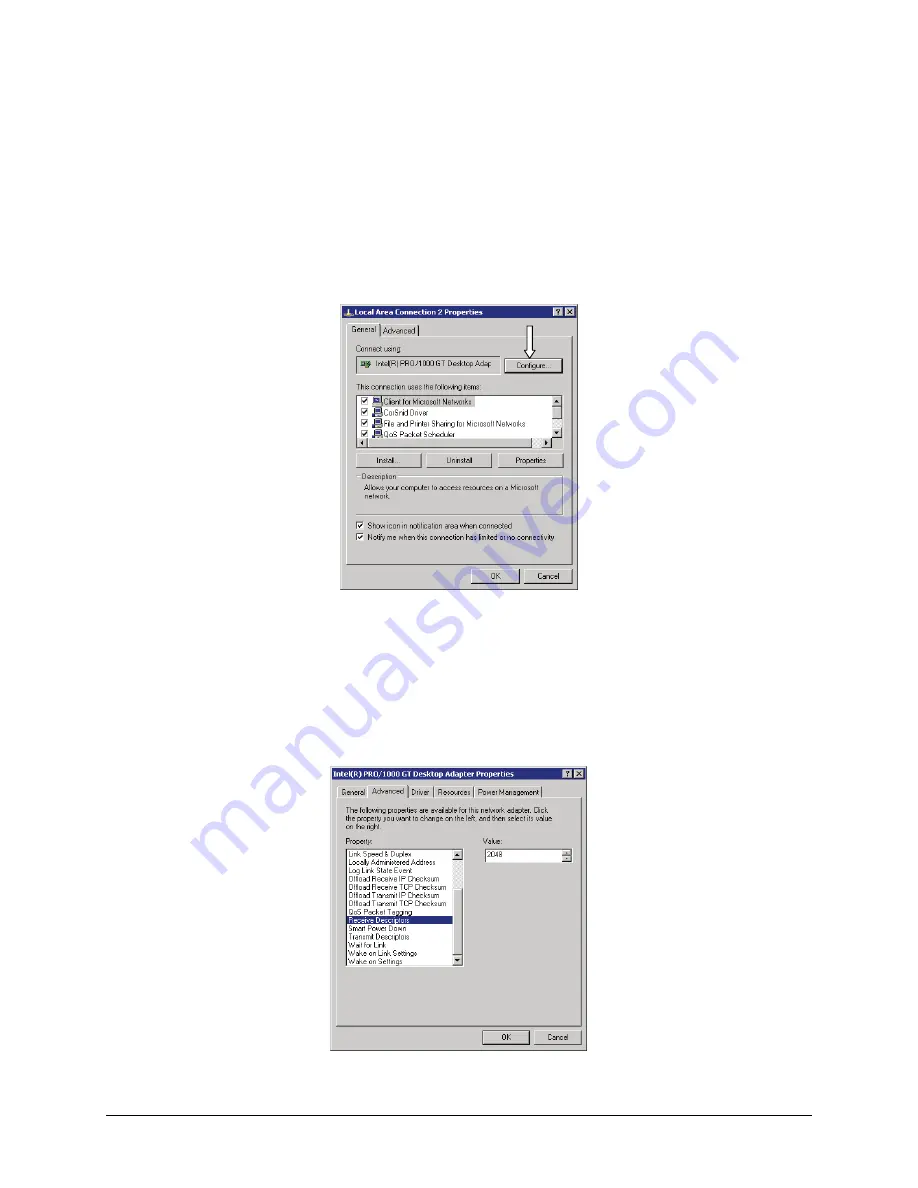
Select NIC Advanced Configuration Properties
Note that the following applies to the Intel Pro NIC driver. Other NIC products may or may not have similar
configuration parameters.
•
From the
Start
menu go to
Settings • Control Panel • Network Connections
and select the NIC used to
connect the Genie to.
•
Open the
Properties
for the Ethernet GigE NIC used with the Genie.
•
Click the
Configure
button.
GigE NIC Configuration
•
Click on the
Advanced
tab. Modify the values for Receive Descriptors and Jumbo Frames as follows.
Receive Descriptors
•
Select the 'Receive Descriptors' property.
•
Change the value to the largest value supported by the installed NIC. In this example the value is 2048.
GigE NIC Receive Buffers
Содержание M1024
Страница 88: ...86 Network Overview Tools Genie Monochrome Series GigE Vision Camera...
Страница 111: ...Genie Monochrome Series GigE Vision Camera Technical Specifications 109 EC FCC Declaration of Conformity...
Страница 112: ......
Страница 126: ...124 Troubleshooting Genie Monochrome Series GigE Vision Camera...
Страница 132: ...130 Glossary of Terms Genie Monochrome Series GigE Vision Camera...


