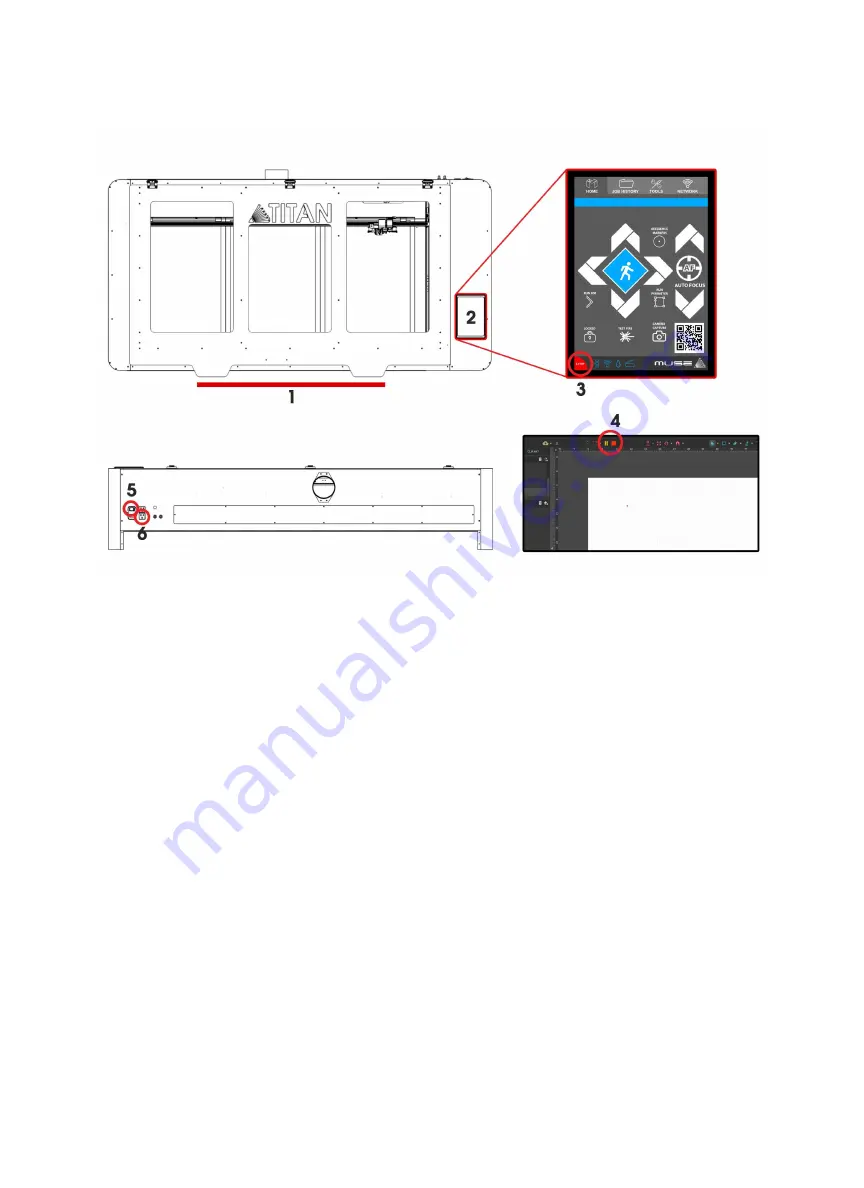
Stopping the Laser
Once a project has begun, the laser will continue until the project is complete. If for any reason an operator
needs to stop the laser immediately, choose one of these options:
1.
Open the Lid:
The large workbed access lid is installed with a device that automatically (and instantly) cuts
off the laser if it is opened even slightly. This should be your first method of stopping the laser during an
emergency. This is a safety feature of Muse Titan and under no circumstances should this safe lid
auto-shutoff device be tampered with or removed. Doing so will void your machine’s warranty. If the
machine ever fails to shut off the laser when the safety lid is open, immediately unplug the machine and
contact customer service.
2.
Touch Screen Pause Button:
Top of Machine Pause Button. On the top of Muse Titan machines there is a
button that can pause or stop the laser. Press once to pause the job. Press and hold to stop the job. Once a
job is stopped, starting again will start the project from the beginning.
3.
E-Stop:
On the touch screen, in the lower left corner, is an “Emergency” stop button (E-Stop). Pushing this
button will instantly cut power to the laser. Be aware this is still part of the touch screen and is fragile. Do not
slam this button.
4.
Software Pause Button:
In the software, on your computer, you can click the Pause Button (converted
Play button when the laser is running a job) to halt the laser. This may take a second to process,so it is not
recommended as a method of stopping the laser in an emergency.
5.
Power Switch:
At the back of the machine is the power on/off switch. Flipping this switch to the off position
instantly cuts power from the laser head (and the entire machine). Using this option will completely cut
power from the laser, the touch screen and all other Muse Titan systems.
6.
Unplug Power:
You can also simply unplug the power cord of the main Muse Titan unit. This should be a
last resort method for emergencies as the other methods are quicker to access and prevent pulling on cords
and connections.
66
Содержание MUSE TITAM
Страница 1: ......
Страница 4: ...Symbols and Definitions 3...
Страница 38: ...Settings A Laser Information regarding device options 37 Info Information regarding your machine...
Страница 39: ...Rotary Shows information on rotary Defaults Set image defaults with dither options 38...
Страница 40: ...Editor Editing menu for RE3 Network Network settings for RE3 39...
Страница 49: ...48 Engraving Rastering Power Settings...


