243
Displaying/Editing/Managing Data
Using the Infrared Remote Control
Once infrared remote control software is downloaded from
a site and saved in the FOMA terminal, the FOMA terminal
can be used as the TV or DVD player remote control.
To use the infrared remote control, it is necessary to download
the software corresponding to the target equipment. Even if
the corresponding software is used, some equipment may not
be operated.
The infrared remote control key operations vary depending on
the software.
■
Remote control operation
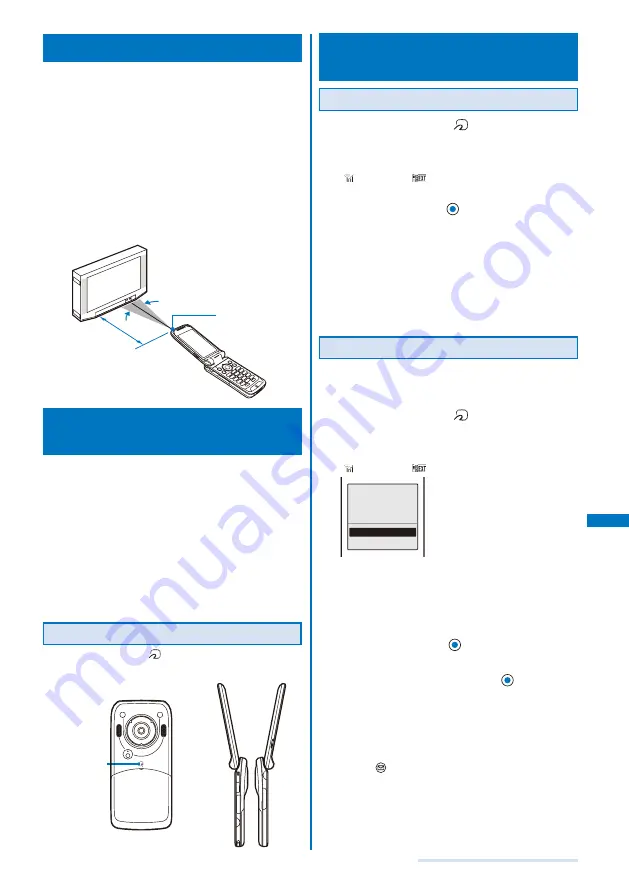
When using this function, point the FOMA terminal’s infrared
data port at the remote control receiver of the TV or DVD player
and operate the FOMA terminal within about 4 m remote control
range. Note that communication may be affected by the target
equipment or ambient brightness.
Within
about 4 m
Reception angle:
±15 degrees
off axis
Infrared
data port
What is iC Communication
Function?
You can send and receive data by placing the FOMA
terminal provided with the iC communication function
over the FeliCa mark of another FOMA terminal.
Data that can be sent and received by iC communication is the
same as the data exchanged using infrared communication (P.241).
You cannot perform the iC communication during a call, i-mode/
packet/64K data/infrared communication, or when the Lock all,
Omakase Lock, PIM lock, Self mode, or IC card lock is set.
To receive data using iC communication, make sure that the
FOMA terminal is in stand-by status. You cannot receive data
when operation of another function is in progress.
During the iC communication, the status of the FOMA terminal is
the same as the outside of the service area status. Therefore, you
cannot place a call or perform i-mode and data communication.
Performing iC Communication
Place the FeliCa mark “
” of the FOMA terminal over that of
the other terminal. Do not move either of the FOMA terminals
until the data exchange is completed.
FeliCa mark
Receiving Data Using iC
Communication
Receiving Data
1
Place the FeliCa mark “
” of the FOMA terminal
over that of the other terminal in the stand-by
display on both terminals.
The vibrator vibrates and the FeliCa Sign lights.
“
” changes to “
” and data exchange is started.
The screen for confirming whether to save data appears.
2
Select [Yes] and press
.
The received data is saved.
When you receive Phonebook data
The screen for confirming whether to save data in the
PushTalk phonebook appears. If you select [Yes], the
data is saved in both the PushTalk and FOMA terminal
phonebooks. If you select [No], the data is saved in the
FOMA terminal phonebook only. When there are several
phone numbers, select the phone number to be saved
in the PushTalk phonebook.
Receiving All Data
It is necessary that you and the sender determine the 4-digit
authentication password beforehand.
Example: Adding received data
1
Place the FeliCa mark “
” of the FOMA terminal
over that of the other terminal in the stand-by
display on both terminals.
The vibrator vibrates and the FeliCa Sign lights.
“
” changes to “
”.
Select the way
to save
Add
Overwrite
[Add]:
Save received data by adding to the existing data.
[Overwrite]:
The screen for confirming whether to overwrite the
existing data with the received data appears. Note that
all existing data is deleted if you select [Yes].
2
Select [Add] and press
.
The Security code screen appears.
3
Enter the Security code and press
(OK).
The Authentication password screen appears.
4
Enter the authentication password.
Data exchange is started and the data is added to the
existing data.
To cancel receiving
Press
(Cancel).
Содержание SO903i
Страница 338: ...335 Index Quick Manual Index 336 Quick Manual 346 ...
Страница 347: ...MEMO ...
Страница 348: ...MEMO ...
Страница 380: ...Kuten Code List 06 11 Ver 1 A CKB 100 11 1 ...
Страница 382: ...2 ...
Страница 383: ...3 ...
Страница 384: ...4 ...


