269
After a Power Cleaning, you must turn off the product and wait at least 12 hours before running another
Power Cleaning.
1.
Turn off the product.
2.
Visually check the ink levels and make sure each ink tank is at least one-third full.
Caution:
If you run a Power Cleaning when the ink levels are low, you may damage the product.
3.
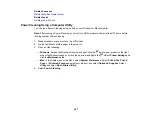
Press and hold the
power button and the
help button at the same time until the Power Cleaning
screen appears on the LCD screen.
4.
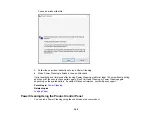
Follow the on-screen instructions to run the Power Cleaning.
5.
When the Power Cleaning is finished, run a nozzle check.
If the print quality did not improve, turn off the printer and wait at least 12 hours before running
another Power Cleaning.
If the print quality does not improve after running the Power Cleaning utility multiple times, contact
Epson for support.
Parent topic:
Related tasks
Related topics
Cleaning the Paper Guide
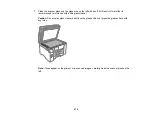
If you see ink on the back of a printout, you can clean the paper guide rollers to remove any excess ink.
1.
If printouts are smeared or scuffed, load plain paper in the paper source that you want to clean in
one of these sizes: Letter (8.5 × 11 inches [216 × 279 mm]) or A4 (8.3 × 11.7 inches
[210 × 297 mm]).
2.
Press the
home button, if necessary.
3.
Select
Settings
>
Maintenance
>
Paper Guide Cleaning
.
4.
Select the paper source you want to clean.
5.
Follow the on-screen instructions to clean the paper guide.
6.
Repeat these steps as necessary until the paper comes out clean.
Содержание EcoTank L15150
Страница 1: ...L15150 L15160 User s Guide ...
Страница 2: ......
Страница 46: ...46 Related topics Wi Fi or Wired Networking ...
Страница 103: ...103 You see this window 3 Select the double sided printing options you want to use 4 Click OK to return to the Main tab ...
Страница 127: ...127 10 Select the Layout tab 11 Select the orientation of your document as the Orientation setting ...
Страница 160: ...160 You see an Epson Scan 2 window like this ...
Страница 162: ...162 You see an Epson Scan 2 window like this ...
Страница 178: ...178 You see a screen like this 2 Click the Save Settings tab ...
Страница 183: ...183 You see this window ...
Страница 279: ...279 Print Quality Adjustment ...

