154
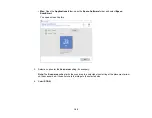
13. Click
OK
or
Close
.
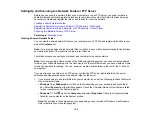
Now you can register the folder path to your product contacts list.
Parent topic:
Setting Up and Scanning to a Network Folder or FTP Server
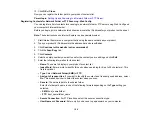
Registering Contacts for Network Folder or FTP Scanning - Web Config
You can register a list of contacts for scanning to a network folder or FTP server using Web Config and
your computer's internet browser.
Before you begin, print a network status sheet and locate the IP address for your product on the sheet.
Note:
These instructions use Internet Explorer as an example browser.
1.
Start Internet Explorer on a computer that is using the same network as your product.
2.
Type your product's IP address into the address bar and press
Enter
.
3.
Click
Continue to this website (not recommended)
.
4.
Click the
Scan/Copy
tab.
5.
Click
Contacts
.
6.
Select an empty number you want to use for the contact you are adding and click
Edit
.
7.
Enter the following information for the contact:
•
Name
: The name to display in your product's contact list.
•
Index Word
: Enter a word to identify this entry when searching for it (up to 30 characters). This
field is optional.
•
Type
: Select
Network Folder (SMB)
or
FTP
.
•
Assign to Frequent Use
: If you want to identify the contact as a frequently used address, select
On
. This makes it quicker to select the contact when you scan.
•
Save to
: The network path to the shared folder.
Enter the folder path name in one of the following formats depending on the
Type
setting you
selected:
•
SMB
: host_name\folder
•
FTP
: host_name/folder_name
•
Secure Connection
: For FTP locations, select the secure connection type.
•
User Name
and
Password
: Enter only if you have set up a password on your computer.
Содержание EcoTank L15150
Страница 1: ...L15150 L15160 User s Guide ...
Страница 2: ......
Страница 46: ...46 Related topics Wi Fi or Wired Networking ...
Страница 103: ...103 You see this window 3 Select the double sided printing options you want to use 4 Click OK to return to the Main tab ...
Страница 127: ...127 10 Select the Layout tab 11 Select the orientation of your document as the Orientation setting ...
Страница 160: ...160 You see an Epson Scan 2 window like this ...
Страница 162: ...162 You see an Epson Scan 2 window like this ...
Страница 178: ...178 You see a screen like this 2 Click the Save Settings tab ...
Страница 183: ...183 You see this window ...
Страница 279: ...279 Print Quality Adjustment ...


