215
Note:
When the maintenance box is full, you cannot print or clean the print head until it is replaced.
However, you can perform operations that do not require ink, such as scanning.
Note the following precautions when replacing the maintenance box:
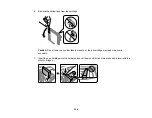
• Do not touch the green chip on the side of the maintenance box.
• Do not drop the maintenance box or subject it to strong shocks.
• Do not replace the maintenance box during printing; otherwise, ink may leak.
• Do not remove the maintenance box or its cover except when replacing the maintenance box;
otherwise, ink may leak.
• If you cannot replace the cover, the maintenance box may not be installed correctly. Remove the
maintenance box and reinstall it.
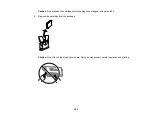
• Do not tilt the maintenance box after removing it; otherwise, ink may leak.
• Do not touch the openings in the maintenance box or you may get ink on you.
• Do not reuse a maintenance box that has been removed and left uninstalled for a long period.
• Keep the maintenance box out of direct sunlight.
• Do not store the maintenance box in high or freezing temperatures.
Note:
The maintenance box is a user-replaceable part and is not covered by the product warranty.
Parent topic:
Содержание C11CK60201
Страница 1: ...WF 2960 User s Guide ...
Страница 2: ......
Страница 13: ...13 WF 2960 User s Guide Welcome to the WF 2960 User s Guide For a printable PDF copy of this guide click here ...
Страница 17: ...17 Product Parts Inside 1 Document cover 2 Scanner glass 3 Control panel 4 Front cover ...
Страница 52: ...52 Parent topic Changing or Updating Network Connections Related references Status Icon Information ...
Страница 109: ...109 10 Select the Layout tab 11 Select the orientation of your document as the Orientation setting ...
Страница 134: ...134 You see an Epson Scan 2 window like this ...
Страница 136: ...136 You see an Epson Scan 2 window like this ...
Страница 150: ...150 You see a screen like this 2 Click the Save Settings tab ...
Страница 155: ...155 You see this window ...
Страница 267: ...267 2 Squeeze the tabs and remove the rear cover 3 Carefully remove any jammed paper from inside the product ...
Страница 269: ...269 3 Open the ADF cover 4 Carefully remove any jammed pages from beneath the ADF ...


