Ecosaire
®
EN Series Precision Air Conditioner Owners Manual
56
Ecosaire
®
July 2009
Data subject to change without notice.
Completed by _________________________________ Ph.
( ) _ _ _ - _ _ _ _
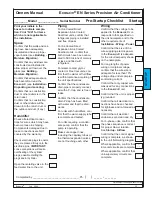
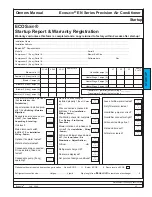
Unit preparation
Confirm that the
Ecosaire
®
unit is properly supported.
Confirm that all shipping
blocks, shipping braces, com-
pressor locks, etc., have been
removed or released for nor-
mal operation.
Confirm that the air volumes
have been measured and are
correct (see
Installation - Air
Distribution - Adjust Airflow
).
Confirm that a copy of the air-
balance report is available.
Confirm that all air filters are
clean and in place.
Confirm that the air heat
exchangers are clean.
Confirm that power has been
applied to the crankcase
heaters for at least 12 hours.
Check that the blower(s)
rotates freely.
Check that the blower wheel
is securely tightened to the
shafts.
Air distribution
Confirm that all ducts and
plenums have been sized and
installed correctly to limit the
external static pressure to no
more than the specified
amount.
Confirm that all grilles and dif-
fusers are unobstructed.
Confirm that all construction
dust and debris has been
removed from ducts and
plenums.
For glycol-cooled and Free-
Cool units
,
make sure all pipe
air vents are closed tightly.
Remote Heat
Exchanger (if any)
Confirm that the heat
exchanger is located properly
for good airflow (see
Installation- Locate Remote
Heat Exchanger
).
Confirm that the voltage
applied to the heat exchanger
corresponds to that specified
on the nameplate, NEMA MG-
1 and ANSI C84.1.
Confirm that the heat
exchanger tubes have been
tested for refrigerant leaks.
Confirm that the top and side
clearances are at least as
large as specified in
Installation - Locate Remote
Heat Exchanger
.
Confirm that no construction
dust, leaves, or other debris
will be drawn into the heat
exchangers.
Confirm that any shipping
blocks, spacers, or retainers
have been removed.
Check that the heat exchang-
ers are clean, the fins are
straight, and there are no
obstructions to airflow.
your
initials
your
initials
your
initials
your
initials
your
initials
your
initials
your
initials
your
initials
your
initials
your
initials
your
initials
your
initials
your
initials
your
initials
your
initials
your
initials
your
initials
your
initials
your
initials
your
initials
Startup Pre-Startup Checklist
Model ________ Serial No. ____________
ST
ARTUP
Содержание EN Series
Страница 1: ......
Страница 103: ...OEM User manual ...
Страница 104: ......
Страница 106: ......
Страница 108: ......
Страница 110: ......
Страница 115: ...OEM CAREL code 030221791 rel 2 1 21 09 07 7 KUE 4 L H A1 A2 S2 S1 V3 V1 P S V X X1 Y Y1 KUE CC ...
Страница 123: ...OEM CAREL code 030221791 rel 2 1 21 09 07 15 4 2 Single phase wiring diagram INTERNAL TAM CP2 ...
Страница 124: ...OEM CAREL code 030221791 rel 2 1 21 09 07 16 4 3 Single phase wiring diagram INTERNAL TAM with contactor CP4 ...
Страница 125: ...OEM CAREL code 030221791 rel 2 1 21 09 07 17 4 4 Single phase wiring diagram EXTERNAL TAM with contactor CP3 ...
Страница 126: ...OEM CAREL code 030221791 rel 2 1 21 09 07 18 4 5 Three phase wiring diagram EXTERNAL TAM with contactor CP3 ...
Страница 127: ...OEM CAREL code 030221791 rel 2 1 21 09 07 19 4 6 Three phase wiring diagram INTERNAL TAM with contactor CP4 ...
Страница 141: ......


