MAINTENANCE
SECTION 5
Page 39
DRESSTA
OM515C520C99/1E
ENGINE
5.13.1. FUEL TANK
Check the fuel level at the gauge on the instrument panel. To prevent moisture due to condensation,
the fuel tank must be filled at the end of each day’s operation.
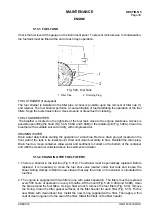
Fig. 5.29. Fuel Tank
1. Filler Pipe 2. Draining Plug
FUEL STRAINER (if equipped)
The fuel strainer is installed in the filler pipe. Access is possible upon the removal of filler cap (1)
and retainer. The fuel strainer performs a coarse filtration of fuel facilitating the operation of the fuel
filters. Keep the fuel strainer clean. Use kerosene or diesel fuel for cleaning.
FUEL TANK BREATHER
The breather is located on the right side of the fuel tank, close to the engine crankcase. Access is
possible upon lifting the hood (Fig. 5.48, 5.48A and 5.48B) or the radiator grill (Fig. 5.48A). Clean the
breather with a suitable solvent and dry with compressed air.
DRAINING WATER
Drain water daily before starting the operation of a machine. Remove drain plug (2) located on the
front wall of the tank in its lowest point. Wait until clean fuel starts to flow. Reinstall the drain plug.
Drain fuel to a clean container. Allow water and sediment to collect on the bottom of the container
and refill the clean fuel collected above the sediment and water.
5.13.2. CHANGING THE FUEL FILTERS
1. There is a strainer in the fuel line (Fig. 5.31A). The strainer must be periodically replaced. Before
replaced, it is necessary to close the fuel shut valve located under fuel tank and loosen the
hoses farting clamps. Install the new strainer that way the arrow on the strainer is orientated the
fuel flow.
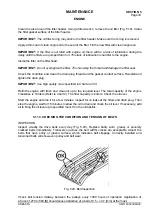
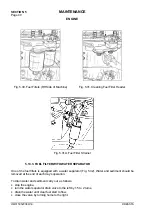
2. The engine is equipped with two filters (one with water separator). The filters must be replaced
every 500 hours of operation or every 6 months. Lift the hood (Fig. 5.48, 5.48A and 5.48B), clean
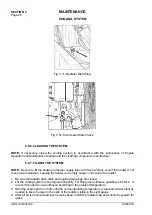
the area around the fuel filters. Using a filter wrench, remove the fuel filters (Fig. 5.30), remove
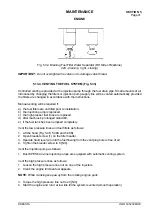
the O-ring. Clean the fitter gasket surfaces of the filter header for each filter (Fig. 5.31). Fill the
new filters with clean diesel fuel. Install the new O-ring supplied with a filter. Then apply a thin
coat of clean engine oil to the seal of the filter. Install the filters on the filter header.
Содержание 515C
Страница 3: ...OM515C520C99 1E DRESSTA ...
Страница 5: ......
Страница 7: ......
Страница 10: ...SECTION 1 INTRODUCTION ...
Страница 11: ...INTRODUCTION SECTION 1 DRESSTA OM515C520C99 1E SECTION CONTENTS 1 1 Introduction 3 1 2 Serial Numbers 5 ...
Страница 12: ......
Страница 17: ...SECTION 2 SAFETY PRECAUTIONS ...
Страница 19: ......
Страница 37: ...SECTION 3 MACHINE TRANSPORT AND STORAGE ...
Страница 39: ......
Страница 49: ...SECTION 4 OPERATING ...
Страница 51: ......
Страница 55: ...SECTION 4 OPERATING Page 6 OM515C520C99 1E DRESSTA UNIVERSAL SYMBOLS FOR INSTRUMENTS AND CONTROLS ...
Страница 107: ...SECTION 5 MAINTENANCE ...
Страница 165: ...SECTION 6 SPECIFICATIONS ...
Страница 167: ......
Страница 181: ...SECTION 6 SPECIFICATIONS Page 16 OM515C520C99 1E DRESSTA WIRING DIAGRAMS ...
Страница 182: ...SPECIFICATIONS SECTION 6 Page 17 DRESSTA OM515C520C99 1E WIRING DIAGRAMS ...
Страница 187: ...SECTION 6 SPECIFICATIONS Page 22 OM515C520C99 1E DRESSTA WIRING DIAGRAMS ...
Страница 192: ...SPECIFICATIONS SECTION 6 Page 27 DRESSTA OM515C520C99 1E SPECIFICATIONS Fig 6 10A Overall Dimensions Wheel Loader 520C ...

