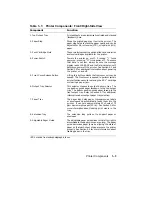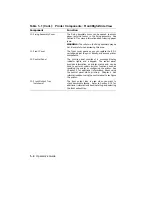
Table 1–1: Printer Components: Front/Right-Side View
Component
Function
1. Top Output Tray
Printed sheets are automatically collated and stacked
(facedown) here.
2. Paper Stop
Stops the printed paper as it exits the printer. The
paper stop helps to stack the paper neatly and can be
adjusted for A4, letter-size (LTR), or legal-size (LGL)
paper.
3. Font Cartridge Slots
These two slots accept the optional font and emulation
protocol cartridges available for the printer.
4. Power Switch
Powers the printer on or off.
Pressing ‘‘ | ’’ turns
power on; pressing ‘‘O’’ turns power off. To ensure
that data is not lost, always be sure the message
display reads 00 READY and the Data indicator is off,
before you power off the printer. See Section 2.1 and
Section 2.2 for additional information about powering
the printer on and off.
5. Front Cover Release Button
Lifting this button unlocks the front cover so it can be
opened. The front cover is opened to perform certain
printer funtions as such replacing the EP-L
1
cartridge
or clearing a paper jam.
6. Output Tray Selector
This selector chooses the output delivery tray. The
top position sends paper facedown to the top output
tray. The bottom position sends paper faceup to the
front output tray. Refer to Section 2.7 for additional
information about output paper tray selection.
7. Paper Tray
The paper tray holds paper, transparencies, labels,
or envelopes and automatically feeds them into the
printer. It can hold approximately 50 sheets of 75
g/m
2
basis weight paper (20 lb.). See Section 2.4 for
more information about loading print media in the
tray.
8. Extension Tray
The extension tray pulls out to support paper or
envelopes.
9. Adjustable Paper Guide
The adjustable paper guide slides to the left or right to
accommodate the paper size you are using. The paper
guide minimizes paper jams by aligning the stack of
paper so that each sheet of paper enters the printer
properly. See Section 2.4 for more information about
loading paper in the tray.
1
EP-L stands for electrophotographic laser.
Printer Components
1–3
Содержание DEClaser 1100 Series
Страница 18: ...Figure 1 1 Components Front Right Side View MLO 005960 1 2 Operator s Guide ...
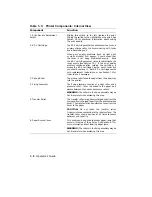
Страница 21: ...Figure 1 2 Components Rear Left Side View MLO 005961 Printer Components 1 5 ...
Страница 23: ...Figure 1 3 Components Inside the Printer MLO 005962 Printer Components 1 7 ...
Страница 31: ...2 Pull the extension tray straight out MLO 005815 Operating Information 2 5 ...
Страница 34: ...3 Tap the stack of paper on a flat surface to align the edges MLO 005967 2 8 Operator s Guide ...
Страница 40: ...2 Align the stack of envelopes by tapping them on a flat surface MLO 005970 2 14 Operator s Guide ...
Страница 65: ...Figure 3 1 Control Panel MLO 005830 3 2 Operator s Guide ...
Страница 123: ...2 Remove any paper remaining in the paper tray and close the extension tray MLO 005981 Troubleshooting 6 15 ...
Страница 141: ...4 Insert the printed cleaning paper into the paper tray with the printed side facing up MLO 005988 Maintenance 7 11 ...
Страница 177: ...Figure C 2 Serial Connections to Modem MLO 004885 Specifications C 5 ...
Страница 180: ...Figure C 4 Parallel Pin Assignment MLO 004886 Figure C 5 Parallel Connections MLO 005828 C 8 Operator s Guide ...

