114
Chapter 9 General Troubleshooting
9.4
Scanner/Application Hangs
Symptoms
•
Scanner application hangs.
•
Warning messages are displayed.
Suggestions
•
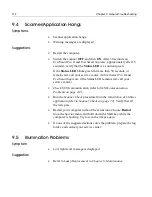
Restart the computer.
•
Switch the scanner
OFF
, and then
ON
. After 30 seconds (in
EverSmart Pro II
and
EverSmart Supreme
, approximately after 15
seconds), verify that the
Status
LED
is a constant green.
If the
Status
LED
blinks green for more than 30 seconds, or
remains red, call your service center. (In
EverSmart Pro II
and
EverSmart Supreme
, if the Status LED remains red, call your
service center.)
•
Check SCSI communication (refer to
SCSI Communication
Problems on page 112
).
•
Run the
Scanner Check
procedure from the
Installation & Utilities
application (refer to
Scanner Checks on page 72
). Verify that all
the tests pass.
•
Restart your computer without the extensions. Choose
Restart
from the
Special
menu, and hold down the Shift key while the
computer is booting. Try to scan the image again.
•
If none of the suggested actions solve the problem, prepare the log
folder, and contact your service center.
9.5
Illumination Problems
Symptom
•
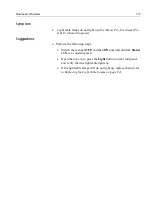
Low light level message is displayed.
Suggestion
•
Refer to
Lamp Replacement in Chapter 8, Maintenance
.
Содержание EverSmart
Страница 1: ...EverSmart Scanners www creo com scanners 399Z50703F Installation Maintenance English...
Страница 2: ......
Страница 8: ......
Страница 12: ......
Страница 13: ...1 Chapter 1 Site Preparation General Requirements 2 Safety Instructions 6...
Страница 19: ...7 Chapter 2 Unpacking Unpacking Procedure 8 Unlocking Screws Removing Packing 13...
Страница 29: ...Powering on the Scanner 17 2 2 2 2 Make sure that the scanner is switched OFF...
Страница 33: ...21 Chapter 4 Software Installation Installation Procedure 22 EverSmart Application Folder Contents 26...
Страница 40: ......
Страница 41: ...29 Chapter 5 SCSI Configuration Configuration Options 30 Setting the SCSI ID 43...
Страница 92: ......
Страница 103: ...Lamp Replacement 91 6 6 6 6 Pull out the glass plate 7 7 7 7 Place the glass plate on a soft surface...
Страница 109: ...Lamp Replacement 97 4 4 4 4 Pull out the left side of the panel...
Страница 110: ...98 Chapter 8 Maintenance 5 5 5 5 Slide out the right side of the panel...
Страница 118: ...106 Chapter 8 Maintenance 2 2 2 2 Lift the two handles of the glass plate 3 3 3 3 Pull out the glass plate...
Страница 120: ......
Страница 128: ......
Страница 129: ...117 Appendix A Packing the Scanner Locking the Scanner 118 Packing the Scanner 121...
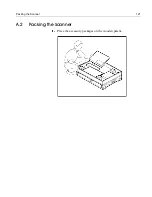
Страница 133: ...Packing the Scanner 121 A 2 Packing the Scanner 1 1 1 1 Place the accessory packages on the wooden palette...
Страница 137: ...125 Appendix B Technical Specifications...
Страница 140: ......
Страница 145: ...133 Appendix D Application Log Files...
Страница 147: ...135 Appendix E Catalog Numbers...
Страница 150: ......


