88
Chapter 8 Maintenance
9.
9.
9.
9.
Open the top cover.
10.
10.
10.
10.
Screw the four screws at the upper corners of the top cover.
11.
11.
11.
11.
Switch the scanner
ON
, and verify that the new lamp illuminates
after a few seconds.
8.1.2 Replacing the Reflective Lamps
The reflective lamps are located beneath the glass plate.
Light level is too low
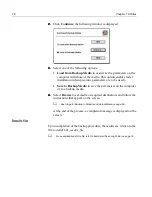
The following message is displayed on the screen.
To exit the message window, perform one of the following:
•
Click
Abort
; the scanner application quits. Replace both lamps,
according to the procedure outlined below
or
•
Click
Ignore
, and continue with the pre-scan/scan. Replace the
lamps when you have completed your work.
Содержание EverSmart
Страница 1: ...EverSmart Scanners www creo com scanners 399Z50703F Installation Maintenance English...
Страница 2: ......
Страница 8: ......
Страница 12: ......
Страница 13: ...1 Chapter 1 Site Preparation General Requirements 2 Safety Instructions 6...
Страница 19: ...7 Chapter 2 Unpacking Unpacking Procedure 8 Unlocking Screws Removing Packing 13...
Страница 29: ...Powering on the Scanner 17 2 2 2 2 Make sure that the scanner is switched OFF...
Страница 33: ...21 Chapter 4 Software Installation Installation Procedure 22 EverSmart Application Folder Contents 26...
Страница 40: ......
Страница 41: ...29 Chapter 5 SCSI Configuration Configuration Options 30 Setting the SCSI ID 43...
Страница 92: ......
Страница 103: ...Lamp Replacement 91 6 6 6 6 Pull out the glass plate 7 7 7 7 Place the glass plate on a soft surface...
Страница 109: ...Lamp Replacement 97 4 4 4 4 Pull out the left side of the panel...
Страница 110: ...98 Chapter 8 Maintenance 5 5 5 5 Slide out the right side of the panel...
Страница 118: ...106 Chapter 8 Maintenance 2 2 2 2 Lift the two handles of the glass plate 3 3 3 3 Pull out the glass plate...
Страница 120: ......
Страница 128: ......
Страница 129: ...117 Appendix A Packing the Scanner Locking the Scanner 118 Packing the Scanner 121...
Страница 133: ...Packing the Scanner 121 A 2 Packing the Scanner 1 1 1 1 Place the accessory packages on the wooden palette...
Страница 137: ...125 Appendix B Technical Specifications...
Страница 140: ......
Страница 145: ...133 Appendix D Application Log Files...
Страница 147: ...135 Appendix E Catalog Numbers...
Страница 150: ......

