background image

Maintenance 


8-20 


13. 

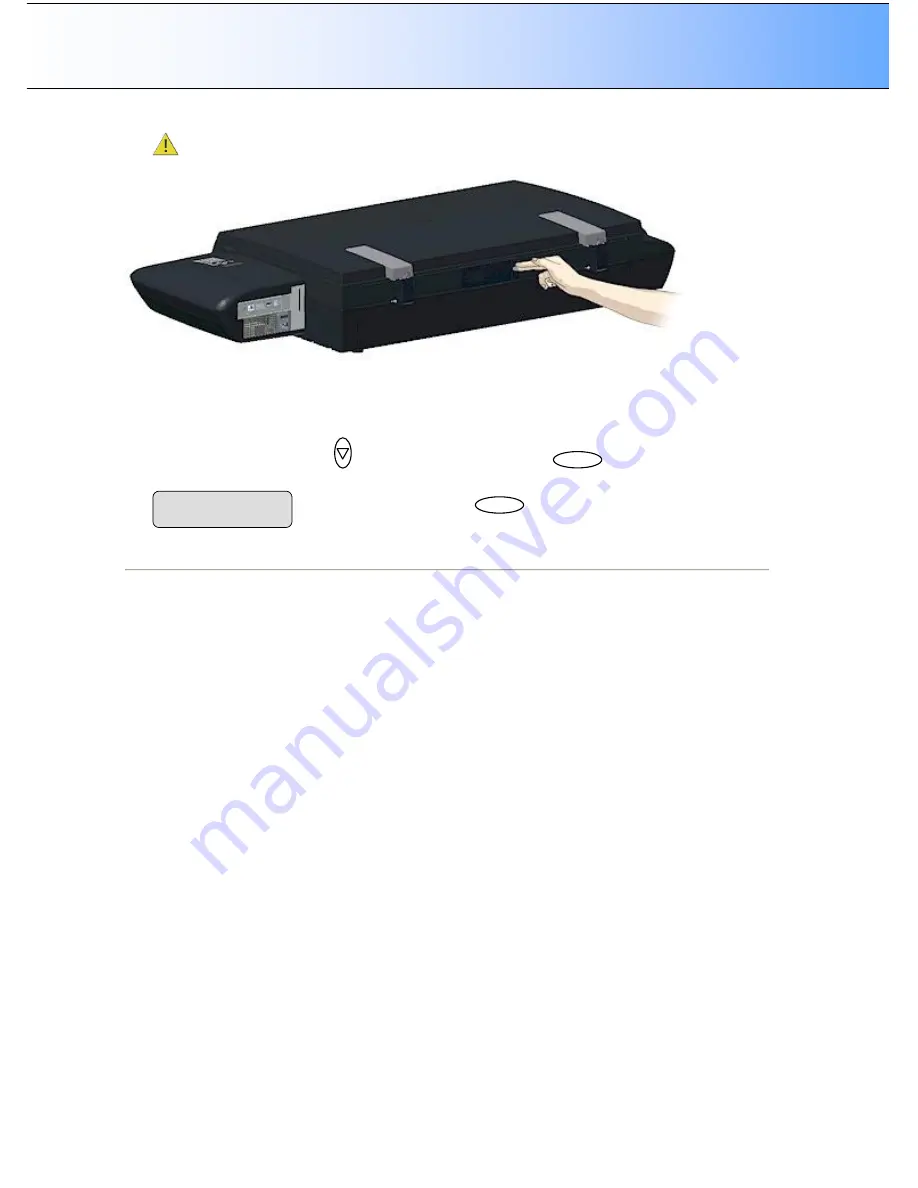
Close the lamp cover 

 Slide the cover to the left until it CLICKS shut. The cover must always be 

closed before turning scanner power ON. 


14.  Test the replacement by turning power on to see if the lamp lights. The scanner panel will display an 

error if the lamp is not inserted correctly or if the lamp cover is not completely closed.  

15.  Reset the part replacement counter that triggers the warning flag -  

Press the arrow down button  

to reach 

Reset Lamp Cnt., 

press


Enter 

 and use the arrow down to 

select 

Yes. C

onfirm with 

Enter. 


16.  Calibrate the scanner. 


Press 


Enter 

 to confirm reseting 

the lamp part replacement counter  

   Reset Lamp Cnt. 

> YES


Содержание FLEX50i

Страница 1: ...User s Guide Wide Format iJET Scanners MODELS FLEX50i HD4230i August 2008 Edition...

Страница 2: ...ia Profiles For Color Printer Setup 3 24 3 10 Scanner on Network Setup 3 25 3 11 Setup to Share the Scanner Use from PCs on the LAN 3 27 3 12 Usability Settings and User Preferences 3 28 3 12 1 Settin...

Страница 3: ...8 1 8 3 Cleaning the Scan Area 8 2 8 4 Running the Scanner Maintenance Program 8 6 8 4 1 Starting Scanner Maintenance from a PC on the LAN 8 6 8 4 2 Starting Scanner Maintenance from a Local PC 8 6 8...

Страница 4: ...on a PC that is either directly connected with the scanner or on the same network While this guide will provide instructions on setting up the scanner with a PC it will not describe in detail how to...

Страница 5: ...a file storage area The embedded web server provides a Web Access Interface that enables users to communicate and control the scanner from a PC on the LAN through the PC s web browser thus bypassing s...

Страница 6: ...and scanning software interface The panel contains a display window control buttons and option buttons The Display Window contains the current selections as you make them and useful messages from the...

Страница 7: ...is set to Auto Scan to button options such as Scan Mode File Format Resolution and so on are all set to your standard settings and the job does not require special adjustments 1 Load the original 2 P...

Страница 8: ...anner must be OFF in Sleep mode When the scanner is in Sleep mode you will see the 3 Print Quality LEDS flashing alternately as shown below Press and hold down the STOP button for a few seconds until...

Страница 9: ...buttons You can select Auto detection or a standard size setting NOTE that Size is a global system variable that can be changed in 3 different ways 1 With the Size button 2 With the Menu button Size o...

Страница 10: ...tton and the Size Quality Copies Lightness and Scale buttons The Scan to button Menu Button For selecting a scan to file target PC on the network and for setting scan to file options You change the sc...

Страница 11: ...changing with the arrow up down buttons In the example above the first line i e the menu option item line is active Pressing the down arrow button in this case will move the menu forward to the next...

Страница 12: ...l or to reset the active option item to its last saved value 9 Press the Stop button if you need to cancel a started scan to file or copy job 10 The copy area quick buttons Lightness Quality Copies an...

Страница 13: ...PCs and also setup to recognize use network PCs as scan targets The scanner is setup to use network printers 3 Scan Copy Station on Local PC Scanner connected to a PC through USB interface Scan copy...

Страница 14: ...ially designed stand alone floor stand or on a sturdy table For sheet feed models make sure there is enough space behind the scanner to allow the media to run out HD4230i If you own a smart card make...

Страница 15: ...lug If you cannot insert the plug into your outlet contact your electrician to replace the outlet and ensure a grounded power connection Do not try to defeat or ignore the purpose of the grounding typ...

Страница 16: ...ist or Custom Setup and apply the additional setting s attached to the Printer Model setup method you selected See the section Printer Setup on the Scanner for more details 11 Prepare the Printer Perf...

Страница 17: ...rinters or for scan to file tasks System Requirements Wide Format Copy scanner Compatible large format printer on the network for copy functionality LAN cable connecting the scanner to the network One...

Страница 18: ...with a three wire pin grounding type plug If you cannot insert the plug into your outlet contact your electrician to replace the outlet and ensure a grounded power connection Do not try to defeat or...

Страница 19: ...to enter the printer s IP address Select the Printer Model setup method Auto Configure Printer List or Custom Setup and apply the additional setting s attached to the Printer Model setup method you se...

Страница 20: ...onality Scan to a network PC to test Scan to file functionality The PC must have WIDEsystemNET installed and must be setup for network scanning See instructions on setting up a PC for scan2net in WIDE...

Страница 21: ...and copy software is not within the scope of this User s Guide Please refer to the software s documentation and on line help for instructions on using the software with the scanner Users can scan to f...

Страница 22: ...d or on a sturdy table For sheet feed models make sure there is enough space behind the scanner to allow the media to run out and Maintenance Locate the Smart Card for instructions for your specific s...

Страница 23: ...er outlet with a three wire pin grounding type plug 11 Verify installation of new hardware Double click on the WIDEsystem scanner icon on the Windows system tray The program should detect a Selected S...

Страница 24: ...and a shared device that can be controlled and used by network PCs The scanner can use both the local printer and printers on the network Both scan to file and copying can be performed either through...

Страница 25: ...instructions below for feet adjustment Adjustment of the scanner s feet for sturdy placement 1 The two outer feet closest to the operator s panel side are adjustable The middle foot on the same side a...

Страница 26: ...s must never be blocked or covered by placing the unit on a bed sofa rug or other similar soft surface Your scanner should never be placed near or over a radiator or heat register You should not place...

Страница 27: ...at the back of the scanner The cable connector panel is found on the scanner s back Locate the cable connector panel On Scanners HD4230i The scanner has LAN USB device input and USB host output inter...

Страница 28: ...3 16 Remove the interface cover with both hands The Interface panel Smart Card USB connection PC USB connection Printer LAN connection Feed the interface cable through the hole in the back until it em...

Страница 29: ...Panel s Display Language On scanners FLEX50i HD4230i On the iJET Panel 1 Select the Menu button 2 Use the arrow button up or down until the display windows shows Advanced and confirm with the Enter bu...

Страница 30: ...isplay should look like this the actual text to the right of the will show the current setting for the option and may be different than the one shown below 7 Use arrows down up to select the paper ser...

Страница 31: ...e a fragile original that you want passed delicately through the drive system With the Soft handling option selected both feeding and scanning are slowed down to enable smooth scanning of curled creas...

Страница 32: ...y shows Options and confirm with 4 Use the arrow buttons up or down to reach the option Time and Date Press to confirm 5 Set the Time Format to 24 hour format example 17 30 or AM PM format example 05...

Страница 33: ...Press to reach the Color Printer option 5 Press to confirm Color Printer and reach the Interface option and again to confirm Interface Use arrows down up to select USB or LAN depending how you connect...

Страница 34: ...cess takes place the first time you try to print and not during setup It is therefore recommended to make a dispensable test copy just after completing the steps for setting up your scanner 7 2 Printe...

Страница 35: ...ntation Landscape Portrait Feeding orientation for printer On most large format printers this will be landscape while on some of the narrower models it will be Portrait Scalable No Yes No means that t...

Страница 36: ...On the iJET Panel 8 Select the Menu button 9 Use the arrow button up or down until the display window shows Advanced and confirm with the Enter button 10 Use the arrow buttons up or down until the di...

Страница 37: ...work setup information automatically from the network On other networks you will have to enter the network ID information manually On scanners FLEX50i HD4230i To apply the scanners network setup setti...

Страница 38: ...ontinue with each group until you have the right IP displayed and press Enter to confirm 6 Use the arrow buttons arrow buttons up down until the iJET Panel displays Subnet Mask and confirm with Enter...

Страница 39: ...i HD4230i To enable a scanner for sharing On the iJET Panel 1 Select the Menu button 2 Use the arrow button up or down until the display window shows Advanced and confirm with the Enter button 3 Use t...

Страница 40: ...s a bit later on Mondays then on other days so the scanner can be programmed to start up at 07 30 By the time you reach work at 08 00 the scanner will be warmed up and ready to work at an optimal inte...

Страница 41: ...ay Each day contains a submenu where Wake up and Sleep times can be set Use the arrow buttons up or down and Enter to move through the days and to set the times Confirm always with NOTE AM or PM must...

Страница 42: ...irm with the Enter button 3 Use the arrow buttons up or down until the display shows Options and confirm with 4 Use the arrow buttons up or down until the display shows Sleep Mode and confirm with 5 U...

Страница 43: ...the lamp to remain always on On the iJET Panel 1 Select the Menu button 2 Use the arrow button up or down until the display window shows Advanced and confirm with the Enter button 3 Use the arrow butt...

Страница 44: ...s in the output This effect will be amplified if the sharpen filter is also applied with the scan In these cases it is recommended to disable sharpening ALE or both To set the ALE mode On the iJET Pan...

Страница 45: ...tion On the iJET Panel 1 Select the Menu button 2 Use the arrow button up or down until the display window shows Advanced and confirm with the Enter button 3 Use the arrow buttons up or down until the...

Страница 46: ...ormation related to the scanner s internal hard disk To access the scanner s internal hard disk On the iJET Panel 1 Select the Menu button 2 Use the arrow button up or down until the display window sh...

Страница 47: ...On Scanners HD4230i You can use manual loading or automatic loading To select your loading method On the iJET Panel 1 Select the Menu button 2 Use the arrow buttons right left until the iJET Panel dis...

Страница 48: ...insert it in the paper slot Automatic loading is reliable for most jobs and especially useful for batch scanning jobs 1 Align the original s center with the scanner s center arrow guide marker 2 Push...

Страница 49: ...T Panel You use the key to raise and lower the pressure platen You can change the insertion slot size pressure platen height on your scanner from 2mm to 15 mm up to 0 6 Originals up to 2mm thick shoul...

Страница 50: ...ressure Platen Press and hold the Paper Forward key arrow up key to raise the pressure platen and create a larger insertion space About Thick Media Settings and Auto Adjustment On scanners HD4230i not...

Страница 51: ...ons on reaching the options in the panel 4 Make a test scanning Bulky stiff media needs to be supported with both hands on its way in and out of the scanner 5 Stitching errors will be easiest to see o...

Страница 52: ...ls option as described above under To Adjust Camera Stitching step 3 Confirm with enter 8 Use arrows down up to reach and set each Camera pair stitching offset value as described above under To Adjust...

Страница 53: ...l system variable that can be changed in 3 different ways 1 With the Size button 2 With the Menu button Size option and 3 With the Scan to button Size option This means that when you change the size f...

Страница 54: ...ion to the original can be set both by pressing the corresponding Quick button and by entering the Menu and navigating to the function There are additional copy options in the Menu that are not access...

Страница 55: ...ess value 4 There are two ways to change the value 5 Repeated presses to the Lightness button will change the Lightness value forward in single steps from 3 to 6 The value list wraps around meaning th...

Страница 56: ...r down to indicate you want to change the Scale factor value 4 There are two ways to change the value 5 Repeated presses to the Scale button will change the Scale factor value forward though a list of...

Страница 57: ...diately change the Quality option s value From here you can skip steps 2 and 3 and go to step 4 to change the value 2 Menu Press the button to enter the main Menu Use the arrow up down buttons to move...

Страница 58: ...arrow up down buttons to move through the Menu options until the display shows Copies 3 Press Enter to move the marker down to indicate you want to change the Copies value 4 There are two ways to chan...

Страница 59: ...will tell the scanner to optimize for high detail The option you choose will be applied by the system when you press the Color Copy button The available options for Org Type Color are described below...

Страница 60: ...to optimize for cleaning up background noise and enhancing image quality The option you choose will be applied by the system when you press the B W Copy button The available options for Org Type B W a...

Страница 61: ...s edges in the image and intensifies them You can use the Sharpen option with both Color Copying and B W Copying and with all original types When set to ON the option will apply the Sharpen filter whe...

Страница 62: ...f zero to 12 for example and thus make the pixels at high lightness levels go to white The option s setting will be applied when you press either the Color Copy or B W Copy button To apply the Backg C...

Страница 63: ...we have repeated these instructions below at end of this section How do I Set the Media Profile Your Media Profile setting is applied when you press the Color Copy button To set a Media Type On the i...

Страница 64: ...xt on the 2 line will show the current setting for the option and may be different than the one shown below 6 Press to move the mark to the current setting so you can change it Use the arrow buttons u...

Страница 65: ...ow down button to change the Mirror option value to YES or to NO YES will mirror the original image in your copy and NO will leave it as it is 5 Press the Enter button to accept the selected setting T...

Страница 66: ...e Menu options until the display shows Reset as shown below 3 Press Enter to move the marker down to indicate you want to activate the Reset option 4 Press Enter to activate the option The system will...

Страница 67: ...options On the iJET Panel 1 Press the button to enter the main Menu 2 Use the arrow up down buttons to move through the Menu options until the display shows Advanced as shown below 3 Press Enter to r...

Страница 68: ...are installed on the PC The software would control the scanner and all settings and operation would take place from the PC If the scanner is connected and setup with network identification on the LAN...

Страница 69: ...canner 3 Your scanner is connected to the network through the LAN interface The scanner has been enabled for access from the PC s on the LAN by setting the scanner s Share option to YES see section Se...

Страница 70: ...rd size setting Auto will detect the edges of the original and always set the scan area to the full original size every time You will probably use Auto for most jobs You can always crop the image in a...

Страница 71: ...The Scan to File Menu and its options are described in the next section 9 Your new scan to file settings will be tied to and stored with the target PC name you selected in step 3 and they will be rec...

Страница 72: ...n as described in the beginning of this section 2 The first Scan to File Menu option is the Scan Mode Your display should look as follows will be shown in the display 3 Press Enter to move the marker...

Страница 73: ...shades that create unwanted noise are close to the shades that make up the image s data and the two are hard to differentiate Level soften sharpen Graytone In this mode 256 gray levels are recognized...

Страница 74: ...of the background is picked up during scanning Adaptive enhancement features are automatically applied in this copy mode with simultaneous processing on different image aspects You only have to adjus...

Страница 75: ...del specifications to view the scanner s optical resolution To set the Scan to File Resolution On the iJET Panel 1 If you are not already in the Scan to File menu start enter the menu with the Scan to...

Страница 76: ...l size This is the recommended setting If necessary you can later crop the image in an image editor after it has been saved to the target PC The standard sizes shown are those that belong to the Paper...

Страница 77: ...h the values for the File Format option The following File Formats are available 5 PDF If selected you can set a quality factor from 1 to 100 70 is default 6 JPG If selected you can set a quality fact...

Страница 78: ...he marker moved back up to the option text File Format From here you can move forward in the Scan to File Menu to set the File Format quality parameter 4 Press the arrow down button to move to the Fil...

Страница 79: ...LAN can recognize and use the scanner if compatible scan or copy software is installed on the PC The PCs must also have WIDEsystemNET installed For both of these cases please refer to the scan copy so...

Страница 80: ...vice status firmware versions and the scanner s log Configure your scanner setup options for language network date time media feeding Make scanner printer communication settings and network setting Se...

Страница 81: ...address displayed below is only an example 8 Enable the Web Access Interface Web server Select in the panel Menu Advanced as described above in steps 3 4 Select Network setup and navigate with the ar...

Страница 82: ...clean the section below describes how to thoroughly clean the internal scan area after periods of use How often you need to clean the scanner will depend on how often and the types of media you scan...

Страница 83: ...canner power off and disconnect the power plug Cleaning the Scan Area On scanners FLEX50i 1 Turn the scanner power off and disconnect the power plug 2 Open the scan area lid 3 The glass plate is now e...

Страница 84: ...ect the power plug 3 Open the scan area lid Push down on the two lever buttons found near the insertion slot on each side of the lid 4 The scanning area lid locking mechanism should now be disengaged...

Страница 85: ...paten and the upper transport rollers with a lint free cloth and a mild streak free glass cleaner Apply the cleaner to the cloth and first wipe the platen s white area and then the upper roller s sur...

Страница 86: ...ace 11 Close the scanning area lid when finished The locks will reengage 12 Clean also the scanner bed surface so dirt and dust are not dragged into the scan area with the original 13 Cover your scann...

Страница 87: ...to the list of recognized scanners on a PC To start scanner maintenance from a PC on the LAN 1 Start WIDEsystemNET and select the scanner from your list of scanners 2 Right click on the WIDEsystemNET...

Страница 88: ...direct light On Scanners HD4230i 1 Power on the scanner if not already ON 2 Insert the Calibration Sheet that came with your scanner Align the midpoint arrow with the middle mark on the scanner The sh...

Страница 89: ...ust filters FLEX50i White background platen Lamp Dust filters Important Safety Instruction Before replacing any user replaceable parts be sure to turn the scanner power off and disconnect the power pl...

Страница 90: ...nsertion slot and flip the scanning area lid back to its open position 5 The glass plate will be exposed and accessible 6 On each side of the glass plate there is a small lever with a round lever hand...

Страница 91: ...Maintenance 8 10 7 With both arms pull simultaneously on the left and right levers to flip the glass plate towards your body so it tilts upwards and is fee from the scan area bed Lever handle Hook Pin...

Страница 92: ...o free it 9 Reverse the above operations to reinsert a new glass plate Fit the new glass plate s lever hooks on to the pins on each side of the scanner Place the hook on the round pin 10 While support...

Страница 93: ...l the way 3 The white background platen is attached to the lid s underside It is constructed as two layers upper layer and lower layer The lower layer faces the glass The upper layer is attached to th...

Страница 94: ...ean Open the lid and press firmly on the new white background platen corners and edges to make sure the Velcro is properly in contact in all places Recalibrate the scanner Replacing the White backgrou...

Страница 95: ...hanism should now be disengaged 4 Place your thumbs in the insertion slot and flip the scanning area lid back to its open position 5 On the lid s left edge you will find a red strip This is the white...

Страница 96: ...f the red strip with your fingers 7 Remove the red strip to expose the edge of the white background platen Edge of the white background platen 8 Grip the edge of the white background platen with your...

Страница 97: ...insert your new white background platen Carefully slide in a new white background platen while taking care not to bend it 10 Reattach the red strip 11 Close the scanning area lid so the locking mecha...

Страница 98: ...Maintenance 8 17...

Страница 99: ...r down until the display window shows Advanced and confirm with the Enter button 3 Use the arrow buttons up or down until the display shows Service and confirm with 4 The option Replace Lamp appears P...

Страница 100: ...ht angle The round end goes in first and the power connector end last The power connector casing must be aligned horizontally with the connections visible through the lamp cover opening To guide you m...

Страница 101: ...The scanner panel will display an error if the lamp is not inserted correctly or if the lamp cover is not completely closed 15 Reset the part replacement counter that triggers the warning flag Press...

Страница 102: ...anner Lamp unit On Scanners HD4230i 1 Turn the scanner power off and disconnect the power plug 2 The lamp cover is on the top right side of the scanner Lamp cover 3 Grasp the cover on each side with b...

Страница 103: ...ards to free it from the scanner 5 You must remove the whole lamp unit A lamp unit consists of a lamp mounted in a reflector brace and fixed power connectors 6 Grasp the edge of the old lamp unit and...

Страница 104: ...y so the internal power connections engage with the connections on the lamp unit 9 Replace the lamp cover on the scanner fit the bottom notches in the holes and snap the cover shut The cover must alwa...

Страница 105: ...g flag Go to Menu button Advanced Options Service Press the arrow down button to reach Reset Lamp Cnt press Enter and use the arrow down to select Yes Confirm with Enter 12 Calibrate the scanner Press...

Страница 106: ...scanner Your scanner monitors usage of the filters and will warn you when it is time for a replacement through a message in the iJET Panel display window Replacing the Dust filters On Scanners FLEX50i...

Страница 107: ...aped dust filter bins on the underside of the scanner 3 Insert a screw driver or other sharp tool under one of the bin s edges to snap it down and detach it from its frame 4 The filter soft material i...

Страница 108: ...Maintenance 8 27 Dust Filter Bins Dust Filters to change...

Страница 109: ...ng inserting a Smart Card or accessing the Smart Card area You will find the Smart Card insertion slot by removing the scanner s interface cover on its right side The Smart Card insertion slot is loca...

Страница 110: ...Maintenance 8 29 Remove the interface cover with both hands The Interface panel Smart Card is inserted in its slot above the interface connections...

Страница 111: ...ed a PC that can access the scanner This can be done from a PC on the LAN that has WIDEsystemNET setup to recognize the scanner The scanner must also be enabled for sharing See the sections Scanner on...

Страница 112: ...the scanner icon in the system tray 3 Select Advanced Options Select Update Scanner Firmware 4 Browse the folders on your machine and find the firmware exe file you wish to apply 5 Select the firmwar...

Страница 113: ...upted your firmware update the scanner should start up in boot mode If not you can use the following panel function to force the scanner into boot mode 1 Turn the scanner s main power switch to OFF Th...

Страница 114: ...not exceed 15 amperes H Slots or openings in the cabinet at the back or bottom are provided for ventilation This ensures reliable operation of the product and protects it from overheating These openin...

Страница 115: ...ority to operate the equipment CE Regulations EU Warning This is a class A product In a domestic environment this product may cause radio interference in which case the user may be required to take ad...

Страница 116: ...iJET Panel Quick Reference Guide 11 2 11 Appendix C iJET Panel Quick Reference Guide Quick Reference Guide to the iJET Panel Wide Format Copy Scanners with iJET Technology...

Страница 117: ...s The guide contains Overview description of the iJET Panel buttons Option description tables to guide you on how to use the panel options Option path and panel button sequence diagrams to help you fi...

Страница 118: ...again press the button or with the arrow up down buttons Copies Copies Settings Button For setting the number of how many copies you want output Press the button to activate option setting You then ch...

Страница 119: ...first value displayed in a menu is the always the current latest selected value If you are setting the first time this will be the default value Back Back Navigation Button for moving one level up wh...

Страница 120: ...capture Select the original type that best describes the document you want to copy Photo Blueprint Sepia Line CAD Default Photo Photo Suitable for photographic images that contain many shades of gray...

Страница 121: ...to detection or a standard size setting Auto will detect the edges of the original and set the scan area to the full original size Size is a global system variable that can be changed with the Size bu...

Страница 122: ...all copy settings at once and thus reset the system for yourself or for other users Enter to Go Press Enter to reset the system to the copy default values Copy settings that return to their default v...

Страница 123: ...s LAN port or if the scanner is connected to the LAN and printer the printer is on the LAN In this case you must enter the printer s IP Adresse Printer Setup B W Printer Interface To select the printe...

Страница 124: ...ize A0 A2 etcetera Render Type Scan to print data protocol See the lists to find the right selection for your printer Use Inked Area Yes means that the printer will cut the output by looking at the ar...

Страница 125: ...ns Closed Loop Cal Calibrate RIP For many printers this is an optional step between steps 1 and 2 in the Media Profile creation process On other printers Calibrate RIP is required in order for the pri...

Страница 126: ...will pull the original into the scanner when you feed it into insertion slot Manual Load you position the original in the slot and press the paper forward button to feed it into the scanner Options S...

Страница 127: ...on when starting a scan In some cases with scan to print a newly started lamp will cause unstable colors This option is a remedy for such problems Automatic Always On Default Automatic Set to Always O...

Страница 128: ...p and wake up schedule The option lets you program the scanner to automatically power on and warm up to optimal internal temperature when most convenient for your schedule In this way it stands ready...

Страница 129: ...make tonal adjustments through a Gamma value Adjustment Options for the Scan Mode The following 5 options are adjustment settings for the Scan Mode described above There is one adjustment setting opt...

Страница 130: ...ing image quality in DPI dots per inch 50 to 9600 Select a value from the list of values available High resolutions create large files 300 dpi or more is adequate for printing Certain maps and CAD dra...

Страница 131: ...tart viewing values with the arrow up down buttons 3 The quick buttons Lightness Scale Quality Copies can also step through their values by repeated presses to the button alternative to using arrow up...

Страница 132: ...in the Complete iJET Panel Menu Diagram This is followed by a diagram showing how the same two options appear in the actual iJETpanel with an indication of the buttons you need to press to reach and...

Страница 133: ...is active and values can be changed Menu Org Type Color Photo Org Type Color Photo Org Type Color Photo Ink Org Type Color Brochure Org Type Color Brochure Ink Enter Org Type B W Photo Org Type B W Ph...

Отзывы: