Procedure
Step 1
The air ramp requires 50 mm of space in a standard 19-inch (482.6-mm) or 23-inch (584.2-mm) rack. Locate
the rack mount unit (RMU) space specified in your site plan.
Step 2
Verify the rack type of your air ramp installation. The brackets are compatible with the following racks.
• 19-inch racks as defined in IEC 297-1(2 Nos.)
• 19-inch for deep door configuration (2 Nos.)
• 23-inch for deep door configuration (2 Nos.)
• Pan Head M4x 8mm (4 Nos.)
• Air Filter
Step 3
Verify that the mounting brackets attached to the unit are correct for your rack size. Complete the
Reverse the Mounting Bracket to Fit a 19-inch (482.6-mm) Rack (ANSI Only), on page 33
as required.
Step 4
Align the chassis with the rack mounting screw holes; insert and tighten the four screws.
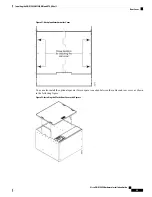
In an ETSI configuration the air ramp comes with pre-installed brackets as illustrated in the following figure.
Figure 17: Air Ramp with Brackets in an ETSI Configuration
Step 5
To install the 19-inch and 23-inch brackets on an ONS 15454 ANSI, with standard door and spool, remove
the screws that attach the mounting bracket to the side of the shelf.
Step 6
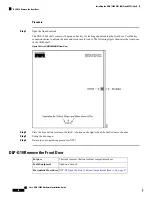
Align the mounting bracket screw holes against the shelf screw holes according to the following figure.
Cisco ONS 15454 Hardware Installation Guide
43
Installing the ONS 15454 M12 (ANSI and ETSI) Shelf
DLP-G8 Install the Air Ramp
Содержание ONS 15454
Страница 2: ... 2019 Cisco Systems Inc All rights reserved ...
Страница 16: ...Cisco ONS 15454 Hardware Installation Guide xvi Contents ...
Страница 28: ...Cisco ONS 15454 Hardware Installation Guide xxviii Preface Preface ...
Страница 36: ...Cisco ONS 15454 Hardware Installation Guide 6 Overview Cisco ONS 15454 M6 Shelf ...
Страница 510: ...Cisco ONS 15454 Hardware Installation Guide 480 Hardware Specifications Dimensions ...


