Chapter 2
2-12
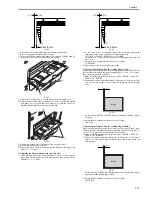
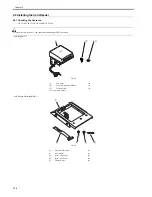
F-2-47
A. Making Adjustments for the Cassette 1
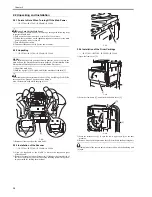
A-1) Free the 2 claws [1], and pull the grip (right front) [2] in the direction
of the arrow to detach.
F-2-48
A-2) Loosen the fixing screw [2] of the adjusting plate [1].
A-3) By referring to the index you took note of in step 5), move the
adjusting plate back and forth. Moving it toward the rear of the machine
will increase the margin on the image front.
F-2-49
A-4) Tighten the fixing screw.
A-5) Slide in the cassette 1.
A-6) Make a copy using the cassette 1 as the source of paper; then, check
to see that the margin in the image front direction is 2.5 +/-1.5 mm.
A-7) Mount back the grip (front right).
B. Making Adjustments to the Cassette 2
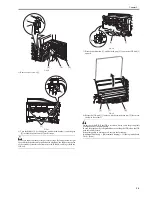
B-1) Loosen the fixing screw [2] of the adjusting plate [1].
B-2) By referring to the index you took note of in step 5), move the
adjusting plate back and forth. Moving it toward the rear of the machine
will increase the margin on the image front side.
F-2-50
B-3) Tighten the fixing screw.
B-4) Slide back the cassette 2.
B-5) Make a copy using the cassette 2 as the source of paper; then, check
to see that the margin in the image front direction is 2.5 +/-1.5 mm.
3) Mount back the machine's cassette front right cover.
4) Close the cassette lower right cover and the cassette upper right cover.
2. Adjusting the Margin (2nd side)
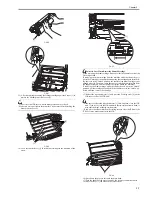
1) Make a copy using the cassette 1 as the source of paper; then, check to
make sure that the margin on the front side is 2.5 +/-2.0 mm.
F-2-51
2) If the margin is as indicated, change the adjustment value of the horizontal
registration for the 2nd side for the cassette 1.
- COPIER > ADJUST > FEED-ADJ > ADJ-C1RE
An increase by '1' will decrease the margin on the front side by 0.1 mm.
3) Enter the adjustment value for the horizontal registration of the 2nd side
for the cassette 1 as the adjustment value for the horizontal registration of
the 2nd side of the cassette 2.
- COPIER > ADJUST > FEED-ADJ > ADJ-C2RE
4) Make a copy using the cassette 2 as the source of paper; then, check to
make sure that the margin on the front side is 2.5 +/-2.0 mm.
5) If the value is not as indicated, change the adjustment value of the 2nd side
for the cassette 2.
- COPIER > ADJUST > FEED-ADJ > ADJ-C2RE
An increase by '1' (for DJ-C2RE) will decrease the horizontal registration
on the front side by 0.1 mm.
6) Record the new values on the service label.
- ADJ-C1RE
- ADJ-C2RE
7) Press the Reset key twice to end service mode.
3. Adjusting the Margin for the Manual Feed Tray (1st side; mechanical
adjustment)
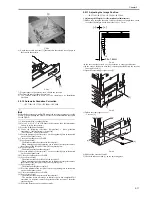
1) Place paper in the manual feed tray. For instructions, see the label attached
to the manual feed tray.
2) Make a copy using the manual feed tray as the source of paper; then, check
to make sure that the margin on the front side is 2.5 +/-1.5 mm.
0
2
4
6
8
10
(–)
(+)
2.5±2.0mm
Содержание iR C3380 series
Страница 1: ...Aug 29 2006 Service Manual iR C3380 2880 Series...
Страница 2: ......
Страница 6: ......
Страница 23: ...Chapter 1 Introduction...
Страница 24: ......
Страница 26: ......
Страница 52: ......
Страница 53: ...Chapter 2 Installation...
Страница 54: ......
Страница 127: ...Chapter 3 Basic Operation...
Страница 128: ......
Страница 130: ......
Страница 136: ......
Страница 137: ...Chapter 4 Main Controller...
Страница 138: ......
Страница 160: ......
Страница 161: ...Chapter 5 Original Exposure System...
Страница 162: ......
Страница 188: ...Chapter 5 5 24 F 5 68 4 Remove the original sensor 2 hook 1 F 5 69...
Страница 189: ...Chapter 6 Laser Exposure...
Страница 190: ......
Страница 192: ......
Страница 206: ......
Страница 207: ...Chapter 7 Image Formation...
Страница 208: ......
Страница 256: ......
Страница 257: ...Chapter 8 Pickup Feeding System...
Страница 258: ......
Страница 262: ......
Страница 303: ...Chapter 9 Fixing System...
Страница 304: ......
Страница 306: ......
Страница 321: ...Chapter 10 Externals and Controls...
Страница 322: ......
Страница 326: ......
Страница 336: ...Chapter 10 10 10 F 10 10 2 Remove the check mark from SNMP Status Enabled...
Страница 337: ...Chapter 10 10 11 F 10 11...
Страница 359: ...Chapter 11 MEAP...
Страница 360: ......
Страница 362: ......
Страница 401: ...Chapter 12 RDS...
Страница 402: ......
Страница 404: ......
Страница 411: ...Chapter 13 Maintenance and Inspection...
Страница 412: ......
Страница 414: ......
Страница 416: ...Chapter 13 13 2 F 13 1 8 9 1 2 3 3 5 6 7 10 11 12 13 14 4...
Страница 421: ...Chapter 14 Standards and Adjustments...
Страница 422: ......
Страница 424: ......
Страница 431: ...Chapter 15 Correcting Faulty Images...
Страница 432: ......
Страница 434: ......
Страница 459: ...Chapter 16 Self Diagnosis...
Страница 460: ......
Страница 462: ......
Страница 481: ...Chapter 17 Service Mode...
Страница 482: ......
Страница 484: ......
Страница 571: ...Chapter 18 Upgrading...
Страница 572: ......
Страница 574: ......
Страница 603: ...Chapter 19 Service Tools...
Страница 604: ......
Страница 605: ...Contents Contents 19 1 Service Tools 19 1 19 1 1 Special Tools 19 1 19 1 2 Solvents and Oils 19 2...
Страница 606: ......
Страница 609: ...Aug 29 2006...
Страница 610: ......


