Chapter 2
2-8
F-2-25
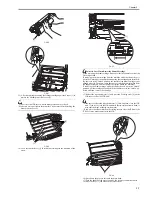
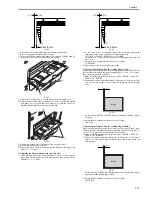
19) Fix the process unit in place with 2 screws that were removed in the step
5) to attach the handle cover.
Close the lower right cover of the main body after fixing surely the process
unit. The position of the process unit may be displaced in closing the lower
right cover of the main body first.
20) Close the lower right cover of the host machine.
2.2.5 Installation of the Toner Retainer
0013-8254
/ / / / iR C3380i / iR C3380 / iR C2880i / iR C2880
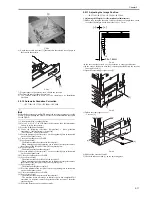
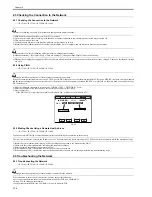
1) Take out the toner retainer Bk [1] from the protection package and shake
it 5 times from side to side.
F-2-26
2) Set the toner retainer Bk [1] to the host machine, and turn the lever [2] in
the direction of the arrow to lock.
F-2-27
3) Set the rest of the toner retainers in the same way.
4) Close the front door.
2.2.6 Connection of the Cable
0013-8405
/ / / / iR C3380i / iR C3380 / iR C2880i / iR C2880
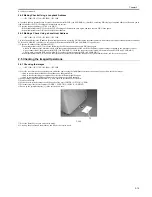
1) Fix the reader communication cable [2] in place with the 3 wire saddles
[1] to connect the connector of the both sides to the main body.
F-2-28
2) Connect the power cable (for outlet) of the main body.
3) Turn on the main power switch.
2.2.7 Attaching Other Parts
0013-8257
/ / / / iR C3380i / iR C3380 / iR C2880i / iR C2880
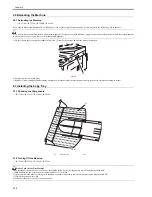
<Service book container>
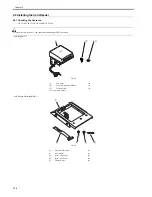
1) Remove the release paper of the double-sided tape on the rib area of the
service book container [1], and attach the service book container on the
bottom plate of the pedestal.
[1]
[1]
[2]
[1]
[1]
[2]
[1]
Содержание iR C3380 series
Страница 1: ...Aug 29 2006 Service Manual iR C3380 2880 Series...
Страница 2: ......
Страница 6: ......
Страница 23: ...Chapter 1 Introduction...
Страница 24: ......
Страница 26: ......
Страница 52: ......
Страница 53: ...Chapter 2 Installation...
Страница 54: ......
Страница 127: ...Chapter 3 Basic Operation...
Страница 128: ......
Страница 130: ......
Страница 136: ......
Страница 137: ...Chapter 4 Main Controller...
Страница 138: ......
Страница 160: ......
Страница 161: ...Chapter 5 Original Exposure System...
Страница 162: ......
Страница 188: ...Chapter 5 5 24 F 5 68 4 Remove the original sensor 2 hook 1 F 5 69...
Страница 189: ...Chapter 6 Laser Exposure...
Страница 190: ......
Страница 192: ......
Страница 206: ......
Страница 207: ...Chapter 7 Image Formation...
Страница 208: ......
Страница 256: ......
Страница 257: ...Chapter 8 Pickup Feeding System...
Страница 258: ......
Страница 262: ......
Страница 303: ...Chapter 9 Fixing System...
Страница 304: ......
Страница 306: ......
Страница 321: ...Chapter 10 Externals and Controls...
Страница 322: ......
Страница 326: ......
Страница 336: ...Chapter 10 10 10 F 10 10 2 Remove the check mark from SNMP Status Enabled...
Страница 337: ...Chapter 10 10 11 F 10 11...
Страница 359: ...Chapter 11 MEAP...
Страница 360: ......
Страница 362: ......
Страница 401: ...Chapter 12 RDS...
Страница 402: ......
Страница 404: ......
Страница 411: ...Chapter 13 Maintenance and Inspection...
Страница 412: ......
Страница 414: ......
Страница 416: ...Chapter 13 13 2 F 13 1 8 9 1 2 3 3 5 6 7 10 11 12 13 14 4...
Страница 421: ...Chapter 14 Standards and Adjustments...
Страница 422: ......
Страница 424: ......
Страница 431: ...Chapter 15 Correcting Faulty Images...
Страница 432: ......
Страница 434: ......
Страница 459: ...Chapter 16 Self Diagnosis...
Страница 460: ......
Страница 462: ......
Страница 481: ...Chapter 17 Service Mode...
Страница 482: ......
Страница 484: ......
Страница 571: ...Chapter 18 Upgrading...
Страница 572: ......
Страница 574: ......
Страница 603: ...Chapter 19 Service Tools...
Страница 604: ......
Страница 605: ...Contents Contents 19 1 Service Tools 19 1 19 1 1 Special Tools 19 1 19 1 2 Solvents and Oils 19 2...
Страница 606: ......
Страница 609: ...Aug 29 2006...
Страница 610: ......


