Chapter 11
11-38
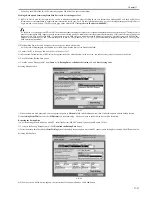
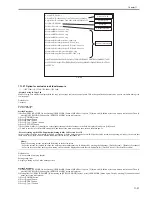
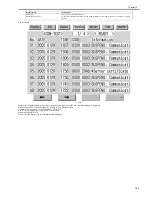
7) Press [ANIM-SW] button.
8) Press either 0 (display warning screen) or 1 (hide warning screen) on control panel (the numerical value input in the field is displayed), and press [OK] button.
9) Check to see that it is reflected in setting field, and turn off the main power, and then, turn on the main power.
-Setting of Screen Transition from MEAP Screen to the Standard Screen
In the case that the operation is restricted by MEAP application, make a setting to hide Native applications such as Copy/Send/Box. With this setting, disable screen
transition with => key.
Default value
0: OFF (transit to Native screen)
Setting range, item
0: OFF (transit to Native screen) 1: ON (No-transition to Native screen)
Setting Procedure
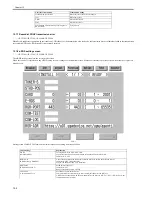
1) Startup [SERVICE MODE] (After pressing [USER MODE] button of MEAP device, press [2] button and [8] button at the same time on control panel. Then,
by pressing [USER MODE] button again, [SERVICE MODE] screen is displayed).
2) Startup level 2 of [SERVICE MODE] (After starting up [SERVICE MODE] in step 1, press [USER MODE] button again. Then, by pressing [2] button on control
panel, the screen is displayed.
3) Press [COPIER] button.
4) Press [Option] button.
5) Press [BODY] button.
6) Press [<-] (arrow) button.
7) Press [ANIM-DSP] button.
8) Press either 0 (transit to Native screen) or 1 (no-transition to Native screen) on control panel (the numerical value input in the field is displayed), and press [OK]
button.
9) Check to see that it is reflected in setting field, and turn off the main power, and then, turn on the main power.
Содержание iR C3380 series
Страница 1: ...Aug 29 2006 Service Manual iR C3380 2880 Series...
Страница 2: ......
Страница 6: ......
Страница 23: ...Chapter 1 Introduction...
Страница 24: ......
Страница 26: ......
Страница 52: ......
Страница 53: ...Chapter 2 Installation...
Страница 54: ......
Страница 127: ...Chapter 3 Basic Operation...
Страница 128: ......
Страница 130: ......
Страница 136: ......
Страница 137: ...Chapter 4 Main Controller...
Страница 138: ......
Страница 160: ......
Страница 161: ...Chapter 5 Original Exposure System...
Страница 162: ......
Страница 188: ...Chapter 5 5 24 F 5 68 4 Remove the original sensor 2 hook 1 F 5 69...
Страница 189: ...Chapter 6 Laser Exposure...
Страница 190: ......
Страница 192: ......
Страница 206: ......
Страница 207: ...Chapter 7 Image Formation...
Страница 208: ......
Страница 256: ......
Страница 257: ...Chapter 8 Pickup Feeding System...
Страница 258: ......
Страница 262: ......
Страница 303: ...Chapter 9 Fixing System...
Страница 304: ......
Страница 306: ......
Страница 321: ...Chapter 10 Externals and Controls...
Страница 322: ......
Страница 326: ......
Страница 336: ...Chapter 10 10 10 F 10 10 2 Remove the check mark from SNMP Status Enabled...
Страница 337: ...Chapter 10 10 11 F 10 11...
Страница 359: ...Chapter 11 MEAP...
Страница 360: ......
Страница 362: ......
Страница 401: ...Chapter 12 RDS...
Страница 402: ......
Страница 404: ......
Страница 411: ...Chapter 13 Maintenance and Inspection...
Страница 412: ......
Страница 414: ......
Страница 416: ...Chapter 13 13 2 F 13 1 8 9 1 2 3 3 5 6 7 10 11 12 13 14 4...
Страница 421: ...Chapter 14 Standards and Adjustments...
Страница 422: ......
Страница 424: ......
Страница 431: ...Chapter 15 Correcting Faulty Images...
Страница 432: ......
Страница 434: ......
Страница 459: ...Chapter 16 Self Diagnosis...
Страница 460: ......
Страница 462: ......
Страница 481: ...Chapter 17 Service Mode...
Страница 482: ......
Страница 484: ......
Страница 571: ...Chapter 18 Upgrading...
Страница 572: ......
Страница 574: ......
Страница 603: ...Chapter 19 Service Tools...
Страница 604: ......
Страница 605: ...Contents Contents 19 1 Service Tools 19 1 19 1 1 Special Tools 19 1 19 1 2 Solvents and Oils 19 2...
Страница 606: ......
Страница 609: ...Aug 29 2006...
Страница 610: ......


