Chapter 8
8-6
8.2.3 Skew Correction
0019-5030
imageCLASS MF9170c / imageCLASS MF9150c / imageCLASS MF8450c
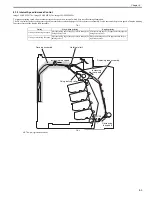
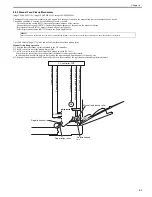
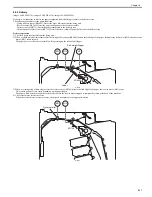
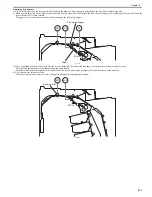
Before the paper fed from the cassette or manual feed tray is transported to the ETB unit, a skew is corrected.
1) The fed paper comes into contact with the registration shutter at the registration roller assembly.
The lead edge of the paper comes into contact with the registration shutter so that the right and left edges of the paper are aligned.
2) The paper is warped because the paper path is obstructed by the registration shutter.
Since the registration shutter is pressed by springs, the registration shutter does not move only with the power of the sheet trying to move ahead.
When the paper is warped, the stiffness of the paper is applied in addition to the power of trying to move ahead, which increases the power of lifting up the
registration shutter.
3) When the power exceeding a specified level is applied to the paper, the registration shutter is lifted up.
In this condition, the paper is transported while keeping the right and left edges being aligned, and the skew is corrected.
F-8-6
Registration shutter
Registration shutter
Paper
Paper
Paper feed direction
Содержание imageCLASS MF8450c
Страница 16: ...Chapter 1 Introduction ...
Страница 55: ...Chapter 2 Basic Operation ...
Страница 61: ...Chapter 3 Main Controller ...
Страница 75: ...Chapter 4 Original Exposure System ...
Страница 88: ...Chapter 5 Original Feeding System ...
Страница 105: ...Chapter 6 Laser Exposure ...
Страница 113: ...Chapter 7 Image Formation ...
Страница 150: ...Chapter 8 Pickup and Feed System ...
Страница 184: ...Chapter 9 Fixing System ...
Страница 200: ...Chapter 10 External and Controls ...
Страница 230: ...Chapter 11 Maintenance and Inspection ...
Страница 233: ...Chapter 12 Measurement and Adjustments ...
Страница 237: ...Chapter 13 Correcting Faulty Images ...
Страница 251: ...Chapter 13 13 13 13 3 5 PCBs 13 3 5 1 PCBs 0019 5065 imageCLASS MF9170c imageCLASS MF9150c imageCLASS MF8450c ...
Страница 256: ...Chapter 13 13 18 F 13 19 21 22 28 29 30 31 24 14 15 16 23 26 25 32 27 20 19 18 17 2 13 6 10 33 1 8 4 3 12 11 5 7 9 ...
Страница 260: ...Chapter 14 Error Code ...
Страница 272: ...Chapter 15 Special Management Mode ...
Страница 280: ...Chapter 16 Service Mode ...
Страница 322: ...Chapter 17 Upgrading ...
Страница 327: ...Chapter 17 17 4 3 Click Next F 17 4 4 Select a USB connected device and click Next F 17 5 ...
Страница 328: ...Chapter 17 17 5 5 Click Start F 17 6 6 Click Yes F 17 7 Download will be started F 17 8 ...
Страница 330: ...Chapter 18 Service Tools ...
Страница 334: ...Appendix ...
Страница 349: ......

