Chapter 7
7-29
When removing the shipping lock that is attached with the main drive unit
as a Service Parts, or when removing the main drive unit for servicing, the
main drive unit must be aligned before installing to the host machine.
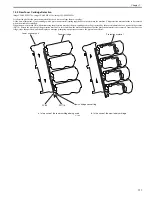
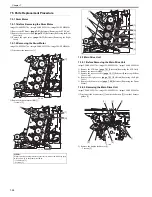
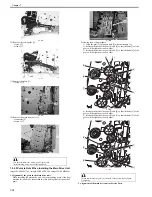
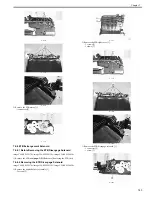
1) Shift the 4 levers [1] of the main drive unit [2] upward.
F-7-51
2) Turn the gear [1] and align the holes [2] and the circles [3] each in 2
locations.
F-7-52
3) Turn the gear [1] and align the holes [2] and the circles [3] each in 2
locations.
F-7-53
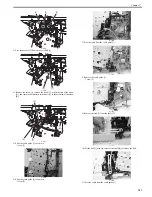
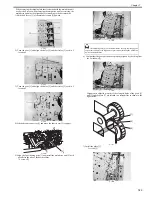
4) Lift the drawer connector [1] and move the shutter arm [2] to upper.
F-7-54
5) Align the 3 positioning parts [1] and install the main drive unit [2] with
parallel to the side of the host machine.
- 4 screws [3]
F-7-55
6) Confirm that the gear positions are properly aligned by checking from
the 2 windows [1].
F-7-56
Alignment is adjusted properly if the elongate holes of the gears [1]
and [2] and the plate [3] are aligned in a straight line as shown in the
figure below.
F-7-57
7) Install the plate [1].
- 3 screws [2]
F-7-58
[1]
[2]
Since 5 interlocked gears [A] on the host machine are easy to disengage, be
careful not to displace the alignment of gears when installing the main drive
unit to the host machine.
[1]
[2]
[3]
Содержание imageCLASS MF8450c
Страница 16: ...Chapter 1 Introduction ...
Страница 55: ...Chapter 2 Basic Operation ...
Страница 61: ...Chapter 3 Main Controller ...
Страница 75: ...Chapter 4 Original Exposure System ...
Страница 88: ...Chapter 5 Original Feeding System ...
Страница 105: ...Chapter 6 Laser Exposure ...
Страница 113: ...Chapter 7 Image Formation ...
Страница 150: ...Chapter 8 Pickup and Feed System ...
Страница 184: ...Chapter 9 Fixing System ...
Страница 200: ...Chapter 10 External and Controls ...
Страница 230: ...Chapter 11 Maintenance and Inspection ...
Страница 233: ...Chapter 12 Measurement and Adjustments ...
Страница 237: ...Chapter 13 Correcting Faulty Images ...
Страница 251: ...Chapter 13 13 13 13 3 5 PCBs 13 3 5 1 PCBs 0019 5065 imageCLASS MF9170c imageCLASS MF9150c imageCLASS MF8450c ...
Страница 256: ...Chapter 13 13 18 F 13 19 21 22 28 29 30 31 24 14 15 16 23 26 25 32 27 20 19 18 17 2 13 6 10 33 1 8 4 3 12 11 5 7 9 ...
Страница 260: ...Chapter 14 Error Code ...
Страница 272: ...Chapter 15 Special Management Mode ...
Страница 280: ...Chapter 16 Service Mode ...
Страница 322: ...Chapter 17 Upgrading ...
Страница 327: ...Chapter 17 17 4 3 Click Next F 17 4 4 Select a USB connected device and click Next F 17 5 ...
Страница 328: ...Chapter 17 17 5 5 Click Start F 17 6 6 Click Yes F 17 7 Download will be started F 17 8 ...
Страница 330: ...Chapter 18 Service Tools ...
Страница 334: ...Appendix ...
Страница 349: ......

