background image

31

Changing the Battery

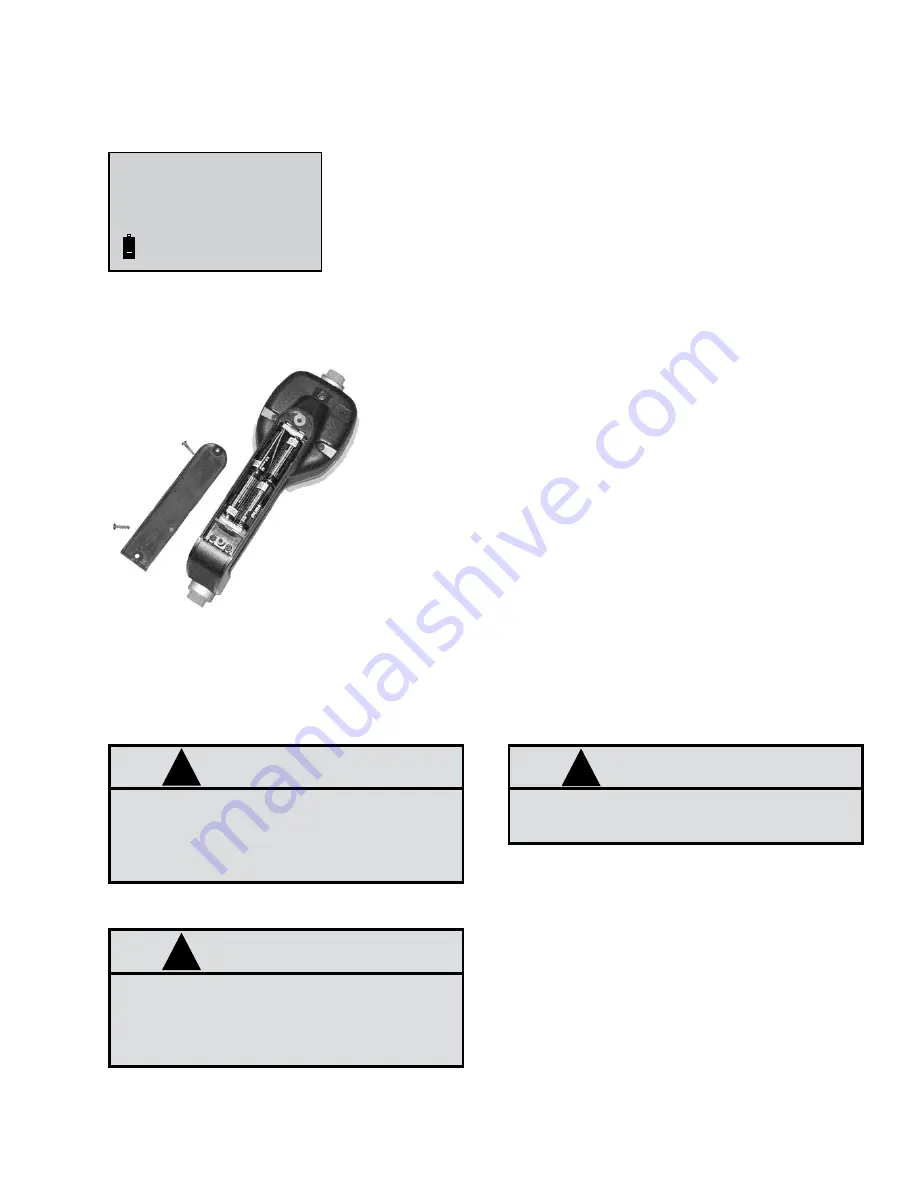
When the batteries need changing, a progression of warnings appears on the meter screen.

0.00


Qt


 7.2

+

First Warning

The Low Battery icon appears in the lower left corner of the display. That means 
the batteries are low and need to be changed when the icon appears.

Second Warning

The Battery icon flashes. The battery power is too low and meter functions are 
disabled.

The battery compartment is located in the lower case on the backside of the trigger guard.

1. Position the unit face down.
2. Unscrew the two screws. Remove the battery door to expose the 
batteries.
3. Replace the old batteries with 4 AA alkaline batteries.
      NOTE:  Battery polarity markings are inside battery compartment.
4. Dispose of used batteries properly, according to local regulations.
      NOTE:  Changing the batteries does not affect any of the pro-

                   grammed values or totals�

Programming the Fusion 2.4 RF Control Handle

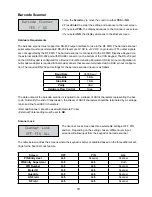
The units of measurement and scale factor can be changed. For instructions, see Service Bulletin 3088, (Fusion 

2.4 RF Control Handle).

NOTE

Each  meter  can  only  be  associated  with 

one Dispense Keypad� All system users can 

access  each  of  the  Dispense  Keypads

!

NOTE

Maximum of 24 meters per dispense keypad

!

IMPORTANT

The  PC  must  be  equipped  with  a  physi

-

cal 9-Pin Serial  Interface, a USB to Serial 

Convertor will not work

!

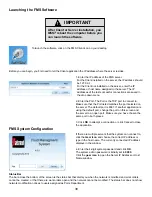
Содержание Fusion 3110-027

Страница 1: ...y read and understand this manual before installing operating or servicing this equipment INSTALLATION AND CONFIGURATION GUIDE fusion 2 4 DCS Model 3110 027 Master Keypad Model 3110 028 Dispense Keypa...

Страница 2: ...ts REP Menu 21 190 Internal Ticket Printer Menu 22 RF Communication Test LNK Menu 22 Radio RAD Menu 23 Network Connect CON Menu 24 System Override SYS Menu 25 Dispense Keypad Menu Overview 26 DISPENSE...

Страница 3: ...transmission to insure that there is reliable communications at all times Communication distances are typically up to 300 feet with unob structed line of sight A remote antenna is available for situa...

Страница 4: ...4 System Overview...
Страница 5: ...ts database 2 By using the Initialize System menu of the FMS software the configuration data is sent to the Master Keypad via the serial interface and finally via radio to all Dispense Keypads 3 The F...

Страница 6: ...perating Temperature 14 140 F 10 60 C Specifications WARNING To satisfy FCC RF exposure requirements for mobile transmitting devices a separation distance of 20 cm or more should be main tained betwee...

Страница 7: ...rical outlet Mount the keypad to a structurally sound wall through the two holes on the top of the keypad case and one hole on the bottom of the keypad Height on the wall should be 5 feet to 6 feet Av...

Страница 8: ...lphanumeric keys enter numbers and alpha characters letters To enter a number press and release a key To enter a letter press and hold the key until the letter you want displays then release the key K...

Страница 9: ...l validate the work order number and provide the fluid and amount to be dispensed The results of the dispense will then be stored on the PC Standalone Mode Work orders will not be validated each enter...

Страница 10: ...ntire keypad To gain access to the supervisor menus the supervisor PIN has to be entered The default PIN is 0001 at initial power up System Version 16aug2012 08 35 V3 00 The standard screen shows the...

Страница 11: ...S or NO Confirm Clear YES NO a If you select YES the keypad asks you to Confirm Reset b If you select NO the keypad advances 3 Press Enter Keypad Timeout Timeout parameter corresponds to the time it t...

Страница 12: ...accepted Host Validation Host Operation Mode This mode is not used and should always be set to NO WO Archived None Mem Print 1 This option is not used in fusion 2 4 2 Set to None 3 Press Enter WO Arc...

Страница 13: ...e Each dash stands for a Dispense Keypad Start DKpd Test Press Enter Press Enter to begin the test Results 1 16 OOK NOTE N Network Error T Timeout Three Dispense Keypads are set up in this example In...

Страница 14: ...Address Radio Prefix Once you select ADR you can use the Scroll key to toggle between the Radio Address and the Radio Prefix screens 1 Use the Scroll key to move the cursor to ADR Select ADR NWK PWR S...

Страница 15: ...en the keypad and the radio Select ADR NWK PWR STA 1 Use the Scroll key to move the cursor to STA 2 Press Enter to display the Radio Status screen RADIO STATUS NWK CONNECTED 3 Press Enter to return to...

Страница 16: ...set Keypad Timeout Buzzer WO Valid Host WO Valid PC WO Archived Archive on PC Test ALL DKs Start DKpd Test Start Comm Results 1 16 Results 17 32 Results 33 36 Test All DKs Dispense kpd Tst Start Comm...

Страница 17: ...in No NOTE An N displayed in the lower left hand corner of the system version screen indicates a Radio Network error See Radio Status on page 23 to check the source of the error Settings Overview Supe...

Страница 18: ...Reader Port RS232 if the External Printer is enabled the Barcode Scanner menu will disappear Barcode Scanner YES NO Select YES to enable the Barcode Scanner Scanner Lock OFF PIN ALL OFF Data can be e...

Страница 19: ...select YES the display advances to the Scanner Lock screen If you select NO the display advances to the Buzzer screen Baud Rate 9600 Baud Data Bits 8 Bits Stop Bits 1 Bits Parity Odd Hardware Flow Con...

Страница 20: ...new setting 3 Press Enter to advance to the Buzzer screen Buzzer The buzzer beeps each time you press a button You can turn off the sound See Global Keypad Settings 1 Use the Scroll key to move the c...

Страница 21: ...ile the meter is locked for other dispenses The MET menu is used to delete prepared work orders and release the meter for new work orders Init All Hoses YES NO Reset All Hoses Press Enter 1 Use the Sc...

Страница 22: ...move the cursor to the report you want to print and press Enter The options are INI Initialization MET Sort list by meter CNF Configuration WO Sort list by work order Select CNF MET REP 190 RF Commun...

Страница 23: ...ou select ADR you can use the Scroll key to toggle between the Radio Address and the Radio Prefix screens 1 Use the Scroll key to move the cursor to ADR RADIO PREFIX 00 0D 6F 00 RADIO ADDRESS 01 80 A5...

Страница 24: ...the Scroll key to move the cursor to STA 2 Press Enter to display the Radio Status screen RADIO STATUS NWK CONNECTED 3 Press Enter to return to the selection screen Select ADR NWK PWR STA Network Con...

Страница 25: ...ed to override verification of the Master Keypad NOTE If multiple fusion systems are used within the same facility each system must be in its own network In this situation do not use network 0 use net...

Страница 26: ...emOverride YES NO Test in Progress Test Complete Link Quality Select CON Supervisor 0001 Mileage Type KM Miles Topoff Timer 0 Internal Printer External Printer Reset All Hoses Press Enter Hose RESET B...

Страница 27: ...eration modes WO Validation HOST or WO Validation PC see Work Order Validation on page 13 the entered WO number will be compared with the numbers set in the system which are defined in Global Keypad S...

Страница 28: ...pe is displayed for three seconds Product Quantity Quantity 7 Enter the desired quantity and press Enter Optionally the quantity assigned to this WO is shown The quantity can be chosen between 0 0 99...

Страница 29: ...the resettable total when held for 3 seconds Used to enter and exit the auto mode when RF communications are not available Used to accept a dispense order from the keypad Used in normal operating mod...

Страница 30: ...ad The trigger will unlock 2 Pull the trigger to begin the dispensing of fluid then release the trigger The valve will automatically lock in place even though the trigger will fall back to the closed...

Страница 31: ...or to expose the batteries 3 Replace the old batteries with 4 AA alkaline batteries NOTE Battery polarity markings are inside battery compartment 4 Dispose of used batteries properly according to loca...

Страница 32: ...Software Description Before beginning the installation please be sure your Windows user profile has the appropriate rights to install the software properly particularly Windows XP Insert the setup CD...

Страница 33: ...installed they will be skipped If the Net 4 0 Framework is not installed the installer will appear 2 Click Accept If the SQL server 2008 express is not installed the installer will appear 3 Click Acce...

Страница 34: ...ears 1 Select the installation folder you want the Server installed to The default folder is HIGHLY recommended 2 Under Install FMS Server for yourself or for anyone who uses this computer select Ever...

Страница 35: ...Server installed to The default folder is HIGHLY recommended 2 Under Install FMS Server for yourself or for anyone who uses this computer select Everyone 3 Click Next 1 Click Next IMPORTANT After FMS...

Страница 36: ...4 0 Framework installer will appear here if the Client is being installed on a machine without it The Client will also install the SQL Compact Edition 2 Click Accept After the prerequisites are insta...

Страница 37: ...llation 2 Select the installation folder you want the Client installed to The default folder is HIGHLY recommended 3 Click Next When the installation is complete a screen similar to this one displays...

Страница 38: ...is 8081 If another application is using the default port change the port on this screen and the server to an open port Make sure you have chosen the same port in both places 3 Click OK to attempt a c...

Страница 39: ...e 2 Click the Delete in the top left hand corner 3 Confirm your request to delete the user If there was a problem deleting a user an error message will display System Admin Make changes to all levels...

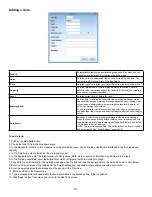
Страница 40: ...ers To track this you first need to add a tank and its corresponding fluid Creating a New Fluid You must create the fluids before tanks can be created To create a fluid 1 Click Add Fluid 2 Enter the F...

Страница 41: ...specified Warning Level this email is sent to the email recipient Multiple recipients can be defined Enter a semicolon between each email address NOTE This is not a required field This option will no...

Страница 42: ...ts in which it was added gal lons liters pints and quarts After entering the information click Save to save your changes You will be asked to verify your changes When the verification screen appears c...

Страница 43: ...lick Edit The window below opens a To delete a fluid select the fluid you would like to delete then click Delete 3 Update the Fluid Name and ID 4 Click Save to save changes or Close to exit without sa...

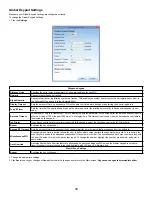
Страница 44: ...the barcode scanner feature is selected on the keypad Int Printer If you have an optional internal printer connected to the keypad select the checkbox next to the Int Printer field Buzzer Activates t...

Страница 45: ...the keypad Use only the last 8 characters as shown here Keypad Address NOTE The keypad address can also be viewed via the keypad RAD menu see page 23 Radio Address Radio Prefix 4 Select the Master Zo...

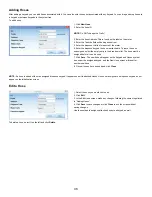
Страница 46: ...hose must be assigned before it can be used 7 Click Save The new hose will appear on the Keypad and Hoses system tree under the assigned keypad and the New Hose screen will reset for another new hose...

Страница 47: ...adios can support up to 250 meters Auto Log Off Sets how long in minutes the PC user will be able to sit idle before timing out and forcing the user to log back in Email Completed WO Emails Work Order...

Страница 48: ...lay The options are Server Client Date Range 3 Click Submit 4 Click Export to save the file Printer Settings 1 From the System Settings screen click Printer Settings 2 Click Select Printer and chose a...

Страница 49: ...stra tor for information 3 Enter the email address of the recipient 4 Enter your email address in the From line 5 Enter the subject in the Subject line 6 Enter the work order message you would like to...

Страница 50: ...e Master Keypad and PC click Test Comm 2 Upon completion a Test Passed screen displays After the system is configured you will need to initialize the system before using The first time you click the I...

Страница 51: ...itialization 4 Upon completion a Request Completed screen displays After the system is initialized once any new changes made to the system configuration need to be initialized before the system can be...

Страница 52: ...rk Order ID field 3 Enter a Quantity and type of Fluid to be dispensed in the respective fields The fluid must be assigned to a valid tank 4 Click Save The screen resets for a new work order entry An...

Страница 53: ...quantity of fluid actually dispensed The quantity that was preset on the work order The user that dispensed the fluid The type of fluid dispensed The hose the fluid was dispensed from The status of t...

Страница 54: ...eria it does not clear the report Reviewing a Work Order To mark a work order as reviewed check the box below Reviewed and press Enter Changing the Unit of Measure At the bottom of the screen there ar...

Страница 55: ...and information The information displayed on the tank icons includes The tank ID on line one Type of fluid in that tank and ID on the second line Current level of the tank capacity and warn Tank leve...

Страница 56: ...progress please wait 10 sec Meter Error Codes The meter has several Error Codes that may display These provide indication at the meter that there is an error in communication between the meter and ke...

Страница 57: ...id Capacity Level 1 2 3 4 5 6 7 8 9 10 11 12 13 14 15 16 Maximum 16 Tanks Tank volume format 00000 000 Keypad ID Address xx xx xx xx 1 2 3 4 5 6 7 8 9 10 11 12 Maximum 36 Dispense Keypads RF Keypad ad...

Страница 58: ...Hose Meter ID Address x xxx xxx xxx Tank Unit Keypad 1 2 3 4 5 6 7 8 9 10 11 12 13 14 15 16 17 18 19 20 21 22 23 24 Meters Hoses Maximum 250 Meters Hose Meter Hose address is a 10 digit number 58...

Страница 59: ...4 15 16 17 18 19 20 21 22 23 24 25 26 27 28 29 30 31 32 33 34 35 Users The user field is alphanumeric with a maximum of 16 characters The user PIN ID is a 4 digit number Number of Users Allowed Superv...

Страница 60: ...ration Weaverville NC 28787 800 747 5300 800 763 0840 Fax www balcrank com SERVICE BULLETIN SB 3092 Revision C 9 17 Revision Log Rev A New release Rev B Added important note to pages 41 44 45 regardin...

Отзывы: