© 2009 Austin Kontore LLC
Page 36 of 54
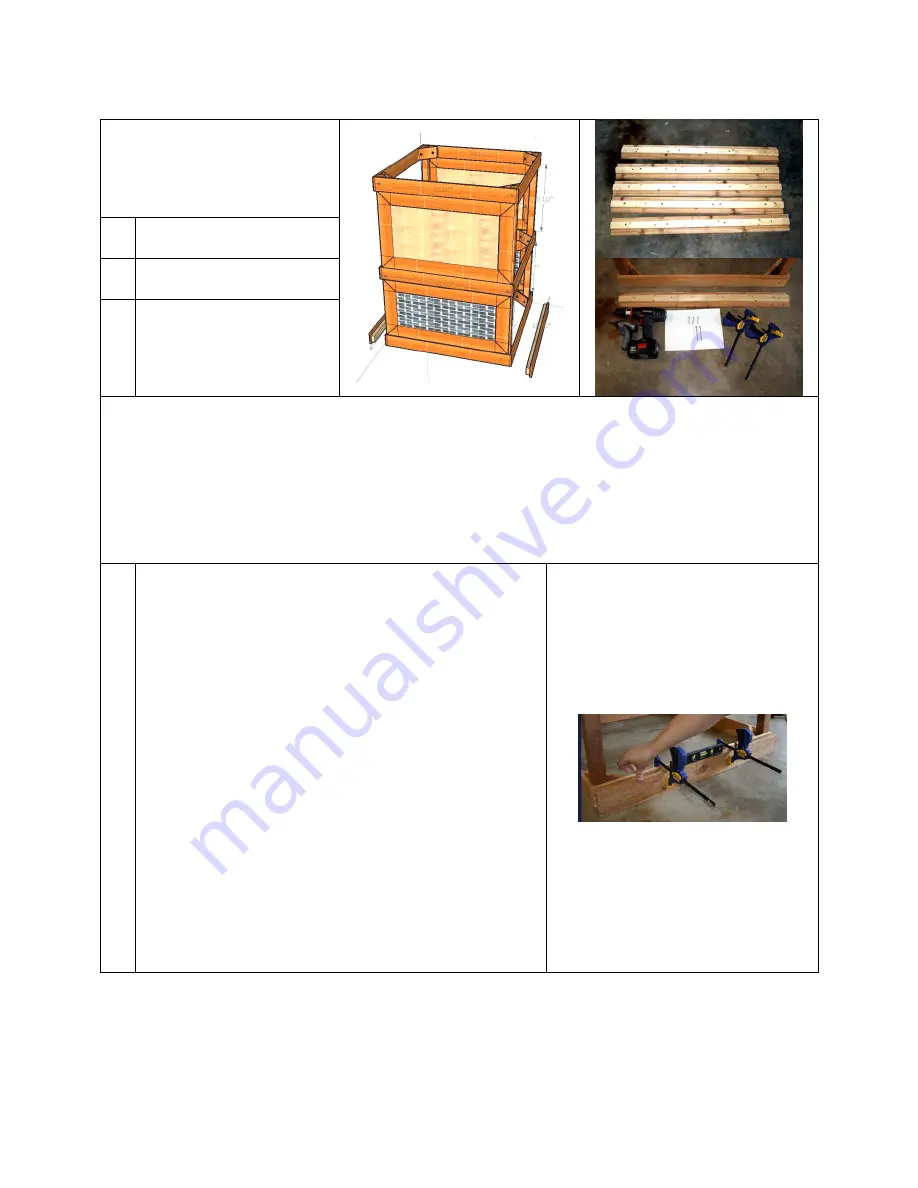
Door Slide Rails:
Lower Level
(2) Door Slide Rails
(prefabricated)
(6) 1 5/8” Screws
(Three per Door Slide Rail)
(4) 3” Screws
(Two per Door Slide Rail)
The Door Slide Rails are prefabricated parts which are mounted to the sides of the chicken coop. The
doors slide on these rails. The installation begins at the bottom of the coop and works upwards. Start
with first slide rail at the bottom of the prefab square.
Important:
To make the photographs in this section clearer, the fixed screens and panels were
removed. When building your coop, two of the sides will have the fixed screens and panels installed.
Rotate the coop so that an open side is facing you.
Place one of the Door Slide Rails against the side of the
Lower Core Square. The ends should be flush to the edges
of the Posts, and the assembly should be flush with the
top edge of the Core Square.
Use a small level to verify that the Door Slide Rail is level
along its length. (It should be, as this piece will be laying
on the floor.)
Clamp the Door Slide Rail in place using two clamps,
located about 12” from the ends.
Important:
Make sure that the Door Slide Rail is
installed on an “open” side of the coop. This is where the
doors will be.


