background image

85

Maintenance

Decommissioning and maintenance works

Inspection and maintenance interval

Boiler maintenance is only to be 

carried out by qualified staff with 

calibrated equipment.

When replacing spare parts only 

original ATAG Service parts are to 

be used. For this purpose, please 

refer to the Service parts list to find 

article numbers and exploded views. 

Please contact ATAG.

Maintenance intervals

Maintenance has to be carried out at 

least after 16,000 operational hours 

max. or every 4 years, whatever comes 

first. 

(To verify with local

service depending by installing

condition).

Depending on the intensive use of 

the device, maintenance intervals will 

have to be decreased accordingly. For 

other situations, maintenance intervals 

may also have to be decreased. In 

such cases, please contact ATAG for 

additional advice.

Inspection and maintenance tasks 

have to be carried out in accordance 

with the maintenance instructions at 

all times. Some tasks are described in 

these maintenance instructions. For 

complete inspection and maintenance 

instructions, see pages 87-93.

When carrying out maintenance 

on the boiler, the gas tap has to be 

closed and secured against opening. 

Maintenance works

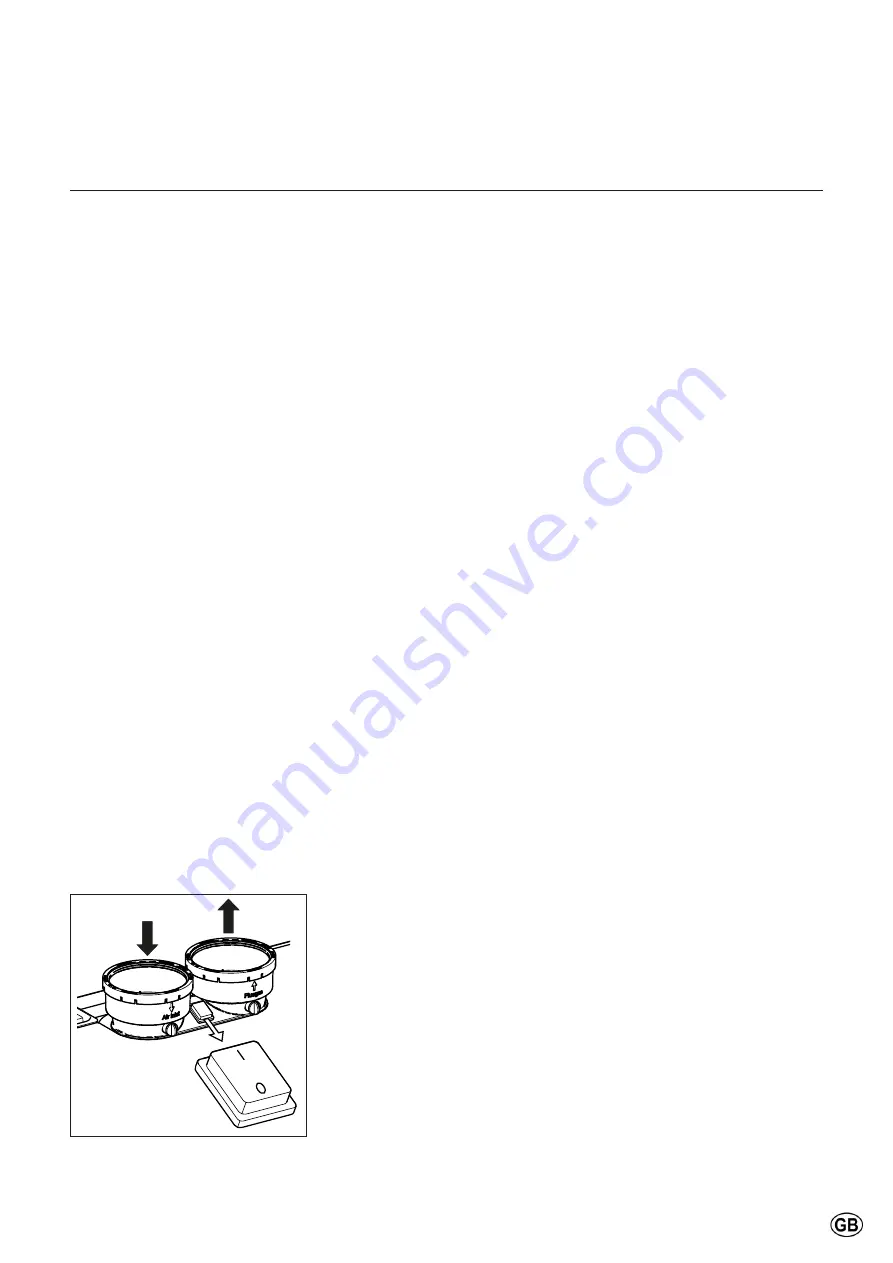
-  Use the ON/OFF switch (A) to turn 

the boiler off;

-  Interrupt the power supply to the 

boiler, by operating the mains circuit 

breaker in the boiler room.

-  Interrupt the gas supply to the boiler.

During emptying of the boiler, it is 

possible that a part of the heating 

water stays behind. Make sure that 

any remaining heating water cannot 

freeze, in case of a frost hazard. 

Decommissioning

It may be necessary to set the boiler 

out of service in some situations. 

Switch the boiler to 

“off”

 mode (white 

color of power button) pressing the 

power button.

This switches off the functions DHW 

prog and Pump prog respectively.

ATAG recommends leaving the power 

switch switched on to ensure that the 

boiler pump(s) and three-way valve 


(if fitted) are automatically activated to 

prevent them from sticking. The frost

protection remains active. Leave gas 

supply open.

If frost, during the period when the 

boiler is out of operation, is likely, 

then you are advised to remove the

power from the boiler and drain the 

boiler(s) and installation. In this

case: close the gas valve.

Maintenance

Please observe the following safety 

instructions:

All works on the boiler and 

the heating facility (assembly, 

maintenance, repairs) may only 

be carried out by authorized 

technicians, by using suitable 

tools and calibrated measuring 

instruments. The exchange of 

components requires original  

ATAG replacement parts. 

The main stopcock for gas must be 

closed and secured against reopening.

The casing must first be removed, 


to be able to carry out maintenance 


on the boiler. The panel is secured 


by 2 screws on top of the door.

After loosening the screw, the casing 

can be removed by pulling and lifting it. 

Follow instruction on page 82.

All equipment is preset at the factory. 

An O

2

 / CO

2

 control measurement must 

be carried out during commissioning.

No change should be made on the 

zero-point setting. The zero-point 

setting must only be checked after 

a malfunction, or after an exchange 

of the gas valve, the venturi or the 

ventilator motor.  

The zero-point setting does not 

serve for setting up the combustion-

technical characteristic values. 

These are made exclusively through 

the O

2

 / CO

2

  setting.

All gas pipes and screws must be 

tested for leakproofness, using 

a leak-detecting spray, whenever 

maintenance or repair works have 

been carried out on the boiler.

In this regard, please observe all of 

the individual maintenance steps 

documented on page 90 ff., as well 

as the overview of inspection and 

maintenance procedures provided on

page 92 to 93.

Inspection interval 

An inspection must be carried out 

at least after every 4,000 boiler 

operating hours, however at least 

once every year. (To verify with local

service depending by installing 

condition).

An inspection consists of a visual 

check, of the general condition of the 

boiler and the installation.

The objectives of an inspection is an 

assessment of the condition of the 

equipment, and an evaluation as to 

when maintenance works are required. 

A visual inspection can lead to a 

maintenance procedure.

No tools are required during an 

inspection (except for tools for 

removing the panel). If necessary, the 

corresponding individual maintenance 

steps must be carried out, which are 

listed as of page 93.

A

Содержание FXL150

Страница 1: ...8G 51 49 01 03 21 Changes reserved Installation Servicing Instructions XL75F XL105F XL125F XL150F XL180F XL210F...

Страница 2: ...ulti function 42 44 Temperature sensors 45 External controls 46 eBus2 controls 47 Wiring diagram 48 49 Boiler setting Boiler setting 51 Operation Description of display 52 Description of display and k...

Страница 3: ...equipment Part 1 Emissions EN 55014 2 2008 EMC Requirements for household appliances electrical tools and similar equipment Part 2 Safety product family standard EN 61000 3 2 2013 Electromagnetic comp...

Страница 4: ...4 Product description ATAG XL F Double Engine 3 11 14 15 13 20 10 19 24 12 APS 6 5 21 9 3 4 T1a T1 2 18 17 T2 16 6 5 9 4 3 T1a T1 1 18 T2 17 8 7 P1 23 22 LV HV R A C G 26 26 27...

Страница 5: ...nt it is ensured that the boiler performance always corresponds to the actual heating requirements Delivery scope The boiler which has been assembled at the factory and is ready to use is delivered in...

Страница 6: ...ri 9 automatic air vent 10 circulation pump 11 control unit HMI 12 burner control unit 13 flue gas outlet 14 air inlet 15 water non return valve T1 flow sensor T1a secondary flow sensor T2 return sens...

Страница 7: ...1 5 Overpressure at boiler output max Pa 156 243 143 200 215 265 Water volume in heating circuit max l 9 3 13 9 16 8 16 8 21 3 25 8 Weight kg 73 80 127 127 132 140 Gas pressure nominal mbar 20 Gas pre...

Страница 8: ...mm 430 430 K Condensate connection mm 15 15 L Boiler return flow gas mm 35 35 M Boiler return flow gas mm 130 130 N Condensate connection mm 190 190 Boiler connections Type ATAG XL F 75 105 Flue gas n...

Страница 9: ...ion mm 430 430 K Condensate connection mm 15 15 L Boiler return flow gas mm 35 35 M Boiler return flow gas mm 130 130 N Condensate connection mm 190 190 Boiler connections Type ATAG XL F 125 150 175 2...

Страница 10: ...ter boiler with the exception of tank probe and Clip in that can be connected also to other boiler Cascade In principle any combination is possible The selection can include models with different outp...

Страница 11: ...utomatic air vent low loss header 13 Pocket for temperature sensor T10 14 Frame 15 LLH connection pipe LEFT or RIGHT side Low loss header can be installed on left or right side of the cascade using pr...

Страница 12: ...ine ATAG XL F 3 boilers floor standing in line ATAG XL F 5 boilers floor standing in line ATAG XL F 8 boilers floor standing in line Product description ATAG XL F Cascade examples floor standing in li...

Страница 13: ...715 1440 715 2140 715 2140 715 4686 715 4686 ATAG XL F 3 boilers floor standing back to back ATAG XL F 4 boilers floor stan ding back to back ATAG XL F 6 boilers floor standing back to back Max 1000k...

Страница 14: ...ONNECTION KIT FS CH BACK x 0 1600 3905166 CONNECTION KIT FS DHW x 0 1600 3905168 COLLECTOR ASM FLOW RETURN DN100 2B LINE 4B B2B FS x x 0 1600 3905169 COLLECTOR ASM FLOW RETURN DN100 3B LINE 6B B2B FS...

Страница 15: ...x 3905225 FLUE WALL PLATE 150MM x x x x x x x 3905226 FLUE SUPPORT ELBOW PP 90 DEGR 150MM x x x x x x x 3905227 FLUE SUPPORT STRIP x x x x x x x 3905228 FLUE SPACER BRACKET 150MM 2PCS x x x x x x x 39...

Страница 16: ...FLUE WALL TERMINAL PP CONC 100 150MM x x x x 3905260 FLUE ADAPTER PAR CONC 100 100 100 150 x x x x 3905261 ADAPTOR 100 110 FLUE AIR x x x x 3905262 FLUE EXPANDER 130 150MM x x x x x 3905263 FLUE EXPAN...

Страница 17: ...n pre set and tested at the factory The package dimensions for all appliances are Width 750mm Height 1200mm Depth 800mm This makes it possible to transport all models in one piece through a normal doo...

Страница 18: ...llation Wheels can be adjusted 10mm to compensate eventual floor irregularity The ATAG XL F cascade can be mounted in 2 ways Floor standing in line All boilers standing alongside one 10 mm 100 mm 1000...

Страница 19: ...x 3 1 51 7 2 0 200 20 For single boiler installation the connection to a low velocity header and secondary circuit pump is strongly recommended For installation of cascaded boilers the connection to a...

Страница 20: ...he supplied M8 bolts spring washers and nut Attention once in the correct and final position the floor standing rack has to be fixed on the ground Collector assembly 6 Place the flow water collectors...

Страница 21: ...lower beam 5 Fit the upper beam on the upper brackets using the supplied M8 bolts spring washers and nut Attention once in the correct and final position the floor standing rack has to be fixed on th...

Страница 22: ...afety valve ATAG recommends fitting the 6 bar safety valve due to the control settings shutting the boiler off at 6 bar Gas 28mm short gas pipe with 1 1 4 flat sealing and 28mm compression fitting wit...

Страница 23: ...ndard with M16x55 bolts spring washers nuts and sealings 5 Flow temperature sensor T10 Every system with more than 1 ATAG XL F boilers must be provided with a flow temperature sensor T10 and must be c...

Страница 24: ...14 1779 440 332 904 1100 907 133 214 1105 690 35 35 99 1007 314 198 290 1027 R 2 R 2 R 1 1 4 1105 690 35 35 99 1007 314 198 290 1027 R 2 R 2 R 1 1 4 1105 690 35 35 99 1007 314 198 290 1027 R 2 R 2 R 1...

Страница 25: ...x BCD 170 120 250 80 349 709 910 560 175 30 220 110 DN100 DN100 DN100 DN100 G1 G1 2 G3 8 Dimensions low loss header DN100 up to 1000kW DN65 133 DN100 197 DN65 DN100 Dimensions bend DN100 85 3 365 400...

Страница 26: ...ration The central heating installation must be de aerated properly before it is taken into operation Please check the Chapter Commissioning in this regard If a regular topping up of water is required...

Страница 27: ...unds polymers and organic bases Kiwa certified 1 litre 100 litres For new CH installations Removes oils grease and flow control agents Sentinel X400 Solution of synthetic organic polymers 1 2 litres 1...

Страница 28: ...installation It is not necessary to install an expansion vessel to each boiler One single central installed expansion vessel is sufficient When using a single expansion vessel the handles of the valve...

Страница 29: ...s value is to be measured in between the operational gas meter and the CH boilers For correct functioning of the boilers it is necessary that the gas dynamic inlet pressure must be at least 19 mbars T...

Страница 30: ...ing is carried out most easily by pouring approximately 0 5 litres of water into the flue gas pipe 3 Once each year the flue gas connections have to be checked for leakproofness and the siphon filled...

Страница 31: ...ansion DHW cylinder circuit When connecting a DHW cylinder to the boiler before the low velocity header an ATAG diverter valve is recommended The circuit between the diverter valve 1 between the boile...

Страница 32: ...ushed out via the boiler and into the siphon Please observe the following recommendations Only use corrosion resistant material The diameter must be calculated and selected according to the national r...

Страница 33: ...oiler will be IPX0D instead of IPX4D An air filter or a grid is recommended on the air intake of the boiler available as an accessory on pages 15 17 Room sealed system The required combustion air is s...

Страница 34: ...e in the same square area C43 Suction air and waste gas duct via the chimney system which is integrated in the building C53 Section the air and waste gas exhaust to the outside in areas with different...

Страница 35: ...ssure or over pressure using a flue gas outlet system The air supply may also be supplied collectively but if the boiler room is suitable for that purpose it may also be obtained from the boiler room...

Страница 36: ...es d d h d d h d d d d Dimensions cascade flue ATAG XL F Open system underpressure Output 80 60 d minimum diameter in mm kW h 2 5 h 5 9 h 9 13 h 13 17 114 240 210 200 190 190 240 360 300 270 260 250 3...

Страница 37: ...d h d d h d d d d Dimensions cascade flue ATAG XL F Open system overpressure Output 80 60 d minimum diameter in mm kW h 2 5 h 6 10 h 11 15 h 16 20 114 240 150 150 150 150 240 360 150 150 180 180 360...

Страница 38: ...ct openings It must be mounted inside of the boiler room The mains switch is used for switching off the power supply during maintenance works Installation Electrical connection All cables are passed t...

Страница 39: ...put Input Input Input Input GND PWM 0 10V 24V Signal GND 24V Signal GND Signal 24V GND 24V 5V Signal GND GND Signal PADIN 3 BOILER LOCK PFDIN 1 PADIN 1 PADIN 2 MO2 0 10V output Input Input Input Outpu...

Страница 40: ...rth Protective Earth 5 1 1 VFR1 Volt Free Contact 1 a i HC1 pump 230VAC 2A max 80A inrush max not fused relay 6 1 2 7 2 1 VFR2 Volt Free Contact 2 a i Alarm Output 230VAC 1A max cos phi 0 8 not fused...

Страница 41: ...2 0 10V output Input In Output Input Contact Line Type Name Function Description Electrical Description 1 PWM MO2 Multifunctional Output 2 System Pump Modulator Tank Filling pump Modulator 0 10 Volt f...

Страница 42: ...preparation there is a dedicated Tank sensor For the other regulations the tank sensor is the Top Sensor Take in account this is a 10K sensor 0 10V GND 5V NTC 5V NTC 5V NTC 5V NTC 5V NTC Signal GND S...

Страница 43: ...ut 24V ignal 24V Signal GND Signal 24V GND 24V 5V Signal GND GND Signal PADIN 3 BOILER LOCK FDIN 1 PADIN 1 PADIN 2 Input Input Input Input On Off heat request Input can be used for on off control up t...

Страница 44: ...t GND PWM 0 10V 24V Signal GND 24V Signal GND Signal 24V GND PFDIN 1 PADIN 1 PADIN 2 MO2 0 10V output Input Input Output Input Cascade connection The connection between boilers in a cascade is done vi...

Страница 45: ...ce Tool Memory Key Flame Sensor PE F4 F1 CN8 CN12 CN23 1 1 1 1 CN6 CN22 CN17 CN14 1 6 4 1 1 1 1 1 3 1 1 1 CN14 CN6 CN18 CN5 F3 F2 CN2 CN17 CN16 1 1 1 3 1 1 CN11 1 CN3 1 CN1 CN9 CN12 CN17 CN10 1 1 1 4...

Страница 46: ...Circulation pump A9 Water pressure sensor P1 A10 Air pressure switch APS A11 HMI communication cable low voltage B Slave printed circuit board B1 Detection electrode B2 Ignition electrode B3 Flow sen...

Страница 47: ...Disconnect the filling hose from the hydraulic circuit When powering up the boiler an automatic air purge program will run to vent the boiler Airpurge active This will last for approximately 7 minutes...

Страница 48: ...boiler is part of a cascade installation select Master boiler cascade and confirm the selection by pressing the OK button On slave boiler 1 to X max 8 you just have to confirm the address Single Boil...

Страница 49: ...5 Pump Continuous function 6 Maintenance Warning present 7 Outdoor Temperature 8 System Pump status T10 means T10 is present When the pump symbol is flashing the relay on block 1 contact 3 is closed...

Страница 50: ...a logical button allocation for menu control confirmation and correction and emission measurement Reset only functions in case of an Error or Message Recommendation First identify the fault by findin...

Страница 51: ...to display the operating status of the system and to set the desired room temperature by simply turning the knob Basic settings menu In this menu the main functions can be accessed by selecting the ma...

Страница 52: ...l Code Press OK 3 Use to go down and to go up to highlight Complete Menu Press OK It is now loading the menu The screen left appears This way you have access to the complete parameter level 1 From the...

Страница 53: ...ce OK Yes BACK No 4 Zone1 Parameters 4 0 Setpoint 4 0 0 T Day Room temperature set point for day period 10 30 C 21 4 0 1 T Night Room temperature set point for night period 10 30 C 16 4 0 2 T set Z1 T...

Страница 54: ...2 4 2 3 Offset Offset heating line adjustable per C LT From 7 C to 7 C HT From 14 C to 14 C 0 0 4 2 4 Room influence proportional Only visible on the boiler if a room sensor is connected LT 2 HT 4 4 2...

Страница 55: ...nction 0 OFF 1 ON 0 1 0 5 Zone2 Parameters see Zone1 chapter 4 6 Zone3 Parameters see Zone1 chapter 4 20 Buffer 20 0 Configuration 20 0 0 Buffer Activation 0 OFF 1 ON 0 1 0 20 0 1 Buffer charge mode 0...

Страница 56: ...gulation 0 OFF 1 ON 0 1 1 24 4 1 External temperature correction 3 to 3 C 0 24 4 2 Boost Time 0 60 min 16 24 4 3 Plant frost protection 0 OFF 1 ON 0 1 0 24 4 4 T Gradient 0 15 C 5 24 4 5 System Pump O...

Страница 57: ...DHW circulation sensor 4 DHW charging sensor 5 Buffer storage tank top 6 Buffer storage tank bottom 7 Flue gas temp sensor 0 7 1 24 6 1 Multi In Temp 2 0 None 1 Common flow sensor 2 DHW storage tank...

Страница 58: ...boiler not complete cascade 8 CH timer input 0 8 0 24 6 7 PADIN 4 input Gas Pressure Switch only applies on the boiler not complete cascade 7 7 7 24 7 Configurable Inputs Outputs 2 24 7 0 Multi Out HV...

Страница 59: ...5 5 24 8 Boiler manual settings 24 8 0 Manual mode activation OFF ON 0 1 0 24 8 1 Boiler pump control OFF ON 0 1 0 24 8 2 Fan control 0 OFF 1 ON 0 1 0 24 8 3 Boiler pump control 2nd Engine 0 OFF 1 ON...

Страница 60: ...urn T C 24 11 7 Pump Flow Rate l min 24 11 8 Gas Power kW 24 12 Boiler Diagnostics 24 12 0 Flue Gas T C 24 12 1 Diverter Valve Pos Hot Water Central Heating 24 12 2 Heating Circuit Pressure bar 24 12...

Страница 61: ...fan cycles n x10 24 15 5 Time of fan ON h x 10 24 15 6 Number Of Flame Faults n x10 24 16 Boiler Statistics 24 16 0 Life Time h x 10 24 16 1 Hours Burner On CH h x10 24 16 2 Hours Burner On DHW h x10...

Страница 62: ...ump target active with LLH target temp 10 90 C 50 25 Cascade Management 25 0 General 25 0 0 Max CH Adjustable Power perc 0 100 100 25 0 1 Max DHW Adjustable Power perc 0 100 100 25 0 2 Cascade Turnove...

Страница 63: ...Domestic Hot Water 25 2 0 DHW Setpoint Temperature 20 80 C 60 25 2 1 Comfort Function 0 Disabled 1 Time Based 2 Always Active 0 2 2 25 2 2 System DHW Mode 0 CH Only 1 DHW Tank NTC 2 DHW Tank Thermost...

Страница 64: ...C 25 3 3 Storage Temperature High C 25 3 4 Storage Temperature Low C 25 3 5 System Pump Status 25 3 6 DHW Pump Status 25 4 Cascade Diagnostics 25 4 0 Cascade Power level 25 4 1 Total Boilers 25 4 2 Av...

Страница 65: ...tion 26 32 3 0 Max PWM Pump 46 95 95 26 32 3 1 Min PWM Pump 40 95 46 26 32 3 2 CH pump overrun 0 16 min 5 26 32 3 3 Max pressure 2 0 6 0 bar 6 26 32 5 Domestic Hot Water 26 32 5 0 DHW Setpoint Tempera...

Страница 66: ...sor 4 DHW charging sensor do not use 5 Buffer storage tank top 6 Buffer storage tank bottom 7 Flue gas temp sensor thermostat 0 7 0 26 32 6 4 PADIN 1 input 0 None 1 Room thermostat HC1 ON OFF 2 Room t...

Страница 67: ...e circulating pump 4 DHW charging pump 5 BUF filling pump 6 Storage tank transfer pump 0 6 0 26 32 7 1 VFR 1 output 1 0 None 1 System pump 25 1 6 2 HC1 Pump 3 DHW re circulating pump 4 DHW charging pu...

Страница 68: ...Test Utilities 26 32 9 0 Test mode 0 OFF 1 ON 0 1 0 26 32 9 1 Air purge function 0 OFF 1 ON 0 1 0 26 32 9 2 Force Backup 0 OFF 1 ON 0 1 0 26 32 9 3 Force Restore 0 OFF 1 ON 0 1 0 26 32 10 Engine 1 dia...

Страница 69: ...26 32 11 7 Pump Flow Rate l min 26 32 11 8 Gas Power kW 26 32 12 Boiler Diagnostics 26 32 12 0 Flue Gas T C 26 32 12 1 Diverter Valve Pos Hot Water Central Heating 26 32 12 2 Heating Circuit Pressure...

Страница 70: ...x 10 26 32 15 6 Number Of Flame Faults n x10 26 32 16 Boiler Statistics 26 32 16 0 Life Time h x 10 26 32 16 1 Hours Burner On CH h x10 26 32 16 2 Hours Burner On DHW h x10 26 32 16 3 Diverter valve...

Страница 71: ...2 1 1 BMS Analog Control Voltage to Stop Heat Demand V 0 5 42 1 2 BMS Analog Control Voltage for Maximum Heat Demand V 9 5 42 1 3 BMS Analog Control Voltage for Minimum Heat Demand V 2 42 1 4 BMS Anal...

Страница 72: ...TIME after each tapping the boiler maintains the comfort temperature for 30 minutes ON Boiler keeps hot water 365 24h at the desired comfort temperature Time program Comfort function DHW Five differen...

Страница 73: ...y monitoring the system return temperature Thermoregulation ON One outdoor sensor and or a room sensor accessories detect changes the outside or room temperature The controller calculates the correct...

Страница 74: ...fic buildings Increase setting Increases the flow temperature especially when the outdoor temperature is cold Lower the setting Reduces the flow temperature especially when the outdoor temperature is...

Страница 75: ...uring 5h delay time is more than 1K above the desired summer winter changeover temperature the boiler switches from winter to summer mode If the outdoor temperature during 5h delay time is more than 1...

Страница 76: ...ments to individual parameter settings The OK button selects the parameter set and confirms and stores any adjustments made 3 Use to go down and to go up to highlight Screen Settings Press OK 4 Option...

Страница 77: ...o go up to highlight the desired field Press OK The relevant field starts to flash Use to go down and to go up to highlight the correct value Press OK After correctly filled in all fields Press Save T...

Страница 78: ...o down and to go up to highlight 007 as the Technical Code Press OK 3 Use to go down and to go up to highlight Complete Menu Press OK It is now loading the menu 25 03 19 09 00 10 1 5 bar CH Pump Overr...

Страница 79: ...ettings 4 2 0 Zone temperature range 0 Low Temp LT 1 High Temp HT 1 4 2 1 Thermoregulation 0 Fix Flow T 1 Basic thermoregulation 2 Room T Only 3 Outdoor T Only 4 Room Outdoor T 0 0 1 2 3 4 4 2 2 Slope...

Страница 80: ...ent control with outdoor sensor The flow temperature is calculated via the heating curve as a function of the current outdoor temperature This type of control requires that the heating characteristic...

Страница 81: ...display F 3 Pull the top panel in a forward motion G H Commissioning Inspection The panelling of the equipment consists of metal and plastic parts which can be cleaned with a mild non aggressive clea...

Страница 82: ...e Flue Gas Analyser into the measuring point of the flue gas pipe 1 see illustration Wait for one minute and then carry out a combustion analysis Check whether the O2 CO2 values that are listed below...

Страница 83: ...is achieved Please contact ATAG if the values should lie outside of the applicable tolerances End of measuring Press the back button for 5 seconds to exit chimney sweep mode This completes the procedu...

Страница 84: ...CO2 Once done repeat the steps above for engine 2 Legend 1 Measuring point for the flue gas probe 2 Offset regulation 3 Main throttle regulation 4 Pressure P int 5 Pressure P out After this setting ha...

Страница 85: ...is likely then you are advised to remove the power from the boiler and drain the boiler s and installation In this case close the gas valve Maintenance Please observe the following safety instructions...

Страница 86: ...on of the equipment Through a reduction of emissions that are related to the production of heat primary energy requirements and environment burdening can be substantially reduced A visual inspection m...

Страница 87: ...uri 1 and the gas valve 2 and remove the gasline 3 Replace the gaskets of the gasline O ring with new ones Disconnect the electrical connections from the fan 4 Turn A clockwise the left 5 and anti clo...

Страница 88: ...ween the burner 8 and upper casing 10 Replace the gasket 11 between the upper casing 10 and exchanger Check the venturi 13 for pollution and clean them with a soft brush in combination with a vacuum c...

Страница 89: ...can be replaced unscrewing it from the heat exchanger Remove and replace the o ring Make sure of the tightness of the connection Sight glass If the sight glass 3 is damaged it can be replaced unscrewi...

Страница 90: ...ance Maintenance details From factory a fixed number of running months is set for service interval The number of running months cannot be changed After expiring of the number of running months the mes...

Страница 91: ...nnections 4 0 4 Siphon dirt collector and condensate drain 4 0 5 Ignition and detection electrode 4 0 6 iConXL heat exchanger 4 0 7 manual deareator 5 Boiler Burner in operation without air box boiler...

Страница 92: ...4 Replace gasket between heat exchanger and top part Top flushing the exchanger with water is not allowed 4 Checking parts on damage corrosion function and leaks and replace if necessary 4 0 1 Ignitio...

Страница 93: ...Error on a slave boiler itself Message on display no indication of BHE0 and BHE1 Fault Code engine 1 Fault Code engine 2 if applicable Overheat 101 1 Overheat 101 2 Reserved Reserved Flow Check 1 1P1...

Страница 94: ...d 309 1 Gas Relais check Failed 309 2 Pump Feedback Open Short Circuit 142 1 Pump Feedback Open Short Circuit 142 2 PCB Fault 1 303 1 PCB Fault 1 303 2 Too many Reset 304 1 Too many Reset 304 2 Pump F...

Страница 95: ...mperature 731 Buf Full Charge Error 732 Boiler parametrization fault 162 Boiler parametrization KO 163 Boiler parametrization OK waiting for NTCs 164 Boiler parametrization missing 165 Boiler parametr...

Страница 96: ...everal errors active it is possible to scroll trough them by pushing the ESC button Last page is the main display When there are no button activities for 30 sec the last error will be displayed again...

Страница 97: ...to go down and to go up to highlight 24 18 Error History Press OK 6 Option 24 18 0 Last 10 Errors is highlighted Press OK A survey of the last 10 Errors appears An example of an error message on the l...

Страница 98: ...recycled Please use the countryspecific recycling systems for professional and appropriate disposal or leave packaging materials with your specialist tradesman or dealer Device disposal The device mu...

Страница 99: ...erature C Resistance Ohm 10 4 574 9 4 358 8 4 152 7 3 958 6 3 774 5 3 600 4 3 435 3 3 279 2 3 131 1 2 990 0 2 857 1 2 730 2 2 610 3 2 496 4 2 387 5 2 284 6 2 186 7 2 093 8 2 004 9 1 920 10 1 840 11 1...

Страница 100: ...sor NTC1 Boiler return sensor NTC2 Outdoor sensor NTC4 Boiler pump 230 V P1 Boiler pump PWM PWM_P1 Common flow sensor T10 MTS1 HC1 pump MO1_HV Pumps managed in parallel System pump MO1_HV Heat request...

Страница 101: ...low sensor NTC1 Boiler return sensor NTC2 T10 MTS1 HC1 pump P_Z1 Controlled with CLIP 3 ZONE MIX CLIP 3 ZONE MIX needed HC2 pump P_Z2 HC3 pump P_Z3 System pump MO1_HV ON OFF Pump Heat request zone 1 P...

Страница 102: ...V_Z1 HC1 flow sensor NTC_Z1 HC2 pump P_Z2 HC2 mix valve MV_Z2 HC2 flow sensor NTC_Z2 HC3 pump P_Z3 HC3 mix valve MV_Z3 HC3 flow sensor NTC_Z3 System pump MO1_HV Heat request zone 1 PADIN1 or EBUS2 Hea...

Страница 103: ...Boiler return sensor NTC2 DHW tank sensor NTC3 DHW pump P2 T10 MTS1 HC1 pump VFR1 See note 1 System pump MO1_HV Heat request zone 1 PADIN1 or EBUS2 Alarm or sanitary pump VFR1 Optional see note 1 LPG...

Страница 104: ...5 EU EN 60335 2 102 2016 EN 60335 1 2011 EMC Directive 2014 30 EU EN 60335 2 102 2016 EN 61000 3 2 2013 EN 61000 3 3 2014 EN 55014 1 2011 EN 55014 2 2008 Ecodesign Directive 2009 125 EC EN 15036 1 200...

Страница 105: ...105 Notes...

Страница 106: ...106 Notes...

Страница 107: ...107 Notes...

Страница 108: ...to change the specifications and dimensions without prior notice ATAG Commercial 3 Juniper West Fenton Way Southfields Business Park SS15 6SJ Basildon Essex P h o n e 0 3 4 5 6 4 6 0 3 7 3 E m a i l...

Отзывы: