148
7. Secure the ECM and front fascia assembly to the
chassis using the existing self-tapping screws.
Tighten securely.
8. Install the resonator and expansion chamber and
secure using existing springs.
9. Install the hood, left-, and right-side access panels.
10. Connect both battery cables to the battery making
sure both are secure; then install the seat.
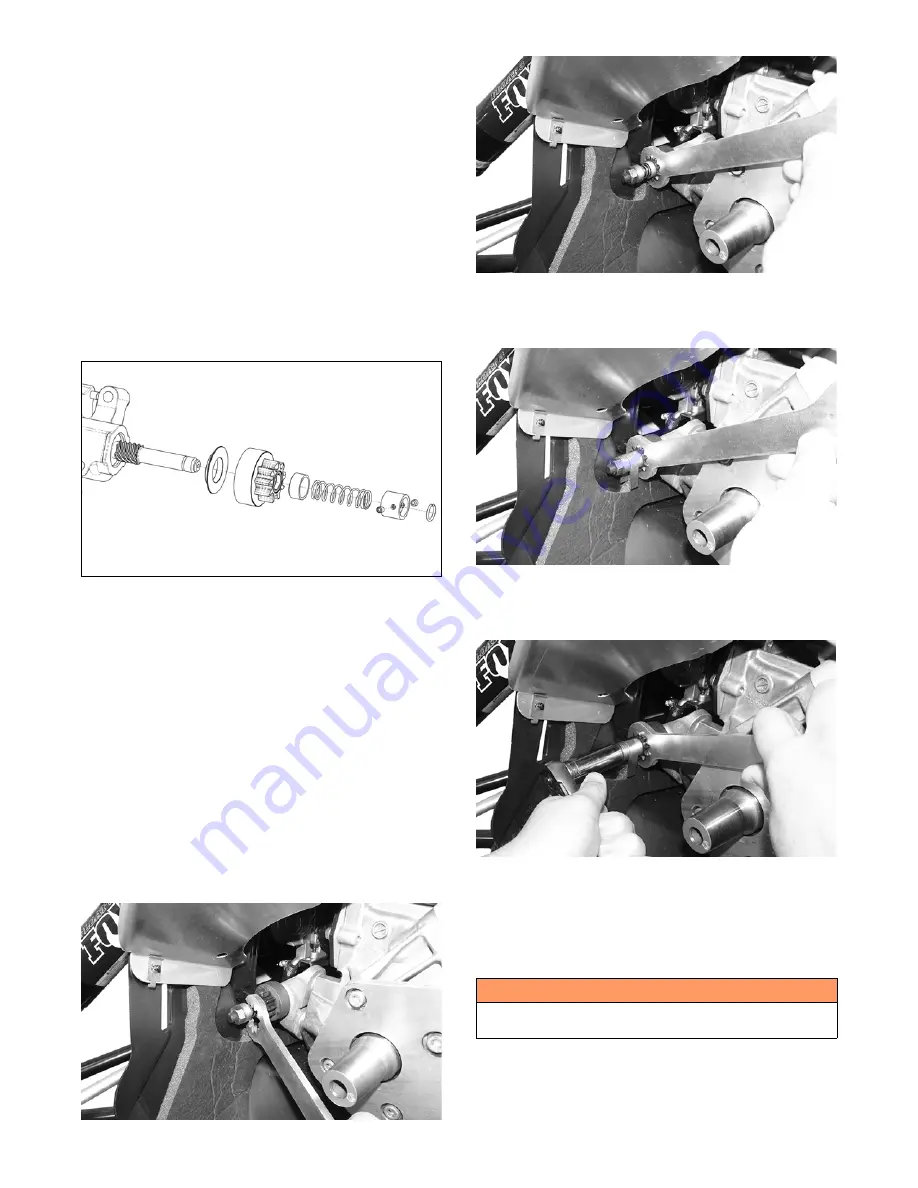
DISASSEMBLING PINION (6000)
NOTE: This procedure does not require the starter
motor to be removed from the snowmobile.
1. Remove the drive clutch.
2. Remove the two set screws securing the pinion stop
assembly to the pinion shaft.
SNO-352
3. Place a 12 mm socket over the end of the pinion shaft
and tap the socket gently with a hammer to dislodge
the snap-ring retainer and expose the snap ring.
4. Using a suitable pliers and flat-head screw driver,
remove and discard the snap ring.
5. Remove the snap-ring retainer (note end-for-end ori-
entation), pinion spring, spring retainer, and pinion
gear. Retain all components.
DISASSEMBLING PINION (8000)
NOTE: This procedure does not require the starter
motor to be removed from the snowmobile.
1. Remove the drive clutch.
2. Install the correct side of the pinion wrench over the
spring and onto the pinion gear aligning the grooves
in the wrench with the teeth on the pinion gear.
XM393
XM394
3. Install the pinion stop tool over the spring and in
between the pinion stop and the pinion spring
retainer.
XM395
4. Using a 17 mm socket, remove the nut and washer
from the pinion shaft noting that the pinion shaft has
reverse thread.
XM396
5. Remove both special tools, pinion stop, spring, and
spring retainer; then remove the pinion gear.
CLEANING AND INSPECTING PINION
1. Using parts-cleaning solvent, wash grease from the
pinion gear. Dry with compressed air.
2. Inspect the pinion gear for wear. If the gear is worn
or chipped, replace the pinion assembly.
3. Inspect the inner gear and housing. If the gear shows
any signs of wear, replace the pinion assembly.
! WARNING
When using compressed air to dry components, always
wear safety glasses.
Содержание M 8000
Страница 1: ...www arcticcat com SERVICE MANUAL www arcticcat com...
Страница 42: ...41 500cc_2A_15...
Страница 50: ...49 600_14_2...
Страница 58: ...57 800_12_2...
Страница 155: ...154 Troubleshooting Servomotor SERVO1A16...
Страница 156: ...155 SERVO2rv16...
Страница 193: ...192 0747 414 M 141 High Country Models...
Страница 209: ...208 NOTES...
Страница 210: ...Printed in U S A Trademarks of Arctic Cat Inc Thief River Falls MN 56701 p n 2260 847...


