6-5
6
.
KM482
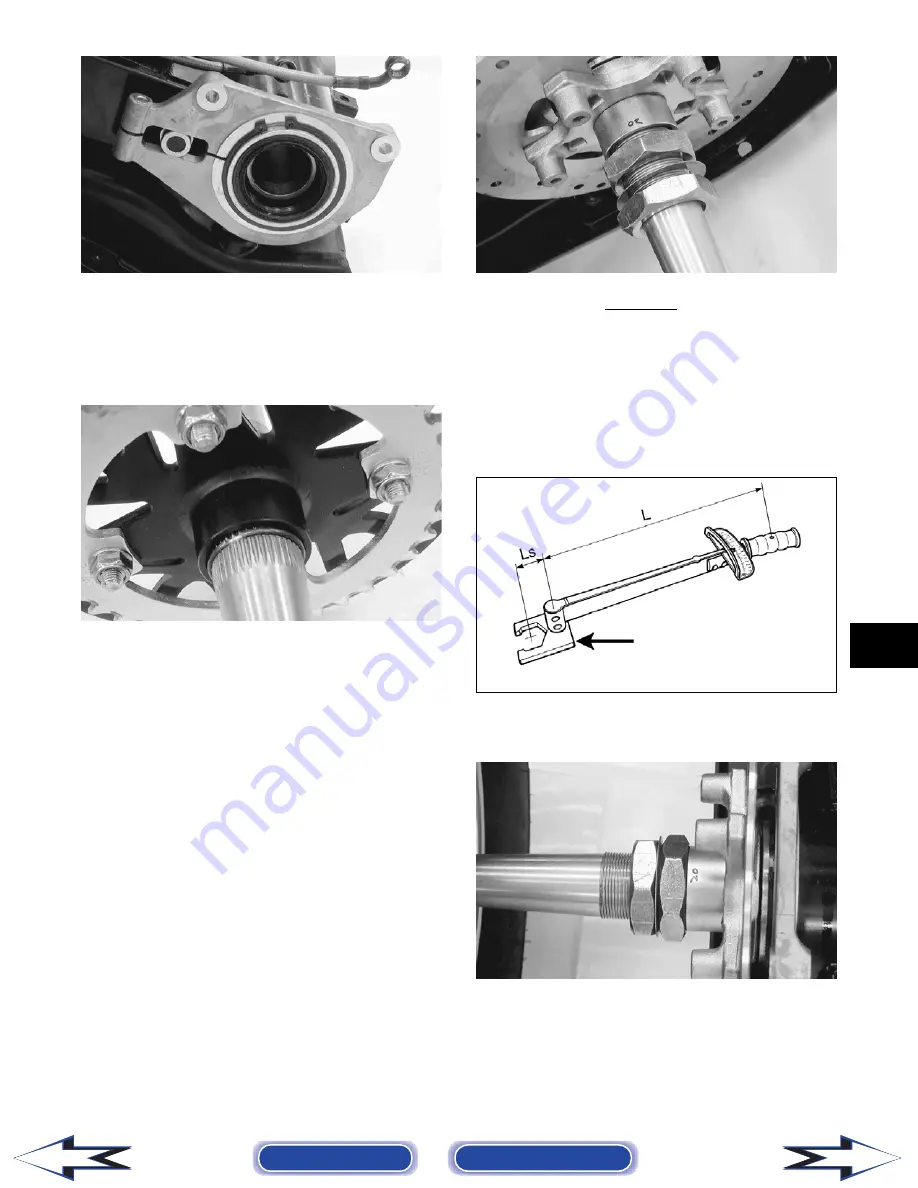
3. Slide the axle into the axle housing from the right
side; then apply multipurpose grease to all splined
areas of the axle.
4. Install the sprocket and sprocket hub on the axle and
secure with the snap ring; then install the drive chain.
KM477
5. On the left side, install the brake disc assembly
and spacer; then install the brake caliper and
secure with the two cap screws.
NOTE: To aid in tightening the axle nuts, engage
the brake lever lock.
NOTE: It is necessary to calculate the torque
value using the following formula due to the offset
of the special tool used to tighten the axle nuts.
6. Coat the axle threads with red Loctite #271 and
install one axle nut (left-hand threads); then using
the Rear Axle Nut Wrench, tighten the inner axle
nut to calculated specification.
KM471
T: Torque wrench reading to be calculated
Ts: Specified torque value (86 ft-lb)
Ls: Tool offset length (center to center)
L: Length of torque wrench (handle pivot to head-
center)
ATV2189
7. Install the washer; then install the outer axle nut
and tighten to calculated specification.
KM470
8. Adjust the drive chain (see Section 2); then tighten
the two cap screws.
9. Install the wheel hubs and tighten the rear wheel
hub nuts to 72 ft-lb; then install the cotter pins and
hub caps.
10. Install the rear wheels and tighten to 32 ft-lb.
L x Ts
= T
L + Ls
Back to TOC
Back to Section TOC
Next
Back
Содержание ATV 250 Utility 2009
Страница 1: ......


