2-8
D. Kinked or binding links.
E. Excessive wear.
The presence of any of the conditions requires drive
chain replacement.
NOTE: If the drive chain is worn or damaged, the
sprockets may also be worn or damaged. Inspect
the sprockets for worn, broken, or damaged teeth.
Always inspect the sprockets when a new drive
chain is being installed.
CLEANING AND LUBRICATING
The drive chain should be cleaned and lubricated fre-
quently to prolong chain and sprocket life. Use the fol-
lowing procedure to clean and lubricate the chain.
NOTE: This ATV is equipped with an O-ring type
roller chain. Each link incorporates small O-rings
to seal out water and dirt. Care should be taken to
choose cleaning solutions and lubricants that are
suitable for O-ring type chains.
1. Using a suitable, nonflammable cleaning solution,
thoroughly wash the chain and sprockets.
2. Allow the chain to dry; then apply a dry, graph-
ite-based lubricant to the chain.
NOTE: The drive chain should be lubricated with
a dry, graphite-based chain lubricant. By using a
dry, graphite-based chain lubricant, dirt build-up
on the drive chain will be minimized.
ADJUSTING TENSION
To adjust the drive chain tension, use the following
procedure.
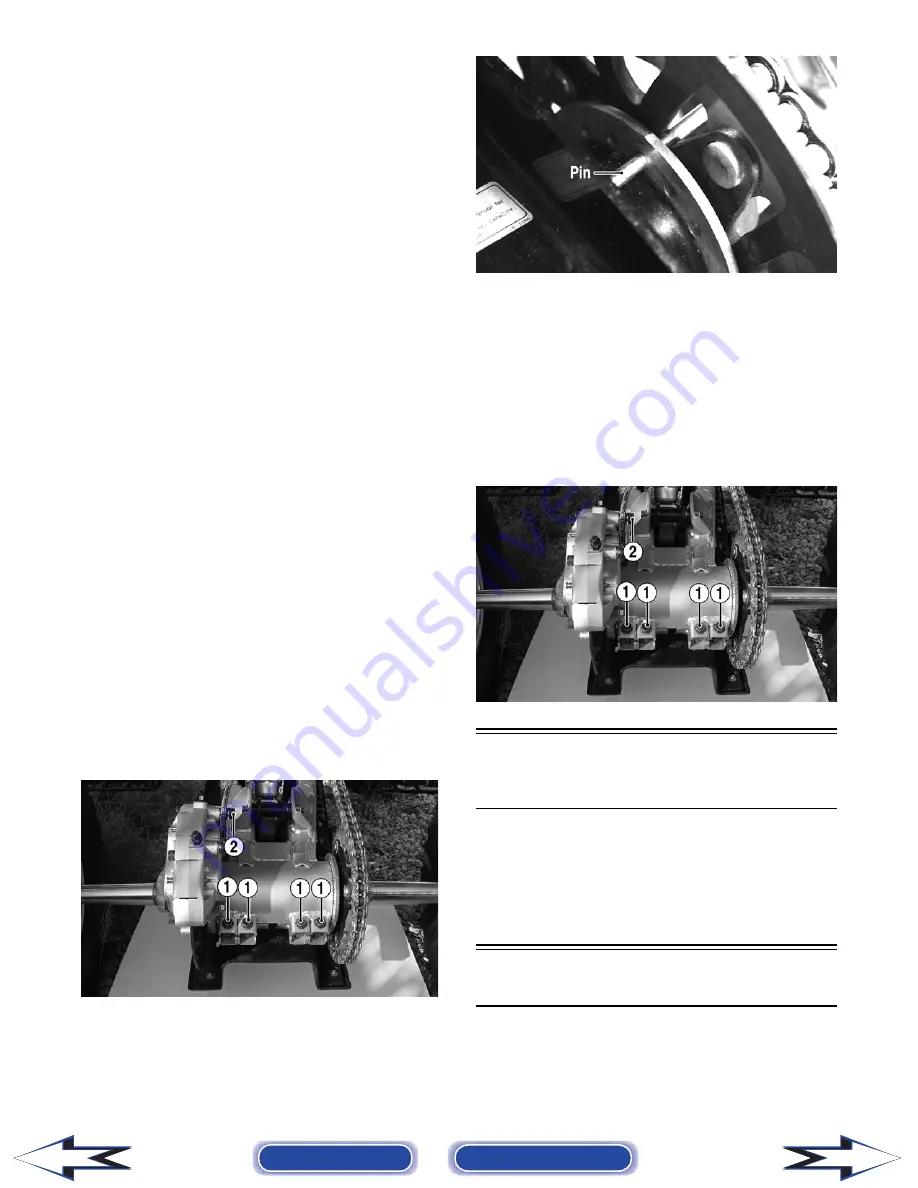
1. Loosen the four cap screws (1) at the rear of the
axle housing; then loosen the cap screw (2) on the
front of the brake caliper.
KM902A
2. Install an appropriate pin through the axle hub and
rear sprocket.
KM158A
3. With a person seated on the ATV, check chain ten-
sion at the mid-point of the chain.
NOTE: Chain “slack” should be within a range of
30-40 mm (1.2-1.6 in.).
4. Push the ATV forward to tighten chain tension;
push the ATV backward to loosen chain tension.
5. Tighten the four cap screws (1) to 29 ft-lb; then
tighten the cap screw (2) to 29 ft-lb.
KM902A
Driveshaft/Coupling
(250 Utility)
The following drive system components should be
inspected periodically to ensure proper operation.
A. Spline lateral movement (slop).
B. Coupling not cracked, damaged, or worn.
Nuts/Bolts/Cap Screws
Tighten all nuts, bolts, and cap screws. Make sure riv-
ets holding components together are tight. Replace all
loose rivets. Care must be taken that all calibrated
nuts, bolts, and cap screws are tightened to specifica-
tions (see Section 1).
Back to TOC
Back to Section TOC
Next
Back
Содержание ATV 250 Utility 2009
Страница 1: ......


