Chapter 6
167
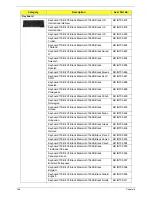
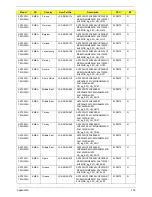
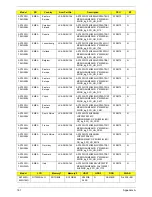
HDD
HDD TOSHIBA 5400rpm 120GB MK1246GSX Leo BS
SATA I LF F/W:LB213J
KH.12004.007
HDD WD 5400rpm 120GB WD1200BEVS-22UST0 ML125
SATA LF F/W:01.01A01
KH.12008.019
HDD(160G) ST9160827AS 9DG133-188 STN B/S
SEAGATE F/W:3.AAA
KH.16001.029
HDD TOSHIBA 5400rpm 160GB MK1646GSX Leo BS
SATA I LF F/W:LB113J
KH.16004.002
HDD HGST 2.5" 5400rpm 160GB HTS542516K9SA00
Bronco-B SATA II LF F/W:C31P
KH.16007.016
HDD WD 2.5" 5400rpm 160GB WD1600BEVT-22ZCTO
ML160 SATA LF F/W:11.01A11
KH.16008.022
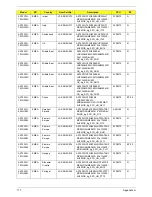
HDD SEAGATE 2.5" 5400rpm 250GB ST9250827AS
Corsair SATA LF F/W:3.AAA
KH.25001.011
HDD TOSHIBA 2.5" 5400rpm 250GB MK2546GSX Leo
BS SATA I LF F/W:LB013J
KH.25004.001
HDD WD 2.5 IN. 5400rpm 250GB WD2500BEVS-22UST0
ML125 SATA LF F/W:01.01A01
KH.25008.018
HDD 250GB 5400RPM SATA II HGST
HTS542525K9SA00 LF F/W:C31P
KH.25007.011
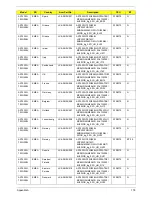
HDD HGST 5400rpm 120GB HTS542512K9SA00 Bronco-
B SATA II LF F/W:C31P
KH.12007.014
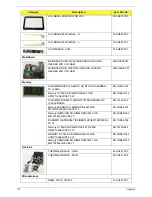
HDD MASTER BRACKET
33.AR907.005
HDD BRACKET ASSY
33.AR907.004
HDD CONNECTOR
20.AR907.001
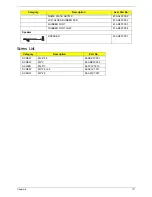
Category
Description
Acer Part No.
Содержание Aspire 7230
Страница 6: ...VI ...
Страница 10: ...X Table of Contents ...
Страница 54: ...44 Chapter 2 3 Reboot the system and key in the selected string qjjg9vy 07yqmjd etc for the BIOS user password ...
Страница 85: ...Chapter 3 75 5 Remove the bracket from the board 6 Remove the Finger Print Reader board from the Upper Cover ...
Страница 92: ...82 Chapter 3 4 Grasp the Subwoofer Module and lift it up to remove ...
Страница 94: ...84 Chapter 3 4 Lift the ExpressCard module away from the upper cover ...
Страница 101: ...Chapter 3 91 4 Lift up the bezel and remove it from the LCD Module ...
Страница 105: ...Chapter 3 95 5 Grasp the panel by both ends and lift to remove ...
Страница 107: ...Chapter 3 97 4 Remove the LCD brackets by pulling away from the LCD Panel as shown ...
Страница 110: ...100 Chapter 3 8 Connect the left and right Inverter cables 9 Connect the camera cable ...
Страница 113: ...Chapter 3 103 3 Tighten the four 4 captive screws on the heatsink 4 Connect the Fan cable to the Mainboard ...
Страница 118: ...108 Chapter 3 4 Connect the two FFC cables as shown 5 Connect the cable as shown ...
Страница 206: ...196 Appendix C ...


