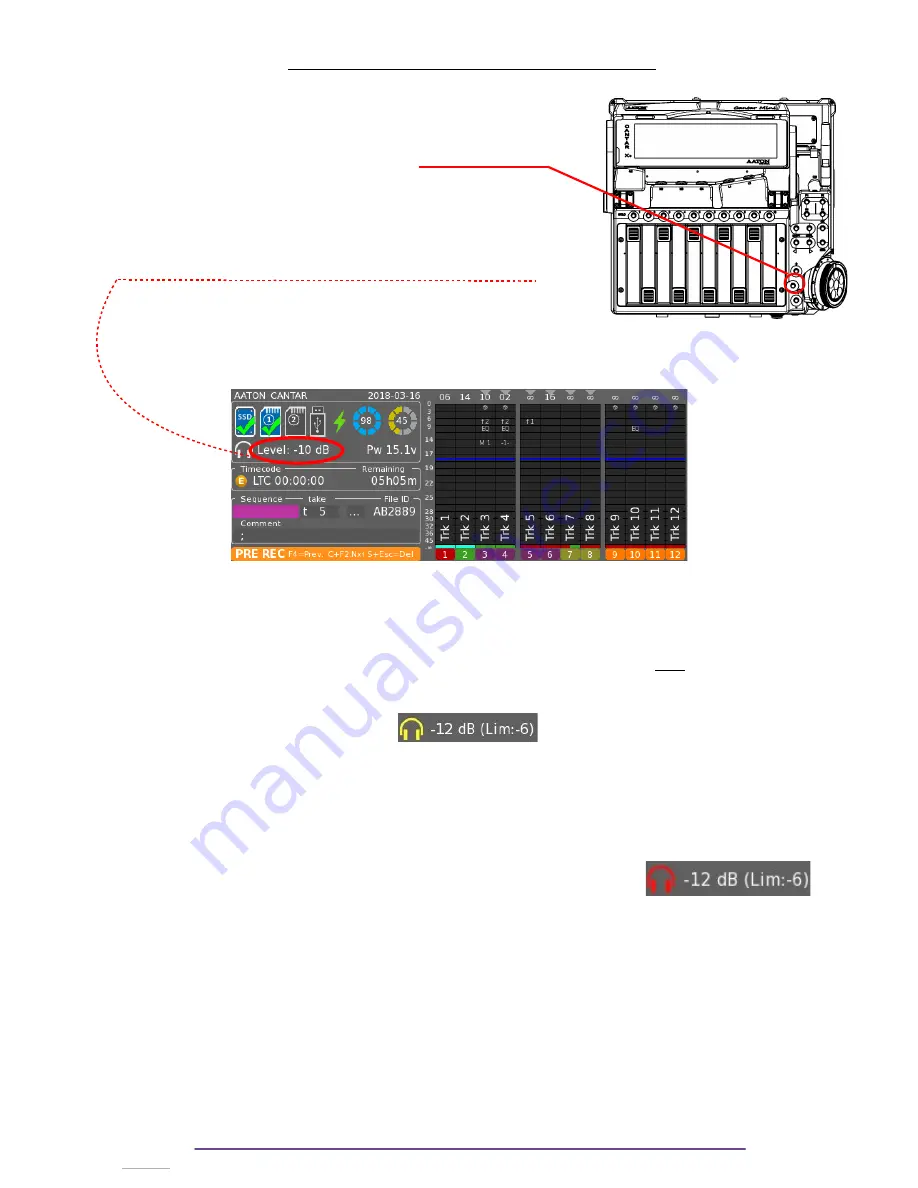
Setting up Outputs : HEADPHONE
I. Headphone Level
1.
Level
To display the headphone Level, press the Headphone button
at the right corner of the Cantar.
This is available in all Main Selector positions.
The level will be displayed aside the headphone symbol,
replacing temporarily the current Headphone Outmap name.
If this part of the screen is not visible (during Solo or in other
Menus, a small dialog box will be displayed).
The Headphone Level is protected against wrong modification by the Headphone Button,
hold it
pressed while rotating the Jog wheel
in order to
modify the current value
.
2.
Safety Level
An adjustable headphone safety clamping can be enabled : for example in case of a loud
noise, the headphone level will be clamped automatically, preventing deafing sound.
Toggle the function On/Off by
holding the Headphone Button pressed and then by pressing the
Shift Button.
When disabled, the headphone symbol is painted in White whereas once the safety is enabled
the symbol is painted in Yellow.
How to set it up
:
– With the safety level disabled, adjust the headphone level matching with
a full scale viewmeter signal.
– Turn on the Safety protection and set the safety value to 0dB by turning
the jog wheel while holding the Sihft and Headphone buttons pressed.
When the clamp is active on too high signal, headphone audio quality
is affected and the headphone symbol blinks in red during 3 seconds.
II. Outmaps
Headphone Outmaps can be modified while the Main Selector is in the 6 o'clock position.
You can configure up to 26 Headphone Outmaps (from 'A' to 'Z').
1.
Current Outmap
To go to the next or previous Outmap, use the Left Crown.
Nota Bene (NB):
Copy and Paste.
By pressing the Ctrl+F1 buttons, the current outmap is copied to the clipboard.
Paste it over any Outmap by pressing the Ctrl + F2 buttons.
Cantar X3
32
Содержание Cantar Mini
Страница 1: ...Cantar Mini User Manual Software v 2 37...
Страница 2: ...Cantar X3 2...
Страница 81: ...Cantar X3 81...
Страница 82: ...Cantar X3 82...


