Configuring Security Features
881
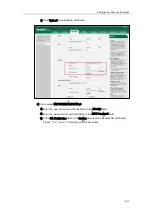
3) In the CA Certificates field, click Browse to select the desired CA certificate
(*.pem, *.crt, *.cer or *.der) from your local system.
4) Click Upload to upload the certificate.
3.
Click Confirm to accept the change.
A dialog box pops up to prompt that settings will take effect after a reboot.
4.
Click OK to reboot the phone.
To configure the 802.1X authentication via phone user interface:
1.
Press Menu->Settings->Advanced Settings (default password: admin)
->Network->802.1x Settings.
2.
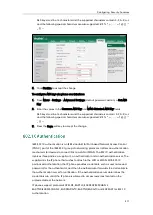
Press or , or the Switch soft key to select the desired value from the 802.1x
Mode field.
a) If you select EAP-MD5:
1) Enter the user name for authentication in the Identity field.
2) Enter the password for authentication in the MD5 Password field.
b) If you select EAP-TLS:
1) Enter the user name for authentication in the Identity field.
2) Leave the MD5 Password field blank.
c) If you select EAP-PEAP/MSCHAPv2:
1) Enter the user name for authentication in the Identity field.
2) Enter the password for authentication in the MD5 Password field.
d) If you select EAP-TTLS/EAP-MSCHAPv2:
Summary of Contents for CD860
Page 1: ......
Page 45: ...Getting Started 23 For SIP T42G T41P T40P Desk Mount Method Wall Mount Method Optional ...
Page 47: ...Getting Started 25 For SIP T23P T23G Desk Mount Method Wall Mount Method Optional ...
Page 122: ...Administrator s Guide for SIP T2 Series T19 P E2 T4 Series CP860 IP Phones 100 ...
Page 840: ...Administrator s Guide for SIP T2 Series T19 P E2 T4 Series CP860 IP Phones 818 ...
Page 995: ...Appendix 973 ...


