Administrator’s Guide for SIP-T2 Series/T19(P) E2/T4 Series/CP860 IP Phones
92
9G/T27P/T23P/T23G/T21(P)
E2/T19(P) E2:
http://<phoneIPAddress>/servlet
?p=network-pcport&q=load
For SIP VP-T49G:
http://<phoneIPAddress>/servlet
?m=mod_data&p=network-pcpo
rt&q=load
Details of Configuration Parameters:
Parameters
Permitted Values
Default
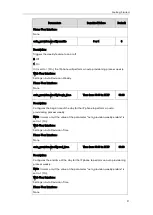
network.pc_port.enable
0 or 1
1
Description:
Enables or disables the PC (LAN) port.
0-Disabled
1-Auto Negotiate
Note: It is not applicable to CP860 IP phones. If you change this parameter, the IP
phone will reboot to make the change take effect.
Web User Interface:
Network->PC Port->PC Port Active
Phone User Interface:
None
To enable the PC port via web user interface:
1.
Click on Network->PC Port.
2.
Select Auto Negotiate from the pull-down list of PC Port Active.
3.
Click Confirm to accept the change.
A dialog box pops up to prompt that settings will take effect after a reboot.
4.
Click OK to reboot the phone.
Summary of Contents for CD860
Page 1: ......
Page 45: ...Getting Started 23 For SIP T42G T41P T40P Desk Mount Method Wall Mount Method Optional ...
Page 47: ...Getting Started 25 For SIP T23P T23G Desk Mount Method Wall Mount Method Optional ...
Page 122: ...Administrator s Guide for SIP T2 Series T19 P E2 T4 Series CP860 IP Phones 100 ...
Page 840: ...Administrator s Guide for SIP T2 Series T19 P E2 T4 Series CP860 IP Phones 818 ...
Page 995: ...Appendix 973 ...


