Getting Started
63
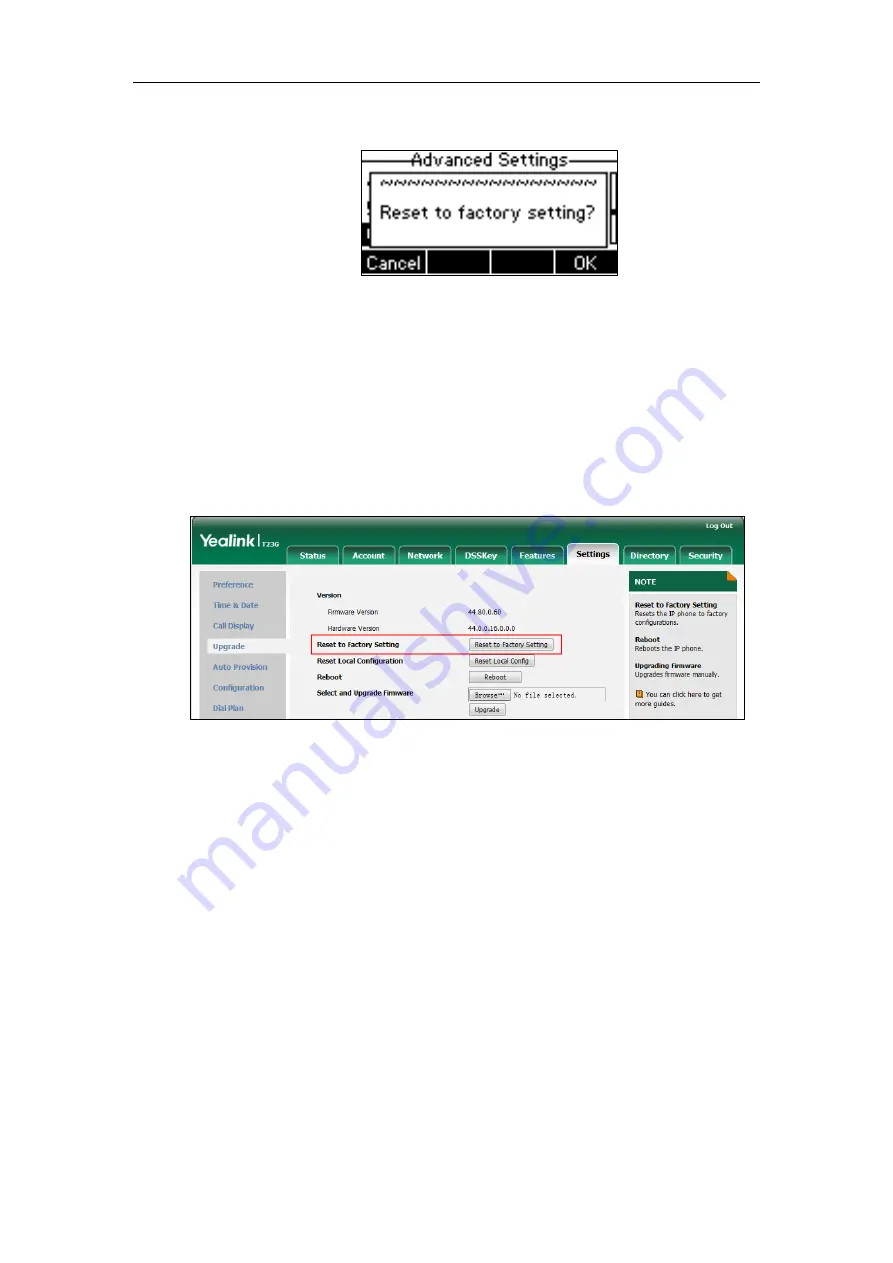
The LCD screen prompts ―Reset to factory setting?‖.
3.
Press the OK soft key.
The LCD screen prompts ―Resetting to factory, please Wait…‖.
The LCD screen prompts ―Welcome Initializing…please wait‖.
To reset the phone to factory via web user interface:
1.
Click on Settings->Upgrade.
2.
Click Reset to Factory Setting to reset the phone.
The web user interface prompts ―Do you want to reset to factory?‖.
3.
Click OK.
After startup, all configurations of the phone will be reset to factory defaults.
Configurations in the 001565770984-local.cfg file saved on the IP phone will also be
cleared. But configurations in the 001565770984-local.cfg file stored on the
provisioning server (tftp://192.168.1.211) will not be cleared after reset.
To retrieve personalized settings of the phone after factory reset:
1.
Set the values of the parameters ―auto_provision.custom.sync‖ and
―auto_provision.custom.protect‖ to be 1 in the configuration file (y000000000044.cfg
or 001565770984.cfg).
2.
Trigger the phone to perform the auto provisioning process.
The IP phone will download the 001565770984-local.cfg file from the provisioning
server, and then update configurations in it during auto provisioning. As a result, the
personalized settings of the phone are retrieved after factory reset.
Summary of Contents for CD860
Page 1: ......
Page 45: ...Getting Started 23 For SIP T42G T41P T40P Desk Mount Method Wall Mount Method Optional ...
Page 47: ...Getting Started 25 For SIP T23P T23G Desk Mount Method Wall Mount Method Optional ...
Page 122: ...Administrator s Guide for SIP T2 Series T19 P E2 T4 Series CP860 IP Phones 100 ...
Page 840: ...Administrator s Guide for SIP T2 Series T19 P E2 T4 Series CP860 IP Phones 818 ...
Page 995: ...Appendix 973 ...


