Printing
WorkCentre 7120 Multifunction Printer
User Guide
55
4.
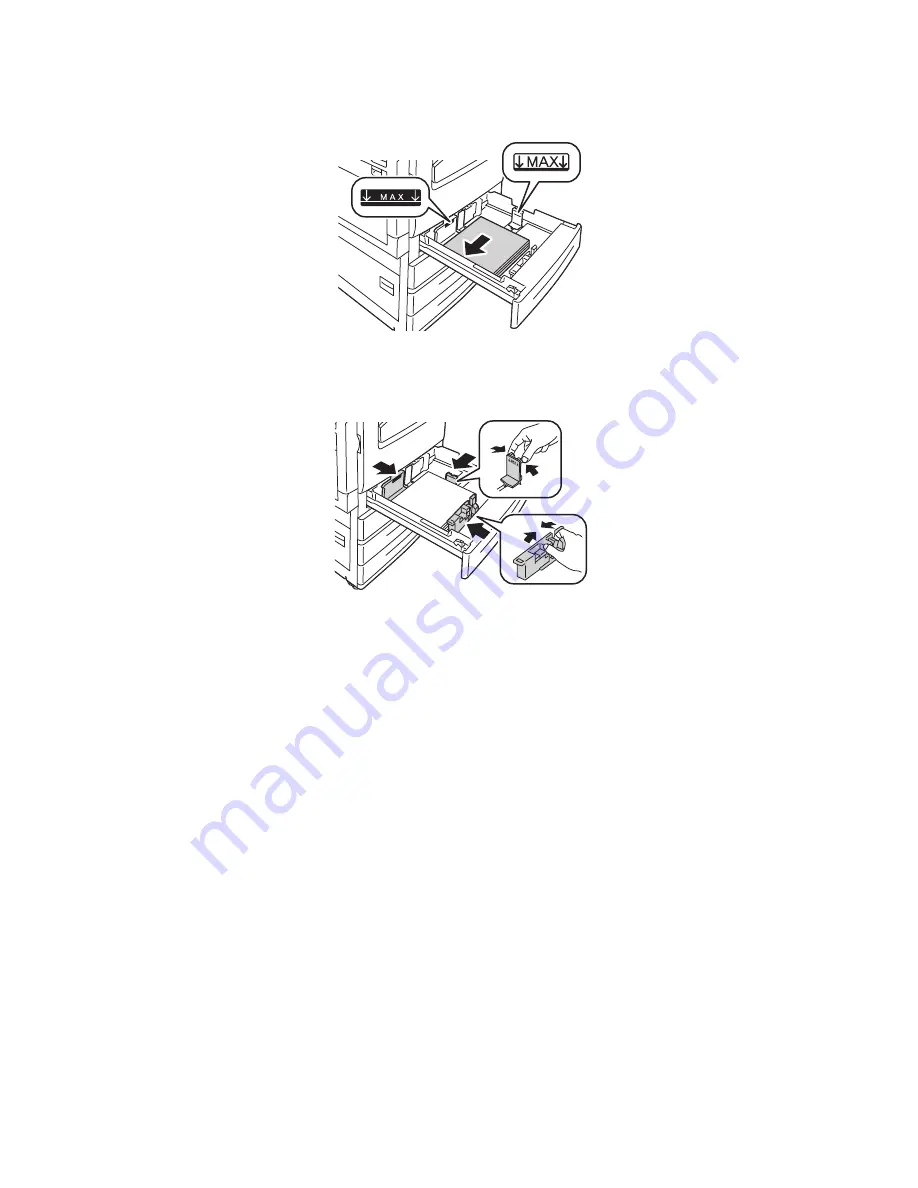
Load the paper against the left-hand side of the tray.
Note:
Do not load paper above the maximum fill line. Doing so may cause paper jams.
5.
Adjust the guides so they touch the edges of the stack.
6.
Push the tray completely into the printer.
7.
If required, choose paper size, type, or color on the printer touch screen, then touch
Confirm
.
8.
If you have not changed the media type, touch
Confirm
on the touch screen.
Loading Paper in Tray 5 (Bypass Tray)
Use the bypass tray for a variety of media types and custom sizes. It is primarily intended for small
quantity jobs using special media. The bypass tray is located on the left-hand side of the printer. A tray
extension is provided to accommodate larger paper. After loading paper in the bypass tray, make sure
that the tray settings on the touch screen match the paper size and type loaded.
Tray 5 (Bypass Tray) accepts the following paper types:
•
Plain
•
Plain Reload
•
Bond
•
Punched
•
Letterhead
•
Heavyweight
•
Extra heavyweight
•
Extra heavyweight reload
•
Recycled
wc7120-028
wc7120-029
Summary of Contents for WORKCENTRE 7120
Page 10: ...Contents WorkCentre 7120 Multifunction Printer User Guide 10...
Page 36: ...Features WorkCentre 7120 Multifunction Printer User Guide 36...
Page 48: ...Installation and Setup WorkCentre 7120 Multifunction Printer User Guide 48...
Page 94: ...Printing WorkCentre 7120 Multifunction Printer User Guide 94...
Page 142: ...Scanning WorkCentre 7120 Multifunction Printer User Guide 142...
Page 158: ...Faxing WorkCentre 7120 Multifunction Printer User Guide 158...
Page 208: ...Troubleshooting WorkCentre 7120 Multifunction Printer User Guide 208...
Page 226: ...Regulatory Information WorkCentre 7120 Multifunction Printer User Guide 226...


