Control Panel Overview
Xerox WorkCentre 3315DN/3325DN/3325DNI
User Guide
13
Using the Keypad
As you perform various tasks, you may need to enter names and numbers. For example, when you set
up your machine, you enter your name or your company’s name, and the fax number. When you store
fax numbers or e-mail addresses in memory, you may also enter the corresponding names.
1.
When you are prompted to enter a letter, locate
the button labeled with the character you want.
Press the button until the correct letter appears
on the display.
•
For example, to enter the letter O, press 6,
labeled with MNO.
•
Each time you press 6, the display shows a
different letter, M, N, O, m, n, o and finally 6.
2.
You can enter special characters, such as
@ / . & +
-
.
Refer to
Keypad Characters
on page 14.
3.
To enter additional letters, repeat step 1. If the next letter is printed on the same button wait 2
seconds between presses, or move the cursor by pressing the right arrow and then press the button
again. The cursor will move to the right and the next letter will appear on the display.
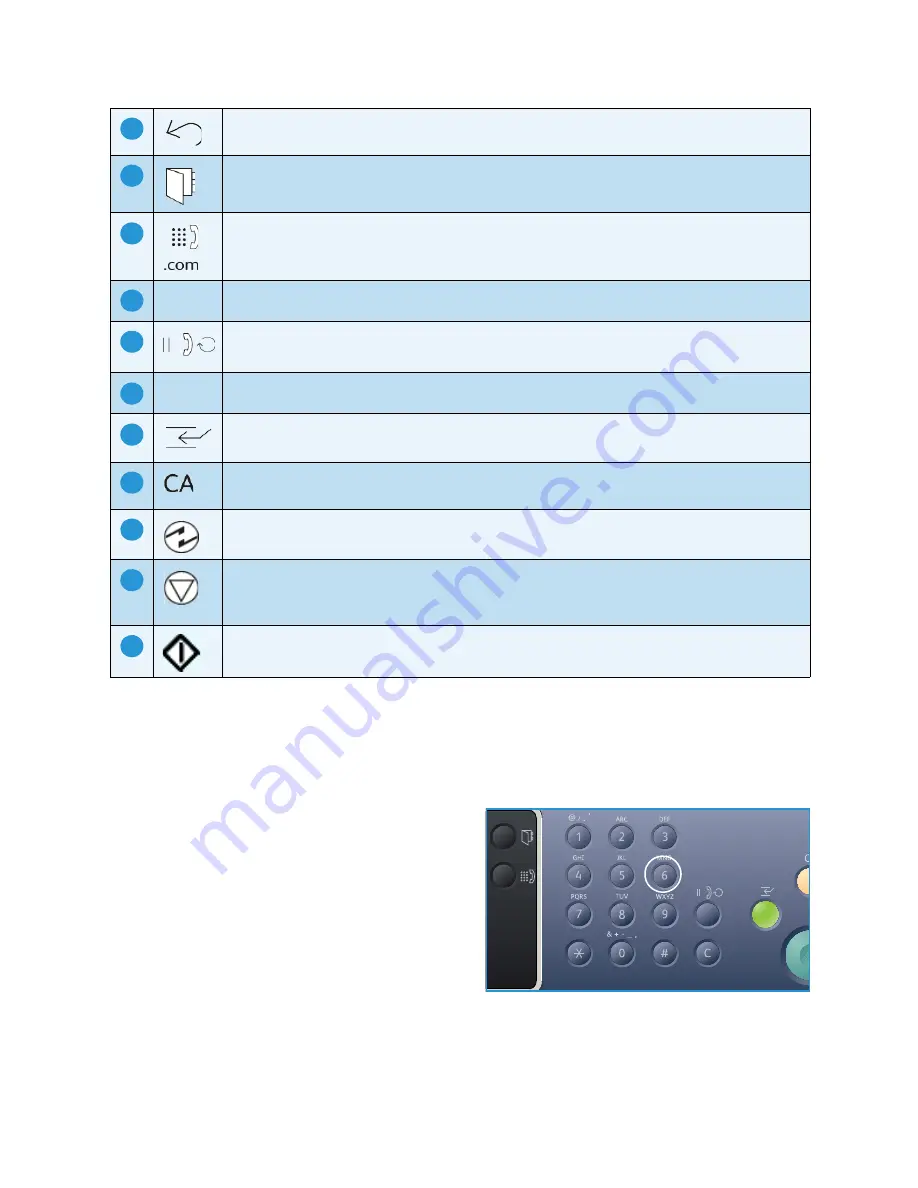
Back:
Used to go back one level in the menu.
Address Book:
Used to search for stored fax numbers or e-mail addresses.
Manual Dial + .com:
In
Fax
mode, opens the fax line. In
mode provides access to
commonly used e-mail address text, for example
.com
or
.org
. The text available can be
customized using CentreWare Internet Services.
Keypad:
Used to enter alphanumeric characters.
Pause / Redial:
In standby mode redials the last number. In edit mode inserts a pause into
a fax number.
‘C’ Cancel Entry:
Cancels the previous entry made on the keypad.
Interrupt Printing:
Interrupts the current job to run a more urgent job.
(Not applicable to the 3315DN)
Clear All:
Clears the last selections made.
Power Save:
Sends the machine into
Power Save
mode or
Power Down
. Press the button
again to restart a powered off machine.
Stop:
Pressing the
Stop
button stops the job in progress. Pressing
Stop
also exits the Menu
Mode. If you have logged in to use the machine, pressing
Stop
will bring up the
Log Out
option.
Start:
Activates a job.
14
15
16
17
18
19
20
21
22
23
24
.com
Summary of Contents for WorkCentre 3315DN
Page 1: ...Version 1 1 December 2013 Xerox WorkCentre 3315DN 3325DN 3325DNI User Guide ...
Page 6: ...Xerox WorkCentre 3315DN 3325DN 3325DNI User Guide 6 ...
Page 72: ...Smart Key Addresses Xerox WorkCentre 3315DN 3325DN 3325DNI User Guide 72 ...
Page 124: ...Printing using Unix Xerox WorkCentre 3315DN 3325DN 3325DNI User Guide 124 ...
Page 130: ...Managing USB Memory Xerox WorkCentre 3315DN 3325DN 3325DNI User Guide 130 ...
Page 222: ...Further Assistance Xerox WorkCentre 3315DN 3325DN 3325DNI User Guide 222 ...
Page 230: ...Feature Specifications Xerox WorkCentre 3315DN 3325DN 3325DNI User Guide 230 ...
Page 262: ...Xerox WorkCentre 3315DN 3325DN 3325DNI User Guide 262 ...


