


Book
TOC
Chapter
TOC
Search
Quit
8-7
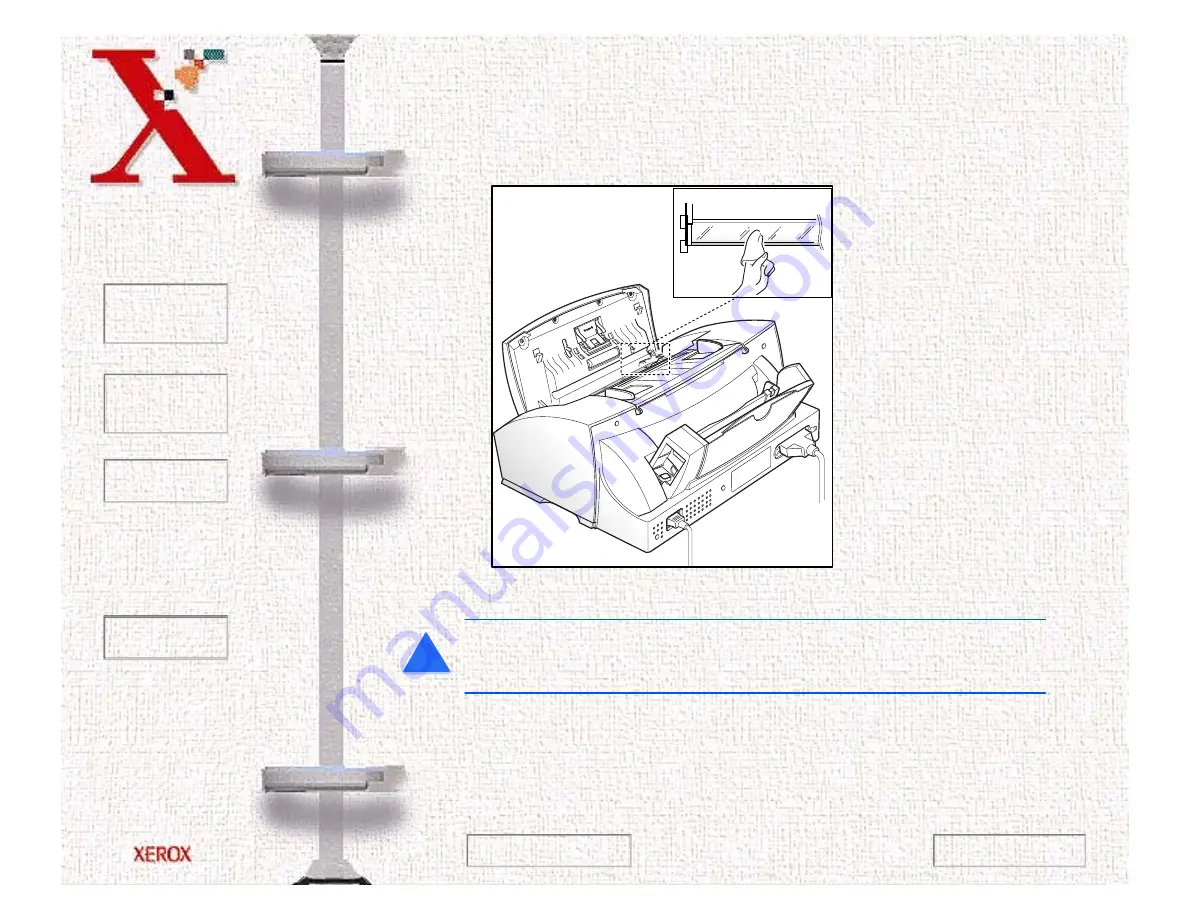
6
Carefully wipe the scanning glass with a SOFT, DRY CLOTH.
If the glass is very dirty, first wipe it with a slightly dampened
cloth, then with a dry cloth. Be very careful not to scratch the
glass surface.
CAUTION:Never spray liquid directly onto the scanning
glass.
7
Replace the roller by performing steps one and two in reverse
order.
!
Next Page
Previous Page


