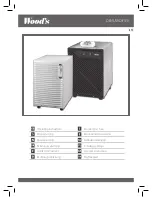
GB
GB
Operating Instructions
Operating Instructions
02
03
Wood’s, the World’s
leading dehumidifiers
Wood’s dehumidifier products have
been known as market leaders for
many years. Their dehumidifiers are
suitable for use in the most demanding
climates, where dehumidifying capacity
is good even at lower temperatures
and humidity levels. They are used with
good results in premises that become
damp such as cellars, garages or
summer-houses. They are also excellent
for drying washing, attics, pool rooms
and laundry. being efficient and low
on energy consumption. Does not wear
out clothes.
The amount of humidity that the
dehumidifier removes depends on
temperature, humidity level and
placement. External weather conditions
may also affect the performance of the
dehumidifier.
In cold weather the relative humidity
decreases and thus the extraction
of humidity from the air by the
dehumidifier is reduced. Therefore the
dehumidifier is suitable for use in the
temperature range +5˚C to +35˚C.
Wood’s dehumidifiers are safe in
operation and intended for continuous
use over many years. That is why
Wood’s offers a 5-year guarantee on the
compressor and 2-year guarantee on
other components.
excessive air humidity – a
danger
Condensation occurs when water
vapour in the air comes into contact
with a cold roof, window or wall.
When water vapour is cooled down,
condensation occurs, and water-drops
are formed. In high air humidity, the air
may get musty and mould is formed,
causing damage to a house and its
furnishings. This environment may
even cause illness for the residents,
since mites and other creatures thrive
in a damp environment. A dehumidifier
with high performance creates a good,
healthy humidity level, and for greatest
efficiency the doors and windows of
rooms that are being dehumidified
should be kept closed. Removes odours,
dries wood and removes moisture from
sportsware outdoors equipment.
A dehumidifier may be used in cellars,
washrooms, garages, crawl spaces,
caravans, summer-houses and on
boats. If the humidifier is kept in colder
environments, you should study the
Hints at the end of the manual.
Placement of dehumidifier
Wood’s dehumidifiers are easy to move
around, all you need to have is a power
source for 220/240V, but bear in mind
the following:
- The dehumidifier should not be placed
near radiators or other heat sources
or exposed to direct sunlight, as it will
reduce performance.
- It is beneficial to use a radiator or
heating fan to keep the temperature
above +5˚C.
- The dehumidifier should stand at least
25cm from a wall or other obstruction,
for maximum air flow.
- Ideal is to put it in the center
of the room / area.
note: When placed in a
shower or bathing area, the
dehumidifier should be fixed
in place. It is compulsory to check
and respect your local bathroom
regulations before use.
using the dehumidifier
If the dehumidifier is transported
horizontally, oil may have run out of
the compressor and into the closed
piping system. In such a case, let
the dehumidifier stand for a few
hours before being used. It is very
important that the oil runs back into the
compressor, otherwise the dehumidifier
may be seriously damaged.
1. Check that the water reservoir is correctly
placed and the float moves freely in the
reservoir. See the section on the Float.
2. Connect the dehumidifier to an earthed
power source.
3. Select fan speed. (not DS12)
4. Set the desired humidity level by means
of the hygrostat. See the section on the
Hygrostat.
note: When the
dehumidifier is turned off, you
should wait three minutes before
restarting, so that the built-in
automatic functions are deactivated.
DS12
DS15
DS28
DS36
TDR36S
ED50
Max. working area
90 m
2
100 m
2
140 m
2
190 m
2
250 m
2
230 m
2
Air flow step 1
256 m
3
/hour
255 m
3
/hour
190 m
3
/hour
197 m
3
/hour
197 m
3
/hour
129 m
3
/hour
Air flow step 2
-
520 m
3
/hour
336 m
3
/hour
347 m
3
/hour
347 m
3
/hour
296 m
3
/hour
Dehumidifying at 20°C and 70% r.h.
6.11/day
6.71/day
10.41/day
13.21/day
-
21.11/day
Dehumidifying at 35°C and 80% r.h.
11.11/day
12.01 day
17.51/day
20.81/day
24.3L
33.21/day
Power at 35°C and 80% r.h.
220W/hour
240 W/hour
460 W/hour
510 W/hour
290 W/hour
850 W/hour
Tank volume
10.4 litres
10.4 litres
10.4 litres
10.4 litres
10.4 litres
10.4 litres
Cooling medium, freon-free
R134A
R134A
R134A
R134A
R134A
R407C
Dimensions in mm., L x B x H
343 x 406 x 527
343 x 406 x 527
343 x 406 x 527
343 x 406 x 527
368 x 435 x 605
343 x 406 x 527
Weight
22 kg.
22 kg.
24 kg.
26 kg.
23,5 kg.
28 kg.
Noise level in decibels
38 dB
38-50 dB
38-50 dB
38-50 dB
38-48 dB
38-58 dB
TECHNICAL DATA
PROBLEM
SOLUTION
Dehumidifier does not start
- Check that dehumidifier is connected to electricity and that fuse has not gone
- If the warning light is on, check that the water reservoir is empty and correctly placed in the dehumidifier.
Check that float is free
- Check that hygrostat is working. Dehumidifier should start when hygrostat is in Maximum position
Does not dehumidify
- Check that fan is spinning
- Check that air can flow freely through the dehumidifier. Front grid and air filter should be clean and dehumidifier should stand
20-30cm from wall
- Listen for sound of compression, but bear in mind that the dehumidifier may be in a dehumidifying cycle, when the compression stops. Wait initially for about 35
minutes.
- Check that a thick coating of ice has not formed on the cooling coils.
High noise level
- Increase distance between dehumidifier and surrounding surfaces
- Cooling coils may be in contact with one another and cause vibration. Disconnect dehumidifier from electricity and separate coils
Ice formation on cooling coils
- Remove air filter at rear of dehumidifier and check that no dust or fluff is obstructing passage of air through machine
- Timer which controls defrosting may be broken, in which case compression will not stop regularly
No water enters reservoir
- Check for obstruction to drip-tray above water reservoir
Does not turn off when water
reservoir is full
- It is important that the float moves freely in the water reservoir. If it does not, it will not respond to water levels and prevent dehumidifier from stopping
If none of the above works, you should contact your nearest retailer for checking and possible overhaul of dehumidifier


