TAC-7X
MANUAL
4. Escapement
Alignment
5.
Lodged
Contact
6. Transfer Tip
Contacts will not feed from the track assembly through the drop tube to the
transfer tip unless the escapement system is aligned and secured properly.
If contacts are not feeding into the drop tube properly, verify that contacts
are aligning themselves in the track assembly (paragraph 6- 3). Inspect the
escapement system to ensure that it is flush against the feeder-bowl, and
that the end of the track assembly is over the center of the drop tube, while
the track assembly inner rails are over the middle of the drop tube. If a
contact enters the drop tube but doesn't exit (bent, too large), it is
necessary to unlock the escapement system, swing both the upper and
lower sections away from the feeder-bowl, and remove the lodged contact.
It is important when returning the escapement system to its operating
position that both sections be firmly set in place and secured with the black
locking handle.
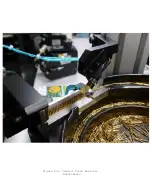
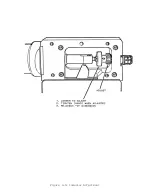
If a contact lodges itself in the drop tube, always remove it by inserting a
thin object from the bottom of the drop tube and pushing the contact out
the top. Refer to Figure4- 1. Use only a smooth non-metallic object.
The transfer tip is equipped with a vacuum sensing system that prevents
the transfer mechanism from returning to the ready-to-crimp position
unless a contact is seated in the tip properly. This system also prevents the
transfer mechanism from retracting to the up postion (pick up) until the
crimped contact has been removed.
Whenever the transfer tip remains in the vertical position, perform the
following checks:
Step 1. Inspect the transfer tip to see if a contact is present but does not
appear seated. If a contact is visible, open the sleeve valve.
Remove the contact from the 'transfer tip. Close the sleeve
valve. Verify the transfer tip is the one designated for the
contact being used.
Summary of Contents for TAC-7AE
Page 6: ...Figure 1 1 TAC 7X Front View ...
Page 8: ... Figure 1 2 Wire Insertion Through Funnel ...
Page 12: ...Figure2 1 Pneumatic Hook Up ...
Page 14: ... Fiqure 2 4 Track Drop Tube Escapement ESCAPEMENT SYSTEM _ _ _ BR ASSEMBL I TRA ...
Page 18: ... ARBOR COVER PLA TE REMOVED Figure 3 1 Crimp Cylinder Arbor Open ...
Page 20: ... ARBOR COVER PLAT E REMOVED Figure 3 2 Crimp Cylinder Arbor Closed ...
Page 23: ... Crimp Inspection Points Improper Crimps ...
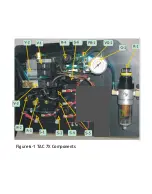
Page 33: ...Figure 6 1 TAC 7X Components ...
Page 34: ...Figure 6 2 Control Box Components Figure 6 2 TAC 7X Components Right View ...
Page 37: ...Figure 6 3 Contact Track Feed Air Adjustments ...
Page 42: ... Figure 6 4 Indenter Plate Removal ...
Page 43: ...HOSE CLAMP CAREFULL Y REMOVE Figure 6 5 Indenter Replacement ...
Page 47: ...Figure 6 6 Indenter Adjustment ...
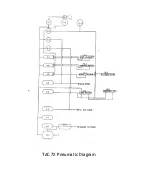
Page 52: ...TAC 7X Pneumatic Diagram ...


