Configuring the Switch
3-130
3
2.
VLAN 1 is the default untagged VLAN containing all ports on the switch, and
can only be modified by first reassigning the default port VLAN ID as
described under “Configuring VLAN Behavior for Interfaces” on page 3-132.
Command Attributes
•
VLAN
– ID of configured VLAN (1-4094).
•
Name
– Name of the VLAN (1 to 32 characters).
•
Status
– Enables or disables the specified VLAN.
-
Enable
: VLAN is operational.
-
Disable
: VLAN is suspended; i.e., does not pass packets.
•
Port
– Port identifier.
•
Membership Type
– Select VLAN membership for each interface by marking the
appropriate radio button for a port or trunk:
-
Tagged
: Interface is a member of the VLAN. All packets transmitted by the port
will be tagged, that is, carry a tag and therefore carry VLAN or CoS information.
-
Untagged
: Interface is a member of the VLAN. All packets transmitted by the
port will be untagged, that is, not carry a tag and therefore not carry VLAN or
CoS information. Note that an interface can only have one untagged VLAN,
which must be the same as the Port VID. See
“Configuring VLAN Behavior for
Interfaces” on page 3-132
for configuring PVID.
-
Forbidden
: Interface is forbidden from automatically joining the VLAN via
GVRP. For more information, see “Automatic VLAN Registration” on page
3-124.
-
None
: Interface is not a member of the VLAN. Packets associated with this
VLAN will not be transmitted by the interface.
-
Trunk Member
– Indicates if a port is a member of a trunk. To add a trunk to the
selected VLAN, use the last table on the VLAN Static Table page.
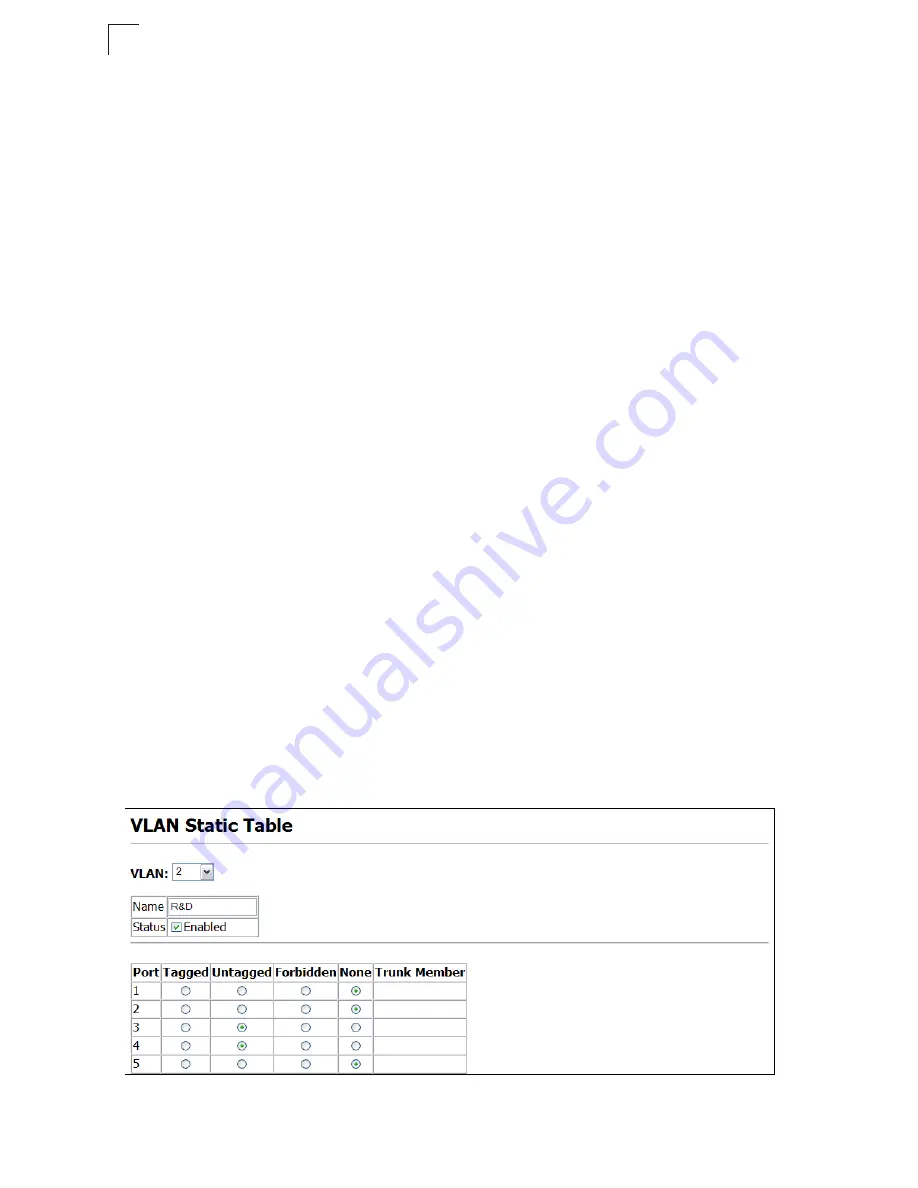
Web
– Click VLAN, 802.1Q VLAN, Static Table. Select a VLAN ID from the
scroll-down list. Modify the VLAN name and status if required. Select the
membership type by marking the appropriate radio button in the list of ports or
trunks. Click Apply.
Figure 3-75 Configuring a VLAN Static Table
Summary of Contents for TL-SG5426 -
Page 1: ...TL SG5426 26 Port Gigabit Managed Switch Rev 1 0 0 1910010105...
Page 17: ...Contents xiv...
Page 21: ...Tables xviii...
Page 25: ...Figures xxii...
Page 42: ...Initial Configuration 2 10 2...
Page 107: ...Configuring the Switch 3 64 3 Figure 3 41 802 1X Port Configuration...
Page 486: ...Software Specifications A 4 A...


