Faxing - e-STUDIO223CS and e-STUDIO263CS only > 90
(c)
Enter comments if required.
(d)
If required select the
Add an outside call number
checkbox
and enter the
Outside call number as appropriate.
11.
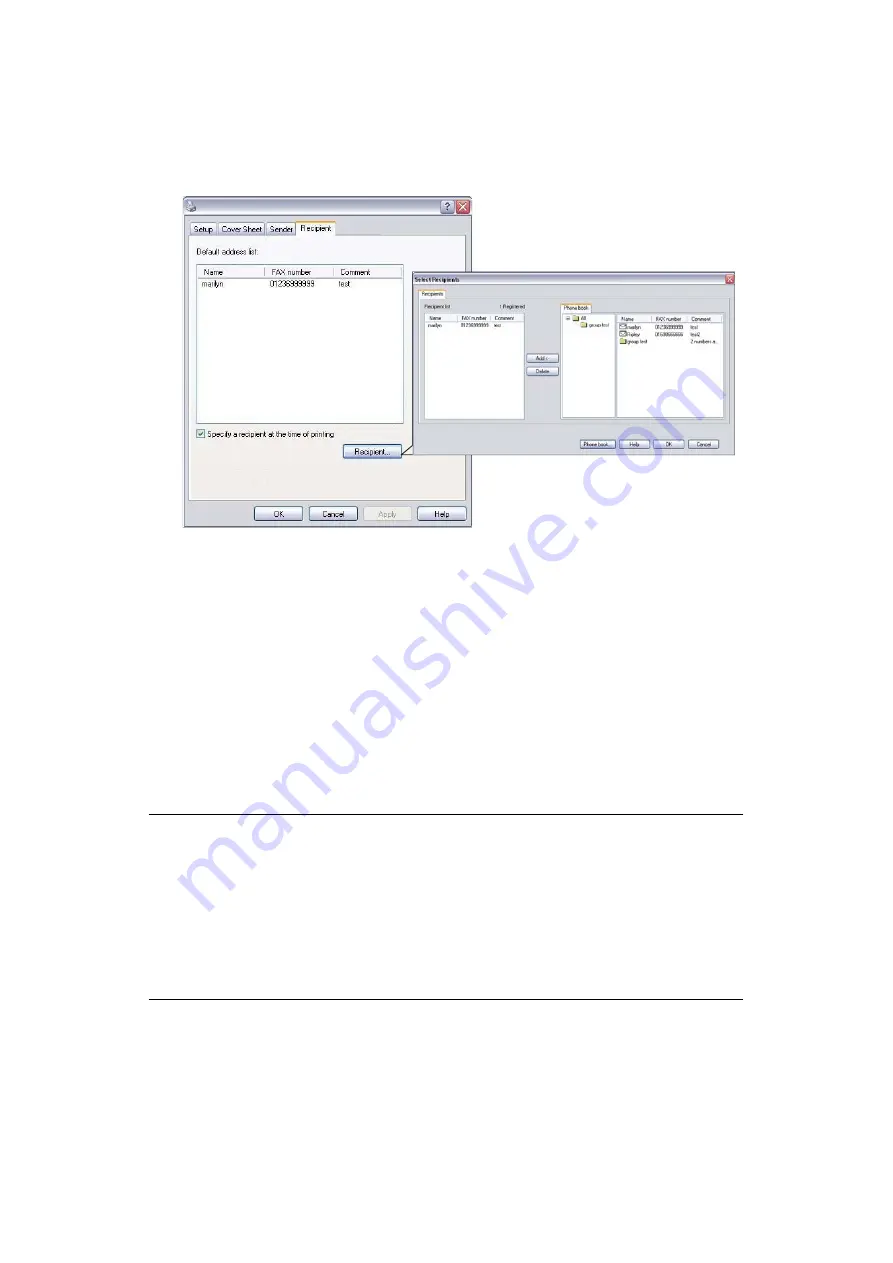
On the Recipient tab:
(a)
Click the
Recipient...
button.
(b)
Select a fax number from the
Phone book
panel on the right hand side. Refer
to
“Adding fax numbers to the phone book” on page 93
.
(c)
Press the
Add
button to add this number to the recipient list.
(d)
Repeat (b) and (c) as required to create the recipient list.
(e)
If you need to remove a number from the recipient list, highlight the appropriate
name and then press the
Delete
button.
(f)
Once you have completed your list, press the
OK
button to close the Select
Recipients window.
12.
Press the
OK
button to close the fax driver window.
13.
Press
OK
to start sending your fax.
NOTE
If you wish to cancel faxing during transmission to the MFP:
1. Double-click the printer icon in the notification area.
2. Select the job from the print queue.
3. From the Document menu, select Cancel.
Once the job is stored in the MFP, you cannot cancel it from the PC, instead
you must cancel it directly from the machine. Refer to
for details.
Summary of Contents for e-studio222cs
Page 1: ......
Page 166: ...R101120J7100 TTEC 07113601 iss1 ...


