•
If no Bus waveform exists, pushing the Bus button adds a Bus waveform to the Waveform view and opens the Bus
configuration menu.
•
If only one Bus waveform is displayed, pushing the button turns off the Bus waveform (removes it from Waveform view).
•
If two Bus waveforms are displayed, pushing the button cycles through selecting each Bus waveform.
• The RF button adds the RF waveform on the Waveform view and switches from the time domain to the frequency domain. All time
domain waveforms are turned off and the spectrum analyzer is turned on. When you switch back to the time domain, the time
domain waveforms are restored.
• The Digital button adds or selects a digital waveform on the Waveform view
•
If the digital channels are not displayed, pushing a Digital button turns on the channels in the Waveform view.
•
If the digital channels are on the screen, but not selected, pushing the Digital button selects the digital channels.
•
If the digital channels are on the screen and are also selected, pushing the Digital button turns the digital channels off
(removes them from Waveform view).
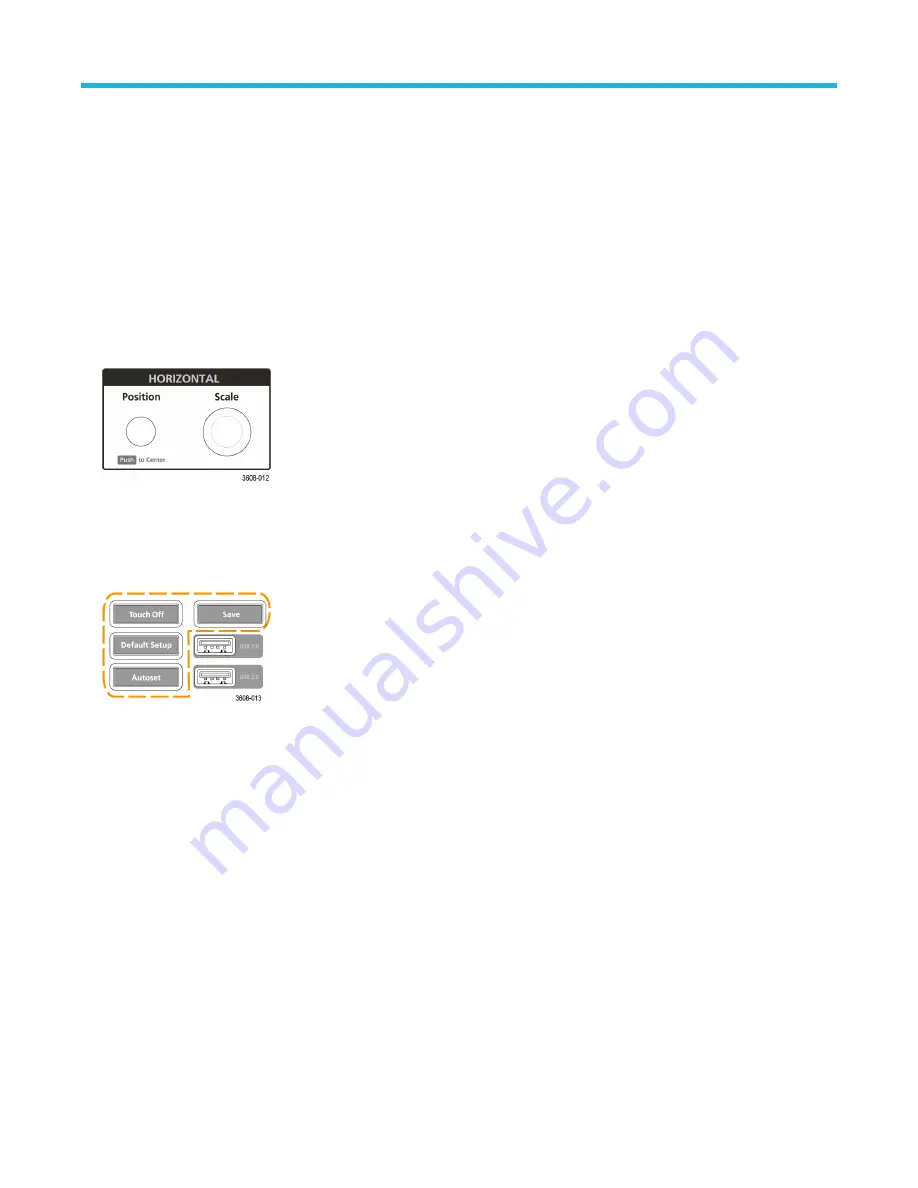
5. Horizontal controls:
• Position moves the waveform from side to side on the screen (changing the trigger point position in the waveform record). Push
the knob to center the trigger event to the center of the graticule.
• Scale sets the time per major horizontal graticule division and samples/second parameters for the oscilloscope. Scale applies to all
waveforms.
6. Miscellaneous controls:
• T
ouch Off turns touchscreen capability off. The Touch Off button is lighted when the touchscreen is turned off.
• Save is a one-push save operation that uses the current File > Save As settings to save screen shots (including open menus and
dialog boxes), waveform files, instrument settings, and so on, as follows:
• If a File > Save or File > Save As operation has occurred since the last instrument startup, pushing Save saves the file types
to the location last set in the Save As configuration menu.
• If no file save operation has occurred since the last instrument startup, pushing Save opens the Save As configuration menu.
Select a tab to select the type of file to save (Screen Capture, Waveform, and so on), set any associated parameters, and
where to save it, and select OK. The specified file or files are saved. The next time you push Save, the same type of files are
saved.
• Screen Captures capture the entire screen, including displayed configuration menus and dialog boxes.
• Default Setup restores the oscilloscope settings (horizontal, vertical, scale, position, and so on) to the default settings. Default
Setup does not change items found in the User Preferences menu.
• Autoset automatically displays a stable waveform. See
Quickly display a waveform (autoset)
on page 66.
7. Ground and Probe Compensation connectors:
Getting acquainted with your instrument
3 Series Mixed Domain Oscilloscope Printable Help
41


