2. PRINTER SETUP
ENGLISH VERSION EO1-33036
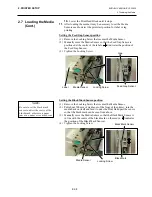
2.7 Loading the Media
E2-10
2.7 Loading the Media
(Cont.)
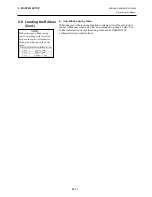
Build-in rewinder mode
When the Rewinder Guide Plate is attached, the Take-up Spool can be
used as a Built-in Rewinder to take up the printed media.
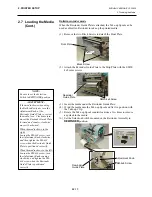
(1) Remove the two Black Screws to detach the Front Plate.
(2) Attach the Rewinder Guide Plate to the Strip Plate with the SMW-
4x8 sems screws.
(3) Insert the media under the Rewinder Guide Plate.
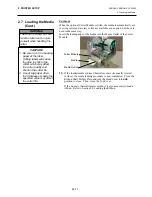
(4) Wind the media onto the Take-up Spool and fix it in position with
the Take-up Clip.
(5) Rotate the Take-up Spool counterclockwise a few times to remove
any slack in the media.
(6) Set the Selection Switch mounted on the Rewinder Assembly to
REWINDER
position.
NOTE:
Be sure to set the Selection
Switch to REWINDER position.
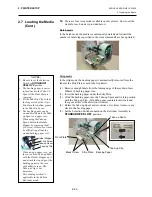
ADJUSTMENT:
If the media skews when using
the Built-in Rewinder, turn the
Adjustment Knob of the
Rewinder Guide Plate to correct
the media feed. Clockwise turn
moves the Rewinder Guide Plate
forward and counter-clockwise
moves it backward.
When the media skews to the
right:
Loosen the SM-4x8 screw, turn
the Adjustment Knob clockwise,
and then tighten the SM-4x8
screw when the Rewinder Guide
Plate is positioned correctly.
When the media skews to the left:
Loosen the SM-4x8 screw, turn
the Adjustment Knob counter-
clockwise, and tighten the SM-
4x8 screw when the Rewinder
Guide Plate is positioned
correctly.
Rewinder
Guide Plate
SM-4x8 Screw
Adjustment Knob
Front Plate
Black Screw
Rewinder
Guide Plate
SMW-4x8 Screw
Summary of Contents for B-SX4T Series
Page 3: ...TEC Thermal Printer B SX4T QQ QP Owner s Manual ...
Page 54: ......
Page 56: ......
Page 57: ......
Page 58: ...M EO1 33034 ...
Page 59: ...TEC Thermal Printer B SX5T QQ QP Owner s Manual ...
Page 112: ......
Page 114: ......
Page 115: ......
Page 116: ...M EO1 33036 ...
Page 141: ......
Page 142: ...PRINTED IN JAPAN EO10 33013A ...
Page 312: ......
Page 313: ......
Page 314: ...PRINTED IN JAPAN EO18 33012A ...
Page 315: ......
Page 316: ...PRINTED IN JAPAN EO0 33013A ...


